When Does Lavender Bloom? Methods and Steps for Growing It at Home
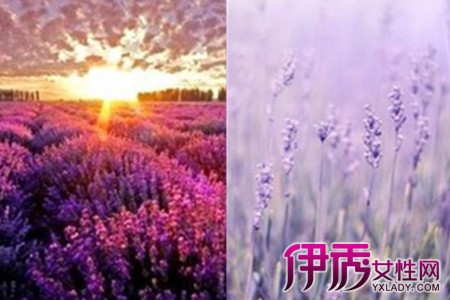
Lavender originated along the Mediterranean coast and throughout Europe. After **10 years of careful cultivation by the Ili people, lavender formed large-scale plantings at the foot of the Tianshan Mountains along the Ili River, and began to be propagated in large quantities in our country. Because of its fresh, crisp, rich and pleasant fragrance, it is widely used in perfume making. Because of its elegant and graceful flowers and leaves, and its charming and unique flower color and fragrance, lavender is loved by more and more young people, who have started growing it at home, but the results are often not very good. Growing lavender mainly involves the following steps.
1. Timing. Lavender is generally sown in spring, but due to differences in geography and climate, spring is not warm and comfortable everywhere. In warm regions, it can be sown from March to June or from September to November, while in cold regions it should be sown from April to June.
2. Container. Lavender is a perennial small shrub. When sowing lavender seeds at home, you can use a relatively shallow flower pot, or other containers such as plastic bottles, but note that the container should be opaque and have drainage holes at the bottom to avoid water accumulating at the bottom of the container.
3. Growing medium. Lavender seeds are tiny and have a low germination rate, so choosing the right soil is extremely important. You need loose, breathable soil with high water-holding capacity. You can look for it in some farm vegetable plots, or buy special flower-growing soil at a flower market.
4. Warm water soaking. Lavender seeds are similar to the seeds of roses and other flowers in that they have a relatively hard seed coat. Soak them in warm water below 40°C to soften the seed coat. After the water cools, continue soaking for 12 to 24 hours, and the seeds will germinate more easily.
5. Sowing. First pour one third of the soil into the container, then add some fertilizer as appropriate, and afterward fill the middle of the container with soil. Sprinkle water slowly to moisten the soil, then scatter the seeds. Choose the distance between seeds according to the area of each container; generally 3 to 5 cm is most suitable, then cover with a thin layer of soil just barely covering the seeds. Water slowly again with a fine spray bottle. Once the seeds at the bottom of the container have just sprouted, thin out some of the crowded seedlings as appropriate according to the distance between seedlings.
6. Moisture retention. After sowing, water thoroughly in one go. Use a fine spray bottle when watering, and do not use too much force, so as not to wash the seeds away. After watering, cover the container with a layer of plastic wrap, and you can poke a few small holes in the plastic wrap to ensure air circulation. Place the container in a spot with plenty of sunlight, and it will sprout after a week.
7. Potting and transplanting. After lavender sprouts, once the seedlings have grown 4 to 6 leaves, they can be transplanted into a larger flower pot. The distance between seedlings should be 3 to 5 cm. When repotting, wait until the soil is somewhat dry. After transplanting, you still need to water; soil that is too wet is not good for root growth. Afterward, shade the pot for a few days, and then it can be placed in the sun for care.
Once lavender has been planted, all that remains is careful tending. Lavender generally blooms in June; in summer and winter there are no flowers or only a few, and in cool summer regions the flowering is also very good. Potted lavender has a longer blooming period, and the blooming time varies. But as long as the growing location has plenty of sunlight and good ventilation, the time from sowing to blooming is generally 18 to 20 weeks. When you see those flower buds opening one by one, the wait is worth it!
How Do You Sow Lavender Seeds? Lavender Seed Growing Methods
Image: Lavender
[Common Questions] How do you sow lavender seeds? Lavender seed growing methods
[Expert Answer]
Tools/Materials:Flower pot, seeds, garden soil, gardening tools, etc.;
Method/Steps:
1. Container
Lavender is a perennial small shrub that can generally be used for about 10 years. The varieties are undemanding, easy to cultivate, and like sunlight, heat, drought, extreme cold, poor soil, and are resistant to salt and alkali. The growing location needs sufficient sunlight and good ventilation. Time required from sowing to blooming (or harvesting): 18-20 weeks. Lavender is best grown in medium-sized or larger containers.
2. Growing medium
Lavender seeds are relatively small and have a low germination rate, so the soil generally used for sowing needs to be loose, breathable, high in water-holding capacity, and fully sterilized to make the soil fluffy. If conditions permit, you can use a mixed soil of plant ash, vermiculite, peat, sphagnum moss, perlite, osmund fiber, etc., or buy special flower-growing soil at a flower market.
3. Warm water soaking
Lavender seeds should be soaked in warm water below 40°C. After the water cools, continue soaking for 12-24 hours before planting, which makes germination easier.
4. Sowing method
Generally, for slightly larger seeds (such as lavender, sage, rosemary), you can space them every 3-5 cm in each container according to the area. After germination, keep the stronger seedlings according to how the seedlings are growing. For tiny seeds (such as marjoram), you can broadcast them over a large area. Dip your hand into some seeds and gently scatter them over the soil. Thin the seedlings after germination. Keep 1-3 seedlings as appropriate.
5. Covering with soil
The thickness of the soil covering the seeds depends on seed size. Generally it is 2-3 times the diameter of the seed. For tiny seeds, cover with thinner soil; lavender seeds are large, so the covering soil should be less than 1 cm. Some seeds are strongly phototropic and do not need to be covered with soil (such as lemon balm and rosemary).
6. Moisture retention
After sowing, water thoroughly in one go. Use a fine spray bottle when watering. Do not use force, so as not to wash the seeds away. It is best to use the bottom-watering method: fill a large basin with 2/3 basin of water and set the container into the basin, letting water slowly seep in through the drainage holes at the bottom of the container (the water level in the large basin should not exceed the height of the soil in the container). After sowing, you can also cover the container with plastic wrap and prick a few small holes in the plastic wrap for ventilation. Place the container in sunlight and maintain a temperature of about 20°C; most seeds can germinate after a week.
7. Care after germination
After lavender seeds germinate, you can remove the plastic wrap. For small seeds, you can wait until the seedlings are a bit stronger before removing it.
8. Potting and transplanting
After lavender seeds sown over a large area germinate, once the seedlings grow 4-6 true leaves, they can be potted. Note that the spacing between seedlings is generally 3-5 cm. At first, use small pots for potting. After the seedlings grow larger, switch to larger pots as appropriate. When repotting, wait until the soil is somewhat dry (because you need to water after repotting; if the soil is wet, the moist period lasts too long, and the seedlings are prone to poor growth). First add more than half of a nutrient-rich growing medium to the small pot. In order not to damage the root system, do not shake off the soil near the roots when transplanting. Move it directly into the small pot, then fill the soil up around the roots. After transplanting, be sure to water thoroughly and shade it for a few days. Then it can be placed in sunlight for care.
[Editor's Comments] After lavender was introduced and cultivated in our country, it has always been very popular with the public. So how do you sow lavender seeds? You should know that the germination rate of lavender seeds is not high, and many flower lovers report sowing failures. Here the First Agricultural Economics editor has summarized some good methods and suggestions. The above text introduced the tools and method steps needed for sowing lavender seeds. We hope everyone can grow lavender from seeds.
What Are the Steps in the Cultivation Method for Hydrangea?
Hydrangea, also known as eight immortal flower and purple sun flower, is a plant in the genus Hydrangea of the family Saxifragaceae. Hydrangea flowers are pure white and full, large and beautiful, and their color can be red or blue, making them delightful to the eye. They are a common potted ornamental flowering shrub. Modern parks and scenic areas plant them in masses to form beautiful landscapes. Many friends want to plant hydrangeas at home, so what are the cultivation methods and effects of hydrangea? Let's take a look together.
Step One of Hydrangea Cultivation
The first step in hydrangea cultivation is choosing the right soil. Hydrangea prefers slightly acidic soil rich in humus and with good drainage. Because it contains organic fertilizer, it is very beneficial to the growth of hydrangea, so when choosing soil, it is better to choose soil rich in humus.
Step Two of Hydrangea Cultivation
Hydrangea cultivation requires suitable temperatures. So what growing temperature does hydrangea need? Generally, the suitable growing temperature for hydrangea is 18-28°C, and the winter temperature must not be lower than 5°C. A temperature of 20°C can promote flowering and growth, so we also need to meet the temperature requirements, as this will benefit the growth of hydrangea.
Step Three of Hydrangea Cultivation
The third step in hydrangea cultivation is sufficient water. Hydrangea grows in an environment with sufficient fertilizer and water, which can make it grow faster. Although hydrangea does prefer plenty of water, you should also be careful not to water too much. In summer, when the weather is relatively hot, you can spray some water on the leaves and the ground, which helps maintain air humidity.
Step Four of Hydrangea Cultivation
The fourth step in hydrangea cultivation requires an appropriate amount of fertilizer. During the vigorous growth stage of hydrangea, it needs sufficient nutrients. You can apply dilute fertilizer water once every half month, which can promote the growth of hydrangea, make its flowers bloom larger, and benefit its growth.
Step Five of Hydrangea Cultivation
The fifth step in hydrangea cultivation requires an appropriate amount of light time. Hydrangea grows relatively slowly in winter, so in winter it needs an appropriate amount of light. It is recommended to place hydrangea on a balcony and give it an appropriate amount of light to promote its growth. But in summer, the sunlight becomes too strong, so at that time it can be placed indoors for cultivation.
Conclusion:The above is the hydrangea cultivation method introduced by the editor. Friends who like hydrangeas can try growing some themselves and turn their balcony or garden into a landscape too.
More links:
|Red Rose Flower Language|Formaldehyde-Removing Plants|Effects of Pothos Flowers|Effects and Functions of Hangzhou White Chrysanthemum|When Does the Lotus Bloom|
|Effects and Functions of Jasmine Tea|Money Tree Pictures|Effects of Lavender|Flower Language of Small Daisies|Effects of Kunlun Snow Chrysanthemum|
|Cultivation Method of Guzmania|Cultivation Method of Clivia|Cultivation Method of Ivy|Ginkgo Tree Planting|Orchid Varieties|
|Are Carnations Easy to Grow|Cultivation Method of Bougainvillea|Effects and Functions of Yellow Chrysanthemum|Flower Language of Gesang Flowers|Is Calla Lily Toxic|
|What Plants Absorb Formaldehyde|Potted Flower Pictures|Effects of Jasmine Tea|Effects and Functions of Costus Root|Hydroponic Lucky Bamboo|