A detailed guide to hollyhock planting methods: a garden full of blooms is no longer just a dream
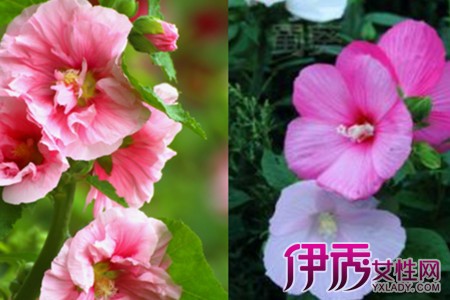
To grow hollyhocks yourself, the first step is to choose good hollyhock seeds; the larger the hollyhock seed, the more readily it sprouts. A reminder here: when buying seeds, try not to buy them online, because old seeds have a low germination rate, and even if they sprout, they are hard to keep alive. After buying the seeds, let us prepare the flower pot and potting soil. An ordinary clay pot will do, and the potting soil should be loose and airy.
After the seeds are planted, if the indoor temperature is warm enough, you can place them on a windowsill in a sunny, well-ventilated spot. If the room temperature is not warm enough, you can also cover them with a layer of plastic film, which encourages the seeds to sprout as quickly as possible. Newly planted hollyhock seeds must be kept adequately moist. After they sprout, you can use a spray bottle to mist the young shoots with a little water every morning and evening, which helps them grow faster.
Once hollyhocks sprout, they grow very quickly. If you planted many in one pot at once, you need to repot them in time. After repotting, water them every day; after one month you can fertilize the hollyhocks, using a flower nutrient solution sold on the market. Fertilize once a month, diluted with water, and do not make the concentration too high. Because the hollyhock stems grow very long, it is best to tie them to a somewhat thicker tree branch placed beside them so the flower stems do not break.
When the flower stems reach a certain height, the hollyhock flowers are just about ready to form. Once you see hollyhock buds, you can give the hollyhocks their last top-dressing before flowering. After that, do not fertilize again; just wait for the hollyhocks to bloom. After the hollyhocks finish flowering, any remaining flowers and flower stems should be cleaned up promptly, which ensures their nutrients are not dispersed and allows healthy growth.
Cultivation methods and growing techniques for the medicinal herb hollyhock
Hollyhock is also known as yizhanghong, dashuji, rongkui, wukui, doupeng flower and so on. It is a biennial upright herbaceous plant in the genus Alcea of the mallow family (Malvaceae), native to Sichuan, China, and now widely distributed across China. Its tender leaves and flowers are edible, its bark provides high-quality fiber, and the whole plant is used as medicine; it has the effects of clearing heat and detoxifying, relieving cough and promoting urination, and its root can be used as an emollient. It has relatively high cultivation value. Let us take a look below at how to grow hollyhocks!
Hollyhock growth habits
Hollyhock is widely distributed in China, found in East China, Central China, North China and South China, and widely cultivated around the world. It likes full sunlight and tolerates partial shade, but dislikes waterlogging. It has strong salt-alkali tolerance and can still grow in soil containing 0.6% salt. It is cold-tolerant and can overwinter safely in the open ground in North China. It grows well in loose, fertile, well-drained sandy soil rich in organic matter.
Hollyhock propagation methods
1. Sowing: in North China, sowing generally produces flowers the same year. The seeds germinate after about one week, and when 2 to 3 true leaves have grown, transplant once.
2. Division: hollyhock division propagation can be done in August to September. Dig up the old plant, divide the stem buds with fibrous roots, and replant them for rejuvenation. Water thoroughly right after planting, and they can bloom the following year.
3. Cuttings: hollyhock cuttings can be taken in spring. It is best to use stem sections from basal shoots as cuttings. The cuttings should be 7 to 8 cm long, with sandy soil as the medium; after cutting, shade them until they root.
Hollyhock planting methods
1. Watering: when hollyhock seedlings have grown 2 to 3 true leaves, they should be transplanted once, with increased spacing between plants and rows, and watered promptly after transplanting. During the flowering period, water appropriately to encourage a long flowering period and good blooms, continuing all the way to the top of the stems.
2. Fertilizing: during the seedling growth period of hollyhocks, pay attention to fertilizing, weeding and loosening the soil so the plants grow strong. After flower buds form in the leaf axils, apply a top-dressing of phosphorus and potassium fertilizer, and trim off a few of the lower leaves.
3. Root pruning: when planting hollyhocks, to keep the plants low and prevent lodging, in June you can use a spade to cut the roots in a cone shape around the plant, pruning the roots once every 2 to 3 weeks, then water immediately for care.
4. Harvesting: when hollyhock fruits turn yellow and ripe, harvest them immediately to prevent the seeds from scattering. After the flowering period ends, you can cut off the aboveground part of the plant; when new shoots sprout, a clumping plant can form. Hollyhocks tend to age, so after 2 to 3 years of cultivation they should be renewed.
Hollyhock pest and disease control
1. Hollyhock rust
[Damage] Perennial old hollyhock plants are prone to hollyhock rust. Infected plants have leaves that turn yellow or die, and brown, powdery spore masses can be seen on the undersides of the leaves.
[Control] Spraying Bordeaux mixture on the plants in spring or summer, or disinfecting the seeds before sowing, can achieve control. In the early stage of the disease, spray 15% triadimefon wettable powder at 1000 times dilution, or 70% thiophanate-methyl wettable powder at 1000 to 1500 times dilution, or 75% chlorothalonil wettable powder at 600 times dilution, etc., once every 7 to 10 days, for 2 to 3 consecutive sprays, all with good control results.
2. Red spider mite
[Damage] During the growth period, hollyhocks can be harmed by red spider mites.
[Control] When the infestation is severe, spray evenly with 1.8% abamectin emulsifiable concentrate at 7000 to 9000 times dilution, or use 15% pyridaben emulsifiable concentrate at 2500 to 3000 times dilution; both have relatively good control results. Do not use dichlorvos to kill mites, as dichlorvos stimulates mite proliferation. Do not use pyrethroid pesticides, as they are basically ineffective against mites.
3. Cotton leaf roller
[Damage] Hollyhocks are sometimes also harmed by the cotton leaf roller, which damages hollyhock leaves.
[Control] When it occurs, spray Bt wettable powder with a potency of 16000 IU/mg at 500 to 700 times dilution, or 25% diflubenzuron suspension concentrate at 1500 to 2000 times dilution, or 20% miman suspension concentrate at 1500 to 2000 times dilution, etc.
4. White spot disease
[Damage] Hollyhock white spot disease mainly harms hollyhock leaves. In the early stage of the disease, small brown spots appear on the leaf surface. As the disease develops, the spots gradually expand into round, oval or irregular shapes, with the center of the spots grayish-white and the outer edge reddish-brown. In humid conditions, a grayish-brown mold layer can form on the spots.
[Control] Remove diseased leaves promptly, pay attention to the density of branches and stems so the plants stay well ventilated and exposed to light. Increase the application of phosphorus and potassium fertilizer, and apply little or no nitrogen fertilizer. In the early stage of the disease, spray 75% chlorothalonil wettable granules at 800 times dilution, or 50% carbendazim wettable granules at 500 times dilution, or 70% thiophanate-methyl wettable granules at 1200 times dilution for control, once every 10 days; 3 to 4 consecutive sprays can effectively bring the disease under control.
How to grow hollyhocks, and how to grow hollyhocks from seed
Hollyhock belongs to the mallow family and is a perennial large herbaceous flower; once planted, it generally blooms year after year, which is why hollyhocks are loved by flower growers. So how do you grow hollyhocks? Hollyhocks are generally grown from seed more often. Below, with practical examples, we introduce the steps for growing hollyhocks from seed.
How to grow hollyhocks: planting timeHollyhock seeds can be sown in either spring or autumn. Depending on how many hollyhock seeds you have, you can sow them in an open-ground seedbed and then transplant the seedlings, or sow them directly in the open ground without transplanting. In the south, autumn sowing is often used, usually in September in an open-ground seedbed, and germination is uniform. In the north, spring sowing is mainly used. But the sowing time is not that strict; if you have seeds, you can plant them right now. You can first sow them in a seedling bed, and once they grow to a certain size, transplant and repot them. For potted plants, be sure to prune; for open-ground plants, you can let them grow freely.
Planting soilThe soil used for planting hollyhocks just needs to be loose and airy; there are not that many requirements, as hollyhocks are a very tough plant. When sowing, cover the seeds with about 1 cm of soil. After sowing, keep the soil adequately moist. Normally they germinate in about one week; about three weeks after sowing, the seedlings grow taller, and in about 45 days they grow strong.
Planting method1. Prepare a small flower pot (plastic or ceramic is fine; this demonstration uses a ceramic pot with a 12 cm diameter as an example), an appropriate amount of nutrient soil, and 7-8 hollyhock flower seeds.
2. Fill the flower pot with soil to three-quarters full, and place the seeds evenly on top of the soil.
3. Use your hand to press the surface soil down slightly so the seeds make full contact with the soil.
4. Slowly water along the edge of the pot until thoroughly watered. This way, first, it is thoroughly watered, and second, the seeds will not be washed out.
Water seeping into the tray means the water has thoroughly soaked through.
5. It is best to attach a label noting the sowing date, which makes it easier to judge whether germination is normal (for example, if you find that it has not sprouted after half a month or even twenty days, the sowing has definitely failed).
6. Place the planted hollyhocks on the balcony. Generally, depending on the weather, they usually germinate in about 10 days. During this period, be sure to keep the potting soil moist, otherwise the little hollyhock shoots will dry out and die.
After the hollyhock seedlings grow out, they still need to be repotted and transplanted once. At that time, the editor will also share the repotting and transplanting experience with everyone, so do not worry.