Master the seed planting method of Clivia and learn a few tricks on how to grow it
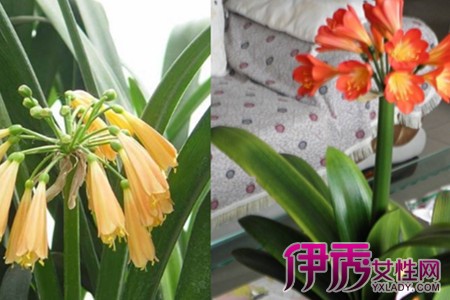
Clivia has very high requirements for its environment and does not particularly like direct sunlight, so temperature and humidity must be well controlled. Many people like to place Clivia outdoors when growing it, which leads to yellowing leaves or white spots. Clivia itself likes a humid and ventilated environment, so when growing Clivia, place it in a ventilated spot indoors and do not let the sun scorch it.
Watering must also be kept at the right level. Clivia cannot be too wet; although it likes a humid environment, that does not mean it should be given too much water. As long as the soil in the pot stays moist, that is enough, and giving Clivia a little beer about every 1-2 months works even better and helps the roots absorb nutrients.
The temperature Clivia likes is around 20°C; it cannot be too high or too low. Too low a temperature will definitely affect Clivia's growth and flowering period. Especially in the winter in the north, when temperatures are below zero, Clivia must be kept indoors; if placed outdoors, it definitely cannot survive. Indoors, do not let it be baked by the heating either; if it is always baked, the leaves will dry out.
Clivia also has a requirement for the flower pot: it cannot be too shallow, because then the roots cannot take hold and growth is affected, so when choosing a flower pot, a relatively deep one is best. It can hold more soil, and more soil means more nutrients. Clivia's roots are very long, so only in soil can they coil around without affecting normal growth. A deep flower pot with holes at the bottom is more suitable.
Clivia's flowering period is generally around spring. After the flowering period has passed, around spring, the soil can be changed. Changing to fresh soil once a year is necessary for sufficient nutrients, normal growth and beautiful blooms. Each time it blooms, it usually opens about a dozen flowers, very beautiful.
Clivia planting techniques
What are the origins and morphological characteristics of Clivia
Clivia belongs to the genus Clivia in the Amaryllidaceae family. It is a perennial herbaceous flower with thick fleshy roots, and the stem is divided into a rhizome and a pseudobulb. The leaves are sword-shaped, alternate and neatly arranged, 30-50 cm long. The inflorescence is a cyme and can bear 10-60 small flowers. It blooms in winter and spring, especially in winter. The small flowers can remain open for 15-20 days, opening in succession in turns and lasting 2-3 months. Each fruit contains one to many seeds.
Clivia is a uniquely flowered ornamental plant native to Africa. It has only been introduced into our country for more than 100 years, and has only been grown by the public for just over 40 years. However, because the flower is graceful in posture and elegant and dignified, it is loved by many flower growers. Its thick, smooth leaves stand upright like swords, symbolizing a noble character of strength, fortitude and unyielding dignity; its full flower form and gorgeous colors symbolize wealth, good fortune, prosperity and happiness, so people cultivate it widely.
The reason Clivia is especially loved is not only its bright and delicate flowers, but also because it has a superiority unmatched by other flowers: it has both pleasing blooms and leaves that are worth admiring, with a bright green, wax-like, crystal-clear, radiant appearance. Therefore, many connoisseurs of flowers believe that even without its delicate and moving flowers, Clivia's leaves, as if carved from jade, alone already leave some foliage plants far behind.
The Clivia cultivated in our country includes two kinds: Clivia nobilis (also called fine-leaved Clivia) and Clivia miniata (also called large-flowered Clivia). Clivia nobilis is propagated most in Beijing and nearby areas. Its leaves are relatively narrow and dark green, 50-90 cm long, the corolla opening is relatively small, and the many small flowers in the inflorescence are all bell-shaped and hang downward; large-leaved Clivia is propagated most in Hebei Province. Its notable features are short and wide leaves, thick and long scapes, a relatively large umbrella-shaped corolla opening, and upward-facing flowers, with relatively high ornamental value.
How to water Clivia
Clivia has relatively well-developed fleshy roots, and the roots store a certain amount of water, so this flower is relatively drought-tolerant. However, even drought-tolerant flowers cannot be severely short of water, especially in summer when high temperatures are combined with dry air, when timely watering must not be forgotten. Otherwise, the roots and leaves of the flower will be damaged, causing new leaves not to emerge and the original leaves to scorch, which not only affects flowering but may even cause the plant to die. But watering too much will also rot the roots. So it must be handled well, always paying attention to whether the potting soil is dry or wet. When it becomes half-dry, water once, but the amount should not be too much. Keeping the potting soil moist but not soggy is just right.
So exactly how often is it good to water once? Under general conditions, water once a day in spring; in summer, use a fine watering can to water the leaf surfaces and the surrounding ground together, watering twice a day on sunny days; in autumn, water once every other day; in winter, water once every other day; in winter, water once a week or less. But it must be noted that this refers to "general conditions." It must be handled flexibly according to various specific situations. For example, water more on sunny days; water less on cloudy days, and during continuous cloudy days water once every few days; do not water on rainy days. When the temperature is high and the air is dry, water several times a day; for large flower pots, because the soil stores more water and does not dry out easily, water less; for small flower pots, because water evaporates easily, water an appropriate amount more. If the flower pot is placed in a well-ventilated place where evaporation is easy, it is appropriate to water more; in places with poor ventilation, slow evaporation and high air humidity, water less. During the seedling stage, water less; during the flowering stage, water more. In short, it should be determined according to specific conditions, with the principle of ensuring the potting soil is soft and moist, not too dry and not too wet.
If conditions permit, magnetized water is of course best; next is rainwater, snow water or living water from rivers, then pond water, and the worst is tap water. Flower growers living in large cities only have tap water available, so they can use a small water vat or basin or bucket, put the tap water in it, and water after 2-3 days. This can let some harmful impurities in the water settle. In addition, it can allow the substances contained in the water to be oxidized and purified, and can bring the water temperature close to the humidity of the potting soil, so it will not be too cold or too hot and harm the plant.
How to fertilize Clivia
Many flowers like fertilizer, but fertilizing fertilizer-loving flowers also has a limit. Too much fertilizer is not good for growth and may even cause the plant's roots to rot or scorch. Clivia also belongs to this type of plant, and fertilizer must be applied in appropriate amounts.
Flowers have different nutrient requirements at different stages of growth and development. Therefore, different fertilization methods suitable for the plant's needs should be adopted at each stage. Such as base fertilizer, topdressing, and foliar fertilization.
(1) Applying base fertilizer (also called basal fertilizer).The purpose is to create conditions for plant growth and development and meet its nutrient needs. Base fertilizer for Clivia should be applied when repotting once every 2 years. Commonly used fertilizers mixed into the soil include manure (that is, poultry and livestock dung), compost, green manure, bean cake fertilizer, etc.
(2) Topdressing.It mainly promotes plant growth. Clivia can be given fertilizers such as cake fertilizer, fish meal, and bone meal. Apply less at initial planting, and later as the plant grows and the leaves increase, the amount of fertilizer should gradually increase accordingly. When fertilizing, dig open the potting soil and apply it 2-3 cm deep into the soil, but note that the fertilizer applied should not be too close to the root system to avoid burning the roots. Applying this kind of solid fertilizer once a month is generally enough, and it should not be more frequent.
(3) Applying liquid fertilizer as topdressing.Applying liquid fertilizer as topdressing means mixing the fully decomposed supernatant liquid of soaked and fermented animal and plant materials with 30-40 times clear water and then pouring it onto the potting soil. For small seedlings, it is suitable to dilute with 40 times water; for medium seedlings, 30 times water; for large seedlings, only 20 times water. After applying the fertilizer liquid, 1-2 days later a clear water watering should follow (the amount of water should not be too much), so that the fertilizer penetrates to the roots in the potting soil and fully exerts its fertilizer effect. Do not water 1-2 days before applying liquid fertilizer; let the potting soil be somewhat dry before applying the fertilizer liquid, which is more effective. The best time to fertilize is early morning; when pouring, the fertilizer liquid should be poured along the edge of the pot, and care should be taken to avoid applying it on the plant and leaves.
In addition, the type of fertilizer should also vary according to the season, applying different fertilizers. For example, in spring and winter, it is suitable to apply some phosphorus and potassium fertilizers, such as fish meal, bone meal, and hemp cake, which help leaf vein formation and improve leaf glossiness; while in autumn, it is suitable to apply the extract of decomposed animal hair, horns, hooves or bean cake, diluted with 30-40 times clear water and poured on, to promote leaf growth.
(4) Foliar topdressing.Using this method of fertilizing is mainly to make up for the lack of nutrients in the soil, to solve the problem of nutrient deficiency in the plant body, so that seedlings grow faster and flowers and fruits grow plump. Foliar fertilization is spraying the diluted fertilizer liquid directly onto the leaf surfaces of the plant with a sprayer, allowing nutrient elements to penetrate through the leaf epidermal cells and stomata into the leaf tissues and then be transported throughout the plant. Commonly used fertilizer types include urea, monopotassium phosphate, superphosphate, etc. When spraying, spray evenly on both the front and back sides of the leaves. Spray once every 4-6 days during the growing season, once every 2 weeks during semi-dormancy. Generally, spray after sunrise, and stop application after the plant blooms. It must be noted that this method can only be used when the plant is found to be lacking fertilizer. If the plant has sufficient nutrients and is growing vigorously, it should not be used.
How to repot Clivia after the young plant grows
Whether it is a seedling grown after sowing or a seedling planted by division, once it has grown to a certain point it must be repotted. Generally, after 2 years of planting it should be repotted, and after it grows larger after repotting, it must be repotted again after another 2 years.
This is because:
① After the plant grows larger, the original small pot can no longer adapt to the need for its roots to extend further.
② The nutrients in the original potting soil have mostly been absorbed, so some new soil with sufficient nutrients should be replaced to supply the plant's need to continue growing.
③ Take this opportunity to check and see whether any roots have been harmed or infected by pests or diseases, and if so, prune them promptly to avoid spreading the infection; if there are too many fibrous roots, also take this opportunity to properly trim off a portion.
The time for repotting is spring (spring is generally before Grain Rain) and autumn, and it is most suitable when the temperature is around 20°C (note: it must not be during the flowering period). The new pot used for repotting should be larger than the original pot, so as to leave room for the plant's root system to extend further afterward. Add some superphosphate (or bone meal) to the potting mix and mix evenly as base fertilizer. When repotting, first use a small knife to insert into the soil along the inner wall of the pot and draw a circle, so that the old potting soil separates from the pot wall (making it easier to pour out). Then, with the right palm facing down, insert the middle finger and ring finger around the plant's root crown, spread the five fingers and press the potting soil firmly; with the left hand turn the pot over, exactly supporting the potting soil and flower seedling on the palm (if the flower is large and the pot heavy, two people must cooperate). Then peel off most of the supported potting soil. Leave a small portion of soil clinging to the roots, spray it moist with water, and immediately plant it in the new pot. When planting, place the plant in the middle of the pot so that the roots can stretch freely in the pot; overly long roots can be partially trimmed, leaving a portion coiled at the bottom of the pot. Then gradually add soil, shaking the pot while adding, so that the potting mix fills the gaps between the root system and fully contacts the roots. Finally, lift the plant up 1-2 cm so that the root system straightens out, then shake the pot again, gently press the soil surface firm, water thoroughly once, and place the pot in a shaded place, and it is done.
How does Clivia carry out sexual reproduction
Clivia usually uses only two propagation methods: one is sexual reproduction, namely seed sowing propagation; the other is division propagation among asexual reproduction methods. Clivia miniata is more commonly propagated by sowing. The advantage of this propagation method is that it can propagate in large quantities to meet the needs of many flower growers. But with sowing propagation, artificial pollination must first be carried out; it is best to pollinate between different plants, because cross-pollination between different plants has a high seed-setting rate. A robust plant after cross-propagation can generally set ten seeds; self-pollination on the same plant can only set a few seeds.
The pollination method is:When the perianth has split for 2-3 days, the flower bud is mature, and the stigma secretes sticky liquid, that is the time for pollination. When pollinating, use a new writing brush to dip the pollen from the stamens and gently shake it onto the stigma of the pistil. To increase the seed-setting rate, pollinate once each between 9-10 a.m. and 2-3 p.m. The seeds mature only after about 8-9 months. When the fruit skin gradually changes from green to black-purple, the fruit cluster can be cut off, and after 10-20 days the seeds can be peeled out. Before sowing, soak the seeds in warm water at 30-35°C for 20-30 minutes, then take them out and air-dry for 1-2 hours (at this time, if they can be soaked in 10% sodium phosphate solution for 20-30 minutes, taken out, washed, and then soaked in clear water for 10-15 hours, so much the better), and then they can be sown into the potting mix. Place the sown flower pot in an environment at room temperature 20-25°C, keep humidity at about 90%, and in about 1-2 weeks the radicle will sprout.
For sowing propagation, one more thing to do well is to first prepare the potting mix. Many materials can be used to make potting mix, but one relatively easy to obtain is loose soil taken from the forest surface layer with sufficient humus, mixed with 1/3 clean fine sandy soil.
Clivia likes slightly acidic soil, and a pH value of 6-6.5 is suitable. The time requirement for propagating Clivia by sowing is not strict; it can be sown in spring, autumn and winter, but temperature is an important condition. It is best to sow under a temperature condition of 20-25°C, which can meet the temperature requirement for sprouting embryos.
How does Clivia carry out asexual reproduction
Asexual reproduction of flowers includes cuttings, division, layering, grafting and other methods, but the asexual reproduction of Clivia generally only uses division, and Clivia nobilis uses this method even more commonly.
To propagate by division, first do several preparations:
① For household pot cultivation, prepare flower pots. The flower pots are best clay pots. Do not buy porcelain or ceramic ones just for the beauty of the pot surface, because they have poor air permeability and are not conducive to plant development and growth.
② Prepare the medium soil, and it is best to disinfect it. If using humus soil mixed with fine sand, the humus soil should be sprayed and disinfected with a 1000-2000 times aqueous solution of potassium permanganate; the fine river sand should also be scalded and disinfected with boiling water to avoid seedlings being infected by pathogens and rotting.
③ Prepare a small amount of charcoal powder to apply to wounds to absorb moisture and prevent rot.
④ Sharpen the cutting knife, and finally quickly dry-grind it on the whetstone (without adding water) several dozen times, making the blade highly hot, in order to kill pathogens.
When dividing, first take the mother Clivia plant out of the pot, remove the old soil, and find the axillary buds that can be divided. If the offset grows on the outer edge of the mother plant and the plant body is relatively small, you can hold the bulb part with one hand and pinch the base of the offset with the other hand, give it a tear, and the offset can be separated from the mother body; if the offset is thick and strong and not easy to break off, you should use the prepared sharp knife to cut it off. Never force it off, so as not to damage the young plant. After the offset is cut off, immediately apply dry charcoal powder to the wound to absorb the flowing liquid and prevent rot. Next, plant the offset in a pot. When planting, the planting depth should be enough to bury the base pseudobulb of the offset, and the part near the seedling should be slightly higher, and cover with sterilized sandy soil. After planting, immediately water thoroughly once, and when the wound heals after 2 weeks, add another layer of potting mix. Generally, it takes 1-2 months to produce new roots and 1-2 years to bloom. Clivia propagated by division has relatively stable heredity and can maintain the various characteristics of the original species.
What common diseases does Clivia have and how to prevent and control them
Several common diseases of Clivia include southern blight, soft rot, anthracnose, etc.
(1) Southern blight.When this disease occurs, water-soaked brown irregular lesions appear on the stem near the roots, the cortex soft-rots, and then white silky mycelium grows and spreads over the soil surface around the roots, later forming small sclerotia, and finally becoming rapeseed-like in color, expanding until the entire base rots and dies.
Prevention and control methods:
① Before potting, the potting mix must be disinfected. A relatively simple method is to place the potting mix at 60°C for 24 hours;
② Always observe the soil surface, and when white mycelial threads are found, pick them out and burn them, and scatter some lime powder around the diseased spot for disinfection;
③ In the early stage of the disease, pour a 500-times solution of 50% carbendazim wettable powder on the stem base of the plant and the soil around the base, once a week, 2-3 times is enough.
(2) Soft rot.Pathogens often invade through wounds. When the disease occurs, light yellow water-soaked spots appear on the leaves, then expand into irregular lesions, turning the leaves into brown soft-rot material, and bacterial fluid flows out from the wound lesions.
Prevention and control methods:
① Once this disease is found, immediately separate the diseased plant, dig open the potting mix around the plant to expose the diseased part, break open the rotten diseased leaves, use a sterilized knife to scrape off the rotten part, expose it to appropriate sunlight, and keep it ventilated and dry;
② If many plants are rotting, completely cut off the diseased tissue, soak in a 5% potassium permanganate aqueous solution for 1 hour, rinse with clear water and dry, apply plant ash to the cut, change to a new pot for planting, and place in a ventilated place with not-high temperature;
③ For drug treatment, penicillin or streptomycin or oxytetracycline plus 4000-**** times aqueous solution can be sprayed or applied to the lesions, with a certain curative effect.
(3) Anthracnose.This disease mostly occurs in rainy, humid, stuffy and hot seasons, and the affected parts are mostly leaf tips and leaf edges. In the initial stage, moist brown small spots appear on the leaves, then expand into oval and similarly wavy main lesions, with yellow around them, and later gradually shrink and dry up. Too-wet potting soil and excessive nitrogen fertilizer easily cause this disease.
Prevention and control methods:
① Give the flower pot an environment with good ventilation and light, and the potting soil should only be moist, not watered too much or too frequently. Increase phosphorus and potassium fertilizers and control nitrogen fertilizer.
② When signs of the disease are found, immediately use 50% wettable carbendazim powder plus 800 times water to make a solution, or use 60% anthracnose Fumei plus 1000 times water solution to spray, about once every 6 days, and 3-5 sprays can show effect.
What common pests does Clivia have and how to prevent and control them
The common pest of Clivia is scale insects. When pest damage occurs, scale insects often gather on the tender tips of the leaves, suck leaf sap, secrete large amounts of pathogens, turn the stems and leaves moldy black, cause sooty mold, and make the leaves wither. This insect has strong reproductive capacity and can occur in multiple generations a year. One female adult can often reproduce hundreds of offspring. If prevention and control measures are not taken in time, it can cause death. Prevention and control methods: prevention should be the main approach. Usually always pay attention to inspecting the plant body, and when pests are found, remove and treat them early to prevent spreading. To eliminate scale insects, manual and chemical methods can be used together. If pests are found on only 1 or 2 leaf tips, manual scraping can be done, using a sharpened thin wooden stick or bamboo skewer to pick off the insect bodies. If a large number of nymphs appear, use 25% phosmet emulsion 1000 times solution to spray and kill, or use 40% omethoate emulsion plus 1000-1500 times water to make a solution and spray. Generally, spraying 1-2 times can kill them.
In addition, note also that: earthworms can also become pests of Clivia. When the Clivia plant is young, its fleshy roots are very tender and weak. If there are earthworms in the potting soil, they often burrow around randomly, injuring the tender roots, destroying Clivia's function of absorbing nutrients, causing the plant to stop growing and developing or causing root rot. Prevention and control method: always pay attention to whether there are round soil pellets on the surface of the potting soil (that is, earthworm excrement). If found, immediately use 50% dichlorvos emulsion plus 1500-2000 times water to make a solution and pour it on. If earthworms appear and burrow after pouring, remove them immediately; after one week, do the same once more, and the earthworms can be completely eliminated.
Loading
Introduction to the soil cultivation methods and hydroponic techniques of Clivia
Clivia is native to the tropical regions of southern Africa, growing beneath trees, so it fears heat and cannot tolerate cold. It likes a semi-shaded and humid environment and fears strong direct sunlight. The optimal temperature for growth is between 18-28°C. Below 10°C and above 30°C, growth is inhibited. Clivia likes a ventilated environment and prefers deep, fertile, loose soil. It is suitable for growing in loose, fertile, slightly acidic organic soil. Clivia is a famous greenhouse flower and is suitable for indoor cultivation. The growing methods of Clivia are introduced as follows:
Propagation methods of Clivia
The commonly used propagation methods of Clivia are sowing propagation and division propagation.
1. Sowing propagation method
The pollination method is: when the perianth has split for 2-3 days, the flower bud is mature, and the stigma secretes sticky liquid, that is the time for pollination. When pollinating, use a new writing brush to dip the pollen from the stamens and gently shake it onto the stigma of the pistil. To increase the seed-setting rate, pollinate once each between 9-10 a.m. and 2-3 p.m. After about 8-9 months the seeds can mature. When the fruit skin gradually changes from green to black-purple, the fruit cluster can be cut off, and after 10-20 days the seeds can be peeled out. Before sowing, soak the seeds in warm water at 30-35°C for 20-30 minutes, then take them out and air-dry for 1-2 hours (at this time, if they can be soaked in 10% sodium phosphate solution for 20-30 minutes, taken out, washed, and then soaked in clear water for 10-15 hours, so much the better), and then they can be sown into the potting mix. Place the sown flower pot in an environment at room temperature 20-25°C and humidity about 90%, and in about 1-2 weeks the radicle will sprout.
Before carrying out sowing propagation, first prepare the potting mix. Many materials can be used to make potting mix, but one relatively easy to obtain is loose soil taken from the forest surface layer with sufficient humus, mixed with 1/3 clean fine sandy soil.
2. Division propagation method
Asexual reproduction of flowers includes cuttings, division, layering, grafting and other methods, but the asexual reproduction of Clivia generally only uses division, and Clivia nobilis uses this method even more commonly. To propagate by division, first do several preparations:
① For household pot cultivation, prepare flower pots. The flower pots are best clay pots. Do not buy porcelain or ceramic ones just for the beauty of the pot surface, because they have poor air permeability and are not conducive to plant development and growth.
② Prepare the medium soil, and it is best to disinfect it. If using humus soil mixed with fine sand, the humus soil should be sprayed and disinfected with a 1000-2000 times aqueous solution of potassium permanganate; the fine river sand should also be scalded and disinfected with boiling water to avoid seedlings being infected by pathogens and rotting.
③ Prepare a small amount of charcoal powder to apply to wounds to absorb moisture and prevent rot.
④ Sharpen the cutting knife, and finally quickly dry-grind it on the whetstone (without adding water) several dozen times, making the blade highly hot, in order to kill pathogens.
When dividing Clivia, first take the mother Clivia plant out of the pot, remove the old soil, and find the axillary buds that can be divided. If the offset grows on the outer edge of the mother plant and the plant body is relatively small, you can hold the bulb part with one hand and pinch the base of the offset with the other hand, give it a tear, and the offset can be separated from the mother body; if the offset is thick and strong and not easy to break off, you should use the prepared sharp knife to cut it off. Never force it off, so as not to damage the young plant. After the offset is cut off, immediately apply dry charcoal powder to the wound to absorb the flowing liquid and prevent rot. Next, plant the offset in a pot. When planting, the planting depth should be enough to bury the base pseudobulb of the offset, and the part near the seedling should be slightly higher, and cover with sterilized sandy soil. After planting, immediately water thoroughly once, and when the wound heals after 2 weeks, add another layer of potting mix. Generally, it takes 1-2 months to produce new roots and 1-2 years to bloom. Clivia propagated by division has relatively stable heredity and can maintain the various characteristics of the original species.
The growing methods of Clivia are divided into soil cultivation methods and hydroponic methods. Below we will look specifically at these 2 growing methods.
Soil cultivation techniques for Clivia
Clivia is relatively easy to cultivate. First, choose the potting soil well, and it can be placed indoors near a window, with fertilizer and water controlled according to the temperature characteristics of each place. During the growing period, the potting soil must be kept moist; during the high-temperature semi-dormant period, the potting soil should be on the dry side, and water should often be sprayed on the leaf surfaces to achieve the purpose of cooling. Clivia likes fertilizer. Every 2 to 3 years, repot once in spring or autumn, adding decomposed cake fertilizer into the potting soil. Each year before the growing period, apply 5 to 40 grams of decomposed cake fertilizer under the pot surface soil, and apply liquid fertilizer once during growth. During management, often turn the pot to prevent the leaves from leaning to one side; if leaning occurs, straighten it promptly. When the temperature is 25 to 30°C, it easily causes excessive leaf growth, making the leaves narrow and long and affecting the ornamental effect, so when cultivating Clivia, be sure to regulate room temperature.
1. Soil
Clivia is suitable for soil rich in humus. This kind of soil has good air permeability, good water permeability, and is fertile and slightly acidic. Generally, the soil configuration for Clivia is 6 parts leaf mold, 2 parts pine needles, 1 part river sand or furnace ash slag, and 1 part base fertilizer (hemp seed, etc.). Leaf mold mainly refers to oak leaves, also called oak tree. This kind of leaf is thick in texture and is very good humus. It is nutritious and has good water permeability. Other leaves are too thin, and after decomposition there is nothing left, so they cannot be mixed with other media to make soil. When cultivating, use pots that gradually increase in size as the plant grows. For cultivating one-year-old seedlings, a 3-inch pot is suitable. In the second year, change to a 5-inch pot, and afterward change to a pot one size larger every 1-2 years. Repotting can be carried out in spring and autumn.
2. Watering
Clivia has relatively well-developed fleshy roots, and the roots store a certain amount of water, so this flower is relatively drought-tolerant. However, even drought-tolerant flowers cannot be severely short of water, especially in summer when high temperatures are combined with dry air, when timely watering must not be forgotten. Otherwise, the roots and leaves of the flower will be damaged, causing new leaves not to emerge and the original leaves to scorch, which not only affects flowering but may even cause the plant to die. But watering too much will also rot the roots. So it must be handled well, always paying attention to whether the potting soil is dry or wet. When it becomes half-dry, water once, but the amount should not be too much. Keeping the potting soil moist but not soggy is just right.
If conditions permit, magnetized water is of course best; next is rainwater, snow water or living water from rivers, then pond water, and the worst is tap water. Flower growers living in large cities only have tap water available, so they can use a small water vat or basin or bucket, put the tap water in it, and water after 2-3 days. This can let some harmful impurities in the water settle. In addition, it can allow the substances contained in the water to be oxidized and purified, and can bring the water temperature close to the temperature of the potting soil, so it will not be too cold or too hot and harm the plant.
3. Fertilizing
Many flowers like fertilizer, but fertilizing fertilizer-loving flowers also has a limit. Too much fertilizer is not good for growth and may even cause the plant's roots to rot or scorch. Clivia also belongs to this type of plant, and fertilizer must be applied in appropriate amounts. Flowers have different nutrient requirements at different stages of growth and development. Therefore, different fertilization methods suitable for the plant's needs should be adopted at each stage. Such as base fertilizer, topdressing, and foliar fertilization.
① Applying base fertilizer (also called basal fertilizer). The purpose is to create conditions for plant growth and development and meet its nutrient needs. Base fertilizer for Clivia should be applied when repotting once every 2 years. Commonly used fertilizers mixed into the soil include manure (that is, poultry and livestock dung), compost, green manure, bean cake fertilizer, etc.
② Topdressing. It mainly promotes plant growth. Clivia can be given fertilizers such as cake fertilizer, fish meal, and bone meal. Apply less at initial planting, and later as the plant grows and the leaves increase, the amount of fertilizer should gradually increase accordingly. When fertilizing, dig open the potting soil and apply it 2-3 cm deep into the soil, but note that the fertilizer applied should not be too close to the root system to avoid burning the roots. Applying this kind of solid fertilizer once a month is generally enough, and it should not be more frequent.
③ Applying liquid fertilizer as topdressing. Applying liquid fertilizer as topdressing means mixing the fully decomposed supernatant liquid of soaked and fermented animal and plant materials with 30-40 times clear water and then pouring it onto the potting soil. For small seedlings, it is suitable to dilute with 40 times water; for medium seedlings, 30 times water; for large seedlings, only 20 times water. After applying the fertilizer liquid, 1-2 days later a clear water watering should follow (the amount of water should not be too much), so that the fertilizer penetrates to the roots in the potting soil and fully exerts its fertilizer effect. Do not water 1-2 days before applying liquid fertilizer; let the potting soil be somewhat dry before applying the fertilizer liquid, which is more effective. The best time to fertilize is early morning; when pouring, the fertilizer liquid should be poured along the edge of the pot, and care should be taken to avoid applying it on the plant and leaves. In addition, the type of fertilizer should also vary according to the season, applying different fertilizers. For example, in spring and winter, it is suitable to apply some phosphorus and potassium fertilizers, such as fish meal, bone meal, and hemp cake, which help leaf vein formation and improve leaf glossiness; while in autumn, it is suitable to apply the extract of decomposed animal hair, horns, hooves or bean cake, diluted with 30-40 times clear water and poured on, to promote leaf growth.
④ Foliar topdressing. Using this method of fertilizing is mainly to make up for the lack of nutrients in the soil, to solve the problem of nutrient deficiency in the plant body, so that seedlings grow faster and flowers and fruits grow plump. Foliar fertilization is spraying the diluted fertilizer liquid directly onto the leaf surfaces of the plant with a sprayer, allowing nutrient elements to penetrate through the leaf epidermal cells and stomata into the leaf tissues and then be transported throughout the plant. Commonly used fertilizer types include urea, monopotassium phosphate, superphosphate, etc. When spraying, spray evenly on both the front and back sides of the leaves. Spray once every 4-6 days during the growing season, once every 2 weeks during semi-dormancy. Generally, spray after sunrise, and stop application after the plant blooms. It must be noted that this method can only be used when the plant is found to be lacking fertilizer. If the plant has sufficient nutrients and is growing vigorously, it should not be used.
4. Avoiding summer heat
In midsummer, the temperature is often above 30°C, which is extremely unfavorable to the growth of Clivia. For this reason, people generally build a shed for cooling. You can also bury the Clivia together with its pot into sand (bury the pot completely), and then sprinkle water on the sand once each morning and evening every day. In this way, it can not only keep the potting soil moist, but more importantly, it can use the heat absorption when the water in the sand evaporates to achieve the purpose of cooling.
5. Later-stage management
Clivia's flowering period is generally from February to April. After flowering, the flowering period can be extended by appropriately lowering the temperature, ventilating and reducing light. The length of Clivia's flowering period can be controlled through people's cultivation techniques.
① Fertilizing: apply an additional round of bone meal, well-fermented fish innards, and bean cake water, which can make the flower color vivid, the flowers larger, and the leaves thick. Otherwise, it is easy to have small flowers, few in number, and pale flower color. At the same time, care should be taken to avoid applying too much nitrogen fertilizer and insufficient phosphorus and potassium fertilizer, which would cause weak growth or excessive leaf growth and affect bud emergence and flowering.
② Light: give a certain amount of light to meet the light requirements for photosynthesis and flowering. Under strong light, the flowering period is short and the flower color is vivid; under weak light, the flower color is pale. Too long or too strong light, or long-term shading and insufficient light, all affect the manufacture and accumulation of nutrients, making it unable to show buds and bloom.
③ Temperature: suitable temperature has a clear effect on the quality of flowering. If the temperature is too high, root hairs exist for an extremely short time and the function of absorbing water and fertilizer is greatly reduced, causing Clivia to appear semi-dormant; if the temperature is below 10°C, growth will also be inhibited; during the growing period it should be controlled at 15-25°C, and during the flowering period it should be 15-20°C. When root hairs exist for a long time and the water and fertilizer absorption function is good, the leaves grow short and wide, and the flowering is luxuriant. Also note that Clivia should maintain a temperature difference of about 8°C between day and night, because the organic matter it produces under higher daytime temperatures needs to be stored and digested under lower nighttime temperatures.
④ Moisture: Clivia cannot lack water during the entire plant growth period, and it needs even more water when entering the flowering period, and the growing humidity should not be lower than 60%.
Hydroponic techniques for Clivia
Clivia can also be grown hydroponically. Below we will look at the hydroponic methods of Clivia.
1. Container selection
To hydroponically grow Clivia, first choose a good container. Generally, a transparent glass container is best. If growing one seedling, only a glass jar is needed. If growing a large number hydroponically, you can use thin iron wire to weave a metal mesh with a hole diameter of one centimeter, and make a glass hydroponic box slightly smaller than the metal mesh; or use a goldfish tank instead. Then cover the hydroponic box with the metal mesh, insert the Clivia seedlings separately through the mesh into the nutrient solution, with the depth of the flower roots in the culture solution limited to not exceeding the base pseudobulb.
2. Nutrient solution preparation
Nutrient solutions are divided into inorganic and organic types. The inorganic nutrient solution can be prepared in the following ratio: calcium 1.5 grams, ferrous sulfate 0.01 grams, urea grams, monopotassium phosphate 1 gram, magnesium sulfate 0.5 grams. After these 5 inorganic salts are all prepared, dissolve them in 1000 grams of water and it is ready to use. The organic nutrient solution is prepared as follows: roasted hemp seed powder 100 grams, bone meal (made from unsalted fresh bones) 100 grams, bean cake powder 150 grams, roasted sesame powder 50 grams, then dissolve in 1000 grams of water. Comparing the above two nutrient solutions, the organic fertilizer has rich components but low nutrient content, while the inorganic fertilizer has relatively single components but strong fertilizer effect and quick results. To make up for each other's shortcomings, the two can be used in combination. If used alone, apply the inorganic fertilizer once a week, and the organic fertilizer once every 5 days.
3. Water used
For hydroponic Clivia, do not directly use tap water; you must use water that has been "aged." So-called "aged" water means putting tap water in a container and sun-drying it in sunlight for 3-5 days, so that chlorides such as bleaching powder that are harmful to Clivia roots settle. For "aged" water, from its appearance, the sediment changes from strip-shaped to clump-shaped, and the water color is best when green. After the water is "aged" well, the position of submerging the roots must not submerge the pseudobulb. If the water level is too shallow, Clivia cannot get a sufficient water supply; if the water level is too deep (submerging the pseudobulb), it will cause root rot. During the growing process, pay attention to observing changes in water quality. If the roots are found to be somewhat yellow or black, it means the water is both short of oxygen and low in fertilizer, and the water must be changed immediately.
4. Air
Whether the ventilation of the roots of hydroponic Clivia can be handled well is the key to the success or failure of hydroponics. After a period of growing hydroponic Clivia, a layer of moss grows on the roots. When the moss is too thick, it seriously affects root respiration and corrodes the culture solution. At this time, use a soft, clean brush to gently brush off the moss layer on the roots (it does not need to be brushed very clean, because a small amount of moss on the roots has little effect). In addition, always check whether the oxygen in the water is sufficient. The checking method is: put two or three small fish into the hydroponic box. If the small fish swim freely in the water, it means the water is not short of oxygen. If the small fish always float to the surface, with their mouths and gills exposed to breathe, it means the water is short of oxygen. After discovering that the water is short of oxygen, oxygen must be supplemented. There are two methods: one is to change the water, and the other is to use a small oxygen pump to supply oxygen to the water.
5. Sunlight
Regarding sunlight, the clivia (Clivia miniata) is a semi-shade, semi-sun plant, so attention must be paid to light; especially in summer, avoid direct, intense sunlight and let it receive diffused light. In addition, because clivia leaves are phototropic, make sure the leaves receive light evenly; otherwise the leaves will differ in length and their growth direction will also become uneven, front to back, so generally the light angle should be adjusted once every two or three days.
6. Temperature
Regarding temperature, the ideal ambient temperature for an adult clivia is 11-25°C, while seedlings can take slightly higher temperatures, 20-35°C is fine. When growing orchids in water, keep the day-night temperature difference in mind; in winter, maintain about 20°C during the day and no lower than 15°C at night.