Detailed steps for salvia cutting propagation, easy for beginners to learn too
1. Remove the leaves at the base of the cutting, do not remove the upper leaves, and make a diagonal cut at 3.5 cm.
2. Before cut
ting, sterilize the substrate.
3. It is best to use a wooden stick to poke a hole in the substrate, and insert the cutting nearly half way into the substrate.
4. After cutting, water the cutting lightly, place it in a shady spot, and once it has rooted, transplant it into a pot.
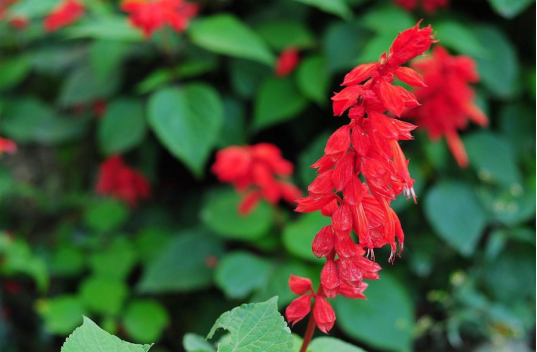
How to propagate salvia by cuttings
Preparatory work for salvia cutting propagation
Selection of cuttings:
For salvia cuttings, healthy branches should be selected from healthy mother plants as the cuttings; the branches should have about two nodes and a length of about 5-10 cm.
Preparation of the substrate:
The substrate is best coarse river sand or vermiculite; if conditions are limited, sandy soil can also be used.
Cutting steps for salvia
1. First remove all the leaves at the base of the cutting, keeping only the upper leaves, and use a knife to cut a 45° slant at about 3.5 cm.
2. Before carrying out the cutting, sterilize the substrate with a disinfectant solution.
3. When cutting, first use a wooden stick to poke a hole in the substrate so as to insert the cutting, and insert the cutting about half way into the substrate.
4. After cutting is finished, water the cutting, and move it to a shady place; after it roots, it can be transplanted into a pot.
Post-cutting care notes for salvia:
Water in a timely manner, and be sure to keep the plant in a shady place.
How to cultivate salvia
Salvia is a perennial herbaceous flower with a short sturdy plant, a neat plant shape, flower spikes in clusters, bright red flowers, and a very long flowering period; it is often grown as an annual.
Steps/methods
Transplanting: When the seedlings grow to 3 pairs of leaves or the cuttings have survived, they can be transplanted. Both the transplanting site and the potting soil must be given a base fertilizer, and water thoroughly right after planting to settle the roots.
Pinching: Pinch immediately after planting, keeping only 1-2 nodes. Afterwards, pinch repeatedly as the seedlings grow, and each time it is best to keep only 1-2 nodes on the original basis. This promotes a short sturdy, full plant with dense flowers.
Bud removal: Salvia can bloom multiple times during the growing period. Generally, under conditions of 20-25°C and short daylight, new shoots can grow for another 25 days and then bloom again. Therefore, after salvia blooms, promptly cut off the spent flowers to reduce nutrient consumption and promote reblooming. At the same time, this characteristic can also be used to adjust the flowering period as needed. For example, to make it bloom brightly and uniformly at National Day, the last pinching can be done on September 1-5.
Water and fertilizer management: During the growing period, to avoid excessive growth of salvia, water less, cultivate and weed frequently, and topdress 2-3 times a month. Especially after each bud removal, water thoroughly, and after one week apply dilute fertilizer water, then apply fertilizer water frequently, and appropriately increase P and K fertilizer to promote new shoots and abundant flowering.
If you want to cultivate a large-sized salvia, you can cut off some tender tips in late autumn, keep the old roots and move them into a greenhouse, and continuously carry out repotting, fertilizing, pinching and other management; by the following summer, a large-sized salvia can be cultivated.