Key Points for Growing Clematis and Daily Care Methods
1. Soil:
Clematis prefers fertile, loose, well-draining alkaline soil, and should not be waterlogged or overly dry.
2. Watering:
Clematis dislikes excessive moisture, so daily watering should be controlled and not excessive, especially during the rainy summer season when watering should be reduced.
3. Sunlight:
Clematis can be placed in a spot with ample light year-round for growing, with no need for shade, but note that it should not be exposed to long periods of intense direct sunlight, which can easily cause the leaves to turn yellow.
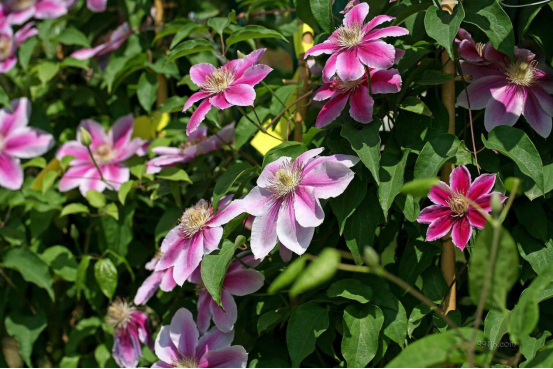
Growing a pot of clematis at home not only fills the household with vitality, but clematis also has an air-purifying effect! Clematis is highly ornamental, and its leaves are a lush green, so beautiful!
Key Points for Transplanting Clematis and Clematis Pruning Methods
Clematis has fairly vigorous vitality, and during pot cultivation it may need transplanting and pruning. Many friends are not yet very familiar with transplanting and pruning clematis, so next Xiao Qi will share the key points for transplanting clematis and clematis pruning methods.
I. Transplanting Clematis
1. Time for transplanting: Potted clematis can be transplanted at any time of the year, because when transplanting you only need to take the clematis plant out of the pot and plant it, which does not cause any harm to the clematis root system. Of course, the ideal time to transplant clematis is in spring or early autumn. During this period the soil temperature is relatively warm, the soil moisture content is more suitable, and it can provide the best living environment for a plant that has just changed environments. But as long as we can dig a hole, we can plant clematis even in winter, and even if it freezes soon after, there is not much of a problem.
2. Transplanting steps: There is no standard size for digging the hole; the size of the round hole depends on the quality of the soil. If the soil is loose, fertile, and well-draining, 30 cm is enough, or a depth of one and a half spades. If the opposite is true, and the soil is heavy and highly clayey, it is best to dig to 50-60 cm deep so you can make a good drainage layer, while the width needs to be 30-40 cm, so the roots can be placed in freely.
II. Clematis Pruning Methods
1. The flowering period begins before the end of May, the flower stalks are short, and usually more than 2 flowers are borne in the leaf axils. In the first year after planting, from February to March, cut all branches back to 30 cm each. In the second year, from February to March, cut all branches back to 1 m each. After the third year, each year after flowering, cut out weak branches and dead branches.
2. Flowers bloom on short branches sprouting from the leaf axils of last year's growth, with 1 flower per branch, and the flowering period begins before the end of June. In the first year after planting, from February to March, cut all branches back to 30 cm each. In the second year, from February to March, cut all branches back to 1 m each. After the third year, each year from February to March, cut all branches short above the first pair of plump lateral buds.
3. Flowers bloom on new growth of the current year, with several flowers per branch, and the flowering period begins in July. In the first year after planting, from February to March, cut all branches back to 30 cm. After the second year, each year from February to March, cut all branches off above the growth point of the previous year, with the plant height not exceeding 75 cm above the ground.
The above is an introduction to the key points for transplanting clematis and clematis pruning methods. Friends who grow clematis at home can refer to it.
Growing Clematis and Precautions for Planting Clematis
Clematis is a flowering plant that has newly risen in popularity in China in the past two years, and is deeply loved for its rich variety of flower colors, endless forms, and abundant blooms. Its climbing nature makes it an indispensable new element in shaping and landscaping courtyards and balconies. In fact, hundreds of years ago there were already records of original varieties being grown in China, but perhaps due to regional limitations and the country's abundance of flowers, it never became mainstream. After foreign horticulturists improved it many times through hybridization, it was only after the internet gradually developed that flower-growing enthusiasts came into contact with it. Clematis is a very easy plant to grow; easy to grow because clematis can grow very well with almost no need for much care. Many flower lovers have reported that clematis is difficult to grow and care for, so here I summarize a few key points from my experience growing clematis:
A well-draining substrate is the first step to growing clematis well
Clematis does not have high requirements for the substrate. It is not necessary for everyone to use soilless substrate for growing; soil can also produce very good results, provided the substrate drains well. Avoid heavy clayey soil; some heavy clayey soils must be improved, and mixing in some tile pieces, fragments of clay pots, perlite, foam pellets, etc. to increase the drainage of the substrate is very important.
This point is especially important for the growth of clematis. Clematis actually has a certain drought tolerance, and long-term moist substrate will bring many potential disease-related risks to clematis. In addition to the substrate, when potting it is also very important to add a drainage layer at the bottom of the flower pot. Filling at least 5 cm of large-diameter clay pebbles or bricks and tile pieces is very necessary.
Growing Clematis (Experience)
Try to use clay pots or ceramic pots to grow clematis
Here I do not very much recommend that everyone use plastic pots. For a flowering plant like clematis whose care focuses on the root system, a good root microenvironment often plays a decisive role in the performance of the whole plant. Growing clematis in clay pots has several very obvious advantages over plastic pots:
The first is that clay pots and ceramic pots can use the micropores on their surface to evaporate excess water from the substrate. This is especially important for flower lovers in the southern regions who have plum rains in summer. You should know that clay pots can help the substrate drain excess water as quickly as possible.
The second is that the evaporation of water from the surface of the clay pot can be used to drive the dynamic balance of minerals in the substrate. It can keep the nutrients in the substrate at a relatively low level (this is especially important for flower lovers who like to use large amounts of organic fertilizer and fertilize without restriction; perhaps clay pots can keep your clematis away from fertilizer burn).
The third is that clay pots can use the evaporation of water from their surface to absorb heat from the substrate and lower the substrate temperature. This is very important for flower lovers in the hot southern summers. You should know that using clay pots can effectively lower the substrate temperature, and some clematis varieties that are not heat-tolerant can use this to increase their survival rate through the summer. Since clay pots and ceramic pots are relatively shallow, try to choose slender clay or ceramic pots with a certain depth to help the clematis root system spread.
How should clematis be watered correctly?
The irrigation management of clematis directly determines its root morphology. If you want to cultivate a robust root system, maintaining a good "dry-wet cycle" watering habit is especially important. In fact, this pot of clematis in my home is often watered only when it is relatively short of water, which is why the root system is so robust, because I put the clematis on a south-facing balcony with a slight offset, so the clematis can avoid the strongest midday sunlight period. Even with short-term water shortage, the clematis will not have any major problems. If your clematis is grown in a location with abundant sunlight and good openness and ventilation, still be careful not to let the clematis go too dry. "Dry-wet cycle" is a very effective way to cultivate robust root systems in root-focused flowering plants.
A few points to note about fertilizing
My fertilizing of clematis is actually quite rough here; I just use a water-soluble fertilizer I mix myself. The formula is based on 13-2-13 with some added ammonium nitrogen and increased content of phosphorus, sulfur and other trace elements. From caring for it until now, this self-mixed formula is still quite good, better than using a general-purpose formula, and the stems are very sturdy, the result of sufficient calcium supply. Previously I saw some flower lovers use large amounts of organic fertilizer and cause fertilizer burn. Here I do not recommend that flower lovers without experience using organic fertilizer use large amounts of organic fertilizer. I suggest everyone start with low-concentration water-soluble fertilizer and slowly become familiar with and understand the mechanism by which plants absorb nutrients.