A detailed guide to Hoya cutting propagation, step by step
1. After you get the branch, cut it apart at the middle of each pair of leaves, cut it into two or three sections and insert them into a prepared flower pot, then place the pot in a ventilated spot with indirect light and keep it moist. After about 20 days it will root and grow new shoots.
2. After successful rooting, place it in a south-facing spot. From this point on, pay attention to how much you water; wait until the soil is completely dry before watering.
3. Hoya grows very fast, so before planting you should decide on its exact position; do not move it around.
4. Generally, cuttings will bloom in their third year; if the light is especially good, they may also bloom in the second year. Because it grows fast, it needs repotting once every other spring; when repotting, remove the old roots and use the same soil and base fertilizer as when planting.
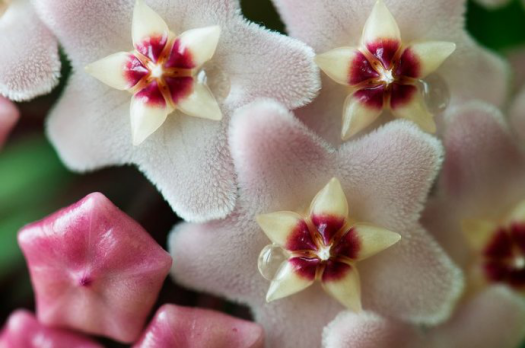
By following the propagation method above, your Hoya will soon grow lush and full of branches too. Once you have mastered the correct method and gained successful experience, you can also propagate other Hoya varieties and enjoy a different kind of beauty.
Hoya cutting propagation method
Hoya is mostly propagated by cuttings. Apart from winter and early spring, when low temperatures make it unsuitable, cuttings can be taken at any other time; March to April each year is the most suitable time to expand propagation by cuttings.For Hoya, both one- to two-year-old old stems and current-year young stems can be used as cuttings. Cut them into 5-8 cm sections, keep 2 nodes, remove the leaves that go into the substrate, leaving only 1-2 leaves on top. After the wound has dried thoroughly, insert the cuttings into a sand bed or a loose-soiled flower pot substrate so that 1/3 or 1/2 is buried. If using a No. 180 flower pot, about 10 cuttings can be inserted per pot.
It is best to insert the cuttings right after cutting them to aid survival. From April to June the light is strong, so to keep a shaded environment you can set up 2 layers of black shade netting. The cuttings will root in about 20 days, and after 1 month new leaves will grow. Once the roots have developed well, they can be transplanted into a larger flower pot for planting, then moved to a semi-shaded, ventilated spot for routine care.
An introduction to Hoya cutting propagation
Hoya grows on plains and mountains, often epiphytically on trees or rocks, and usually blooms in spring. Nowadays many plant lovers grow Hoya indoors for display. Although the scent of Hoya is strong, it is non-toxic, and its nectar is even edible. Generally, Hoya is propagated mostly by cuttings.
Hoya
For Hoya, both one- to two-year-old old stems and current-year young stems can be used as cuttings. Cut them into 5-8 cm sections, keep 2 nodes, remove the leaves that go into the substrate, leaving only 1-2 leaves on top. After the wound has dried thoroughly, insert the cuttings into a sand bed or a loose-soiled flower pot substrate so that 1/3 or 1/2 is buried. If using a No. 180 flower pot, about 10 cuttings can be inserted per pot.
It is best to insert the cuttings right after cutting them to aid survival. From April to June the light is strong, so to keep a shaded environment you can set up 2 layers of black shade netting. The cuttings will root in about 20 days, and after 1 month new leaves will grow. Once the roots have developed well, they can be transplanted into a larger flower pot for planting, then moved to a semi-shaded, ventilated spot for routine care.