Detailed Explanation of Plum Blossom Planting Methods and Techniques
I. Outdoor Planting
1. Environment and Seedling Selection
Choose a spot with full sun, deep and fertile soil, loose topsoil, and slightly clay-heavy subsoil for planting; plants grow better in such locations. In spring, 1- to 2-year-old small seedlings can be planted bare-root and will easily survive; for large plum blossom seedlings over 3 years old, they must be planted with a soil ball.
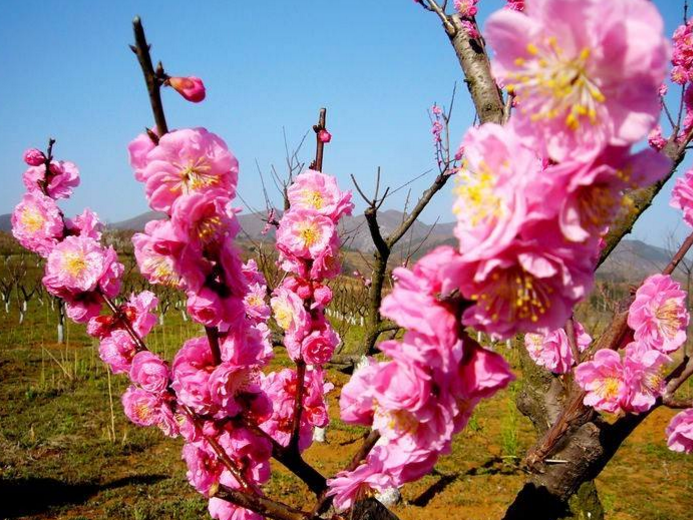
2. Fertilizing
Apply base fertilizer at the bottom of the hole first, then water thoroughly once after planting so the roots bind tightly with the soil. Plum blossoms can be planted as specimens, in pairs, in groups, or scattered among pine forests and bamboo groves. Plum blossoms love fertilizer. Every winter, dig a trench within the canopy projection circle and apply fertilizer. After flowering, apply another topdressing mainly of nitrogen to promote full and sturdy branch growth.
From June, the plant enters the reproductive growth stage. June to August is the period of flower bud differentiation in plum blossoms, and the nutritional status of the tree greatly affects flower bud differentiation. At this time, apply topdressing mainly of phosphorus and potassium to ensure smooth flower bud differentiation. Plum blossoms dislike waterlogging; in rainy summers, attention should be paid to drainage, as excessively wet soil can easily cause root rot.
3. Shaping and Pruning
Pruning is an important measure to promote more flowering and maintain tree shape in plum blossoms. Since plum blossoms form flower buds on the current year's branches that sprout in spring and bloom the following spring, within one week after flowering each year, lightly shorten the branches to encourage more side branches so they bloom more the next year. The tree shape of plum blossoms is valued for its sparseness; do not overemphasize the direction and distance of branches. Prune into a natural open-center shape, with branches evenly distributed and slightly sparse. In winter, thin out diseased, dead, weak, leggy, crossing, and densely growing branches to improve ventilation and light penetration in the canopy. Plum blossom pruning should be light; too heavy pruning leads to leggy growth and affects flowering the next year.
II. Pot Planting Methods
1. Seedling Selection and Potting
During the dormant period, pot 1- to 2-year-old plum seedlings grown in open ground. Use fertile, loose soil for the pot, and apply base fertilizer at the bottom. According to experience, after potting plum seedlings, do not water with clear water; instead, fill the pot to the rim with decomposed and filtered concentrated manure water, allowing the manure water to soak through the potting soil, which promotes good growth of the plum plant. Place the pot in a ventilated, sunny spot for cultivation. The distance between pots should be such that the canopies do not shade each other, ensuring both ventilation and light penetration as well as ease of operation.
2. Watering
Watering potted plum blossoms is key; it should be neither too wet nor too dry. In summer, improper watering often causes leaf drop during the growing season. Plum blossoms fear waterlogging; during heavy rain, tilt the pot to drain water, and straighten it promptly once the rain stops and the sky clears. After autumn begins, reduce watering to once every other day. To promote timely flower bud differentiation in plum blossoms from June to August, the "water withholding" method is commonly used to control vegetative growth and promote flower bud differentiation. When branches grow about 20 cm in early June, stop normal watering; when leaves on the branches appear wilted and drooping, water again to restore them. Repeat this several times. By reducing watering combined with pinching and twisting shoot tips, branch growth is inhibited or stopped, so nutrients can be concentrated for flower bud differentiation, resulting in more and better-quality flower buds.
3. Fertilizing
Fertilizing potted plum blossoms is very important; it should not be excessive to cause leggy growth, but must also ensure the needs of growth and flowering. Besides base fertilizer, apply 1 to 2 topdressings before June to ensure sufficient nutrients for branch and leaf growth. In early June, control nitrogen fertilizer and apply 1 to 2 applications of phosphorus-potassium fertilizer, which benefits flower bud differentiation and maintains flower color and blooming. Stop fertilizing in midsummer. From when flower buds gradually swell until blooming, apply appropriate fertilizer and watering to ensure water supply. During full bloom, water less and keep slightly dry, which can extend the flowering period.
III. Plum Blossom Propagation Methods
Grafting is most commonly used, followed by cutting and layering, and seeding is used the least.
1. Grafting Propagation
In spring, February to March, use cut grafting or cleft grafting. In autumn, bud grafting also survives easily. Use 1- to 2-year-old mountain peach, wild peach, apricot, or seedling plum as rootstock. With apricot and seedling plum as rootstock, grafted seedlings grow slowly in the early stage but have a long lifespan and fewer pests and diseases. Collect scions after leaf fall, store at 0 to 5 °C low temperature, and take them as needed during spring grafting to improve survival. In the Suzhou and Yangzhou areas, to create old plum stumps, approach grafting is used; specifically, graft variety plums onto old roots of fruiting plums, carried out from June to August.
2. Seed Propagation
Seedling plants bloom in 3 to 4 years but tend to degenerate, so they are generally used only as rootstock or for breeding new varieties. In May, when plums mature and turn yellow, harvest the fruit, rub off the flesh, dry in a ventilated, shaded place, and store in moist sand. Generally sown in autumn. Row spacing 25 to 30 cm, plant spacing 5 to 10 cm. After sowing, cover with 2 to 3 cm of soil and cover with grass to retain moisture and protect against cold. They sprout the following spring; after 1 to 2 years of management, with stem diameter 1 to 2 cm, they can be used as rootstock.
3. Cutting Propagation
Plum blossoms are best propagated by softwood cutting with misting; the survival rate of most varieties can reach about 60%, but some varieties are difficult to root. According to the experience of Wuhan Botanical Garden, the survival rate of plum blossom cuttings depends not only on the variety but also on tree age, branch position, and vigor. Varieties such as green calyx and palace pink have higher survival rates. The suitable time for plum blossom cuttings is November. Use 1-year-old branches collected from the outer canopy of large trees. Branches from young trees can also be used as long as they are thick, full, and free of pests and diseases. Cut branches into 10 to 15 cm lengths, dip in 1000 to 2000 mg/kg naphthalene acetic acid for a few seconds, and insert into loose soil, leaving only 1 terminal bud exposed. Spray water once after insertion, then keep the soil moist regularly. Because plum blossoms fear moisture, it is not suitable to flood the bed before cutting, nor to irrigate heavily after cutting, otherwise overly wet bed soil causes rot. To retain moisture and warmth, seal the cuttings in a plastic tunnel. After cutting, plum blossoms callus the same year and root the following spring.
4. Layering
Carried out in February to March, select robust 1- to 3-year-old long branches, dig a trench beside the mother plant, make 2 to 3 shallow cuts in the bark below the bend of the branch with a knife, then bury in soil, and use a forked branch inserted at the burial site to secure the layer and prevent it from springing up. After rooting, cut away from the mother plant and plant. When large seedlings need to be propagated, use air layering: during the plum rain season, select robust branches on the mother plant, wound or girdle the layering site, wrap loose soil in plastic film around the layering site, tie both ends tightly, maintain humidity, and cut off and plant after rooting.
Plum Blossom Pest and Disease Control
Plum blossoms are prone to powdery mildew and sooty mold, which should be controlled early to avoid premature leaf drop. Common pests include aphids, red spiders, and leaf-rolling moths. In addition, plum blossoms in poorly drained areas are prone to root rot; in mild cases, dig out the plant and expose it to sun, then replant; in severe cases, you can try using Genbizhi for root sterilization and anti-rot treatment.
Friends who like plum blossoms should hurry and grow a pot. For more plum blossom-related content, please follow Four Seasons Plant Network!
Plum Blossom Planting Methods
Floral Bonsai Network Flower Care Column: Plum Blossom Planting Methods will introduce you to plum blossom cultivation methods, how to grow plum blossoms well, and plum blossom pest and disease control
Plum blossom belongs to the Rosaceae tree-type flowers
[Plum Blossom Ornamental Value]
Flowers open before leaves, with a delicate fragrance. There are over a hundred varieties, with flower colors including white, pink, red, and purple. It is a traditional famous flower of our country. The flowering period is 1 to 2 months. The leaves are elegant and the branches beautiful, simple and refined; it is often used as a potted stump bonsai.
[Plum Blossom Habits]
(1) Likes sunlight; if kept in shade for a long time, it blooms sparsely.
(2) Suits warm and humid conditions; suffers cold damage below -18 °C. Sensitive to air pollution and grows poorly in urban environments.
(3) Likes moisture but fears waterlogging; suits well-drained sandy loam.
[Plum Blossom Cultivation Key Points]
(1) For propagation, graft good varieties onto wild peach rootstock.
(2) Use potting soil mixed with 6 to 7 parts garden soil and 3 to 4 parts charcoal ash residue.
(3) After sprouting, keep the potting soil according to "water when dry, stop when wet." In early summer during flower bud differentiation, temporarily reduce watering. In summer and autumn, keep the soil moist but not too dry. After leaf fall, if not too dry, no watering is needed. In deep winter and early spring during the flowering period, it should be slightly moister than after leaf fall. In short, the potting soil should not be too wet, otherwise roots rot easily.
(4) Do not fertilize after leaf fall. Apply fertilizer once after flowering, and apply appropriate topdressing once from late August to September. Use decomposed oil cake water or human manure/urine as fertilizer.
(5) Prune in winter or after flowering. For young trees, cut appropriately and leave longer branches to encourage more branch growth. For old trees, prune somewhat heavily; consider the length of retained branches and the direction of growth to ensure a graceful posture (see Q&A 69 to 70 for details).
(6) In spring, summer, and autumn, place potted flowers in a sunny spot to facilitate ventilation and light penetration and reduce pests and diseases.
How to plant plum blossoms? Plum Blossom Planting Methods
To grow plum blossoms well, planting methods are key. Next, the editor will introduce plum blossom planting methods in detail to help everyone grow plum blossoms better.
Plum Blossom Planting Methods:
1. Soil
Choose sandy loam with excellent drainage and aeration. This potting soil can be prepared by mixing peat, fine sand, and garden soil in a 1:1 ratio. If possible, adding a small amount of leaf mold is even better. The purpose of adding leaf mold is to improve the fertilizer-holding capacity of the potting soil and make it slightly acidic.
2. Pot Selection
Elegant pots complement beautiful plum blossoms, enhancing ornamental value. However, it is best to grow plum blossoms in ordinary clay pots, and when the plant blooms, slip it into a gracefully shaped pot. This is because clay pots are beneficial to plum blossom root growth, while antique porcelain or purple clay pots are slightly inferior.
3. Watering
In winter and spring, plum blossoms need little water. Except for keeping the potting soil slightly moist during the flowering period, at other stages keep the potting soil slightly moist and leaning dry. Summer and autumn are the stages when plum blossoms need the most water; water when dry. However, from June to July, flower buds begin to differentiate. During this period, "control water" for plum blossoms several times, that is, reduce watering to make the leaves slightly curl before watering again, so plum blossoms can bloom better.
4. Fertilizing
Plum blossoms love fertilizer, but fertilizer must be applied timely and in appropriate amounts. From late spring to early summer, apply dilute liquid fertilizer once about every 10 days. From late winter to early spring, when plum blossom buds begin to grow noticeably until before color shows, apply dilute liquid fertilizer once every 5 days so the flowers bloom with vivid color and fragrance.
5. Light
In a sunny placement location, plum blossoms grow robustly and bloom more; otherwise, plants grow slowly and differentiate fewer flower buds. Therefore, it is very necessary to ensure potted plum blossoms receive 4 to 6 hours of sunlight daily. During the flowering period, especially after flower buds begin to swell, several hours of direct sunlight daily is beneficial for flowering. After the flowers open, place it in a bright spot without direct sunlight, otherwise the flowers will quickly fade.
6. Pruning
To give plum blossoms a graceful tree shape and strong growth vigor, annual pruning is essential. In the vigorous growth season, pinch the branch tips, allowing them to grow only to a height of 20 to 30 cm. At the same time, promptly cut off sprouts from the rootstock and promptly remove diseased and weak branches and inner-canopy branches. In addition, promptly remove suckers growing from the rootstock. After plum blossoms bloom, pruning is also needed, leaving only 3 to 5 buds at the base of each branch. In spring when branches sprout, thin the buds as well so nutrients are distributed reasonably, so plum blossoms can grow more beautiful and robust.