How to grow edelweiss? A full breakdown of the cultivation methods
1. Soil
Edelweiss grows best in loose, fertile humus soil, so the potting soil should ideally be leaf-mold loam. After sowing, do not just leave it alone; once the seedlings emerge, they need thinning, and when the plants have 3 true leaves they can be transplanted into pots. During the growing season, the potting soil should not be too wet; slightly moist is enough. Fertilize once a month, and be careful not to get the fertilizer solution on the leaves. In winter, keep the potting soil as dry as possible.
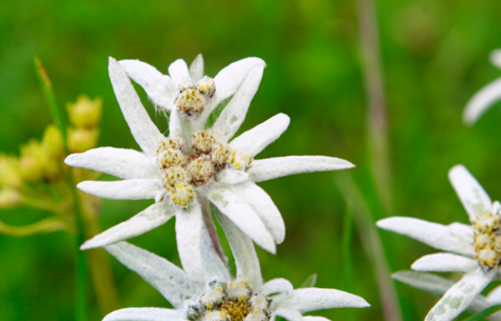
2. Light
Edelweiss loves sunlight very much, and during its growing season the plant must receive sufficient light, otherwise it will easily become leggy. But note that in summer, because of the high temperatures and strong light, the plant should be given appropriate shade, otherwise it may get scorched. In winter, while keeping the plant warm, give it plenty of light.
3. Watering
Edelweiss is quite strict about water. Right after cuttings are taken, do not water the soil directly; instead use a spray bottle to mist. Generally, 1-3 times a day; the higher the temperature, the more often you spray, and on cloudy days reduce the frequency. When the plant is growing normally, make sure it gets enough water, but do not let water accumulate in the pot, otherwise the roots may rot.
That covers how to grow edelweiss. Now let's look at what you need to pay attention to when growing edelweiss!
Edelweiss cultivation methods and precautions
Edelweiss cultivation methods
Cultivation
Edelweiss grows best in loose, fertile humus soil, so the potting soil should ideally be leaf-mold loam. After sowing, do not just leave it alone; once the seedlings emerge, they need thinning, and when the plants have 3 true leaves they can be transplanted into pots. During the growing season, the potting soil should not be too wet; slightly moist is enough. Fertilize once a month, and be careful not to get the fertilizer solution on the leaves. In winter, keep the potting soil as dry as possible.
Propagation
There are mainly two propagation methods for edelweiss: division and seed sowing. Division is best done in spring; you can pull apart the clumping edelweiss and pot them up directly. Sowing is also mainly done in spring, with an ideal seed germination temperature of 20°C, and the seeds sprout 10 days after sowing.
Precautions for growing edelweiss
Repotting
If you are considering repotting edelweiss after it has been growing for a while, it is best to prepare the replacement soil in advance, then cut off any dry or yellowed leaves and stems from the roots of the plant to be moved, and then place it into the fresh soil.
Pests and diseases
Edelweiss generally lives in high, cold environments, so when temperatures are low, the chance of pests and diseases is not great, but pest and disease prevention work should still be done.
From the above, I believe everyone now understands the edelweiss plant and its cultivation methods. So why not prepare to sow pure edelweiss in spring?
Precautions for growing edelweiss
Pest and disease control
Because edelweiss grows in high, cold regions, the ambient temperature there is very low, and the chance of pests and diseases appearing is also very low. But for the healthy growth of the plant, some pest and disease prevention work should still be done. Generally, every 10-15 days or so, you can spray the plant once with 2000x Decis or 1000x dichlorvos to prevent insect pests. Every 7-10 days or so, you can spray the plant once with 700x carbendazim or chlorothalonil for sterilization.
That is all for today. I hope this article is helpful to everyone and can help your edelweiss grow healthier and more beautiful!