How to Propagate Shrimp Plant? Detailed Propagation Methods
Cuttings Propagation
This method can actually be done in all four seasons, but spring and summer are better. In summer, cuttings need shade and moisture retention. The first step is to cut healthy current-year shoots with 2-3 nodes as cuttings. Both hardwood and softwood cuttings are acceptable. Actually, under the same temperature conditions, softwood cuttings root much faster. For the cutting medium, yellow sand, vermiculite or perlite is more suitable, and it needs to be disinfected and sterilized. Insert the basal 1 node into the soil, and the indoor temperature should preferably be kept below 20°C. Roots generally form in about 10 days, and flowers can appear the following year. After the cuttings have rooted, they should be transplanted into pots promptly, with appropriate shade, and once new leaves grow, they can be moved to a spot with ample sunlight.
Seed Propagation
First of course you need to select good seeds; seeds collected in the current year should be used, as this ensures the germination rate to a certain extent. The shrimp plant seeds selected should have the following characteristics: plump and full, free of pests and diseases. Then place the seeds in warm water and soak for about 12-24 hours, until the seeds absorb water and swell.
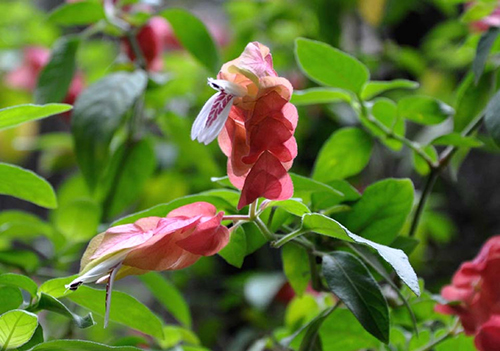
How to Grow Shrimp Plant
First, the shrimp plant blooms in all four seasons, so we need to use different care methods for different seasons.
I. Sufficient Light
In spring and autumn, we need to give the shrimp plant full exposure to light. The plant should not remain in a sunless state for a long time, otherwise it will easily become leggy, affecting the number and quality of flowers.
II. Moderate Fertilization
In spring and autumn, sufficient water and fertilizer should be maintained. The shrimp plant has high requirements, and its potting soil needs to be kept moist. Apply decomposed liquid fertilizer once, and apply phosphorus fertilizer during flowering.
III. Appropriate Moisture
In summer, it is a rainy season, so attention should be paid to drainage. However, when there is ample sunlight, the water demand is still high, so remember to spray water frequently to maintain a fine moisture level, which can also lower the temperature. Also, if the temperature gradually rises and the light becomes stronger, remember to do timely shading and ventilation work, placing the shrimp plant in a cool, ventilated spot; it should not be exposed to sunlight all the time.
Propagation Methods of Shrimp Plant
Cuttings Propagation of Shrimp Plant
Cuttings of shrimp plant can be taken in all four seasons, mainly in spring and summer. Summer cuttings need shading and moisture retention. First cut healthy current-year shoots with 2-3 nodes as cuttings. Both hardwood and softwood cuttings are acceptable, but under the same temperature conditions, softwood cuttings root faster. The cutting medium is preferably yellow sand, vermiculite or perlite, and should be disinfected and sterilized. Insert the basal 1 node into the medium, and the room temperature should be kept below 20°C. Roots will form after about 10 days, and flowers will appear the following year. After the cuttings have rooted, they should be transplanted into pots promptly, with appropriate shade, and once new leaves grow, move them to a spot with ample sunlight.
Seed Propagation of Shrimp Plant
First you need to select seeds; it is best to use seeds collected in the current year to ensure the germination rate. Choose plump, full shrimp plant seeds free of pests and diseases. Then soak the seeds in warm water for about 12-24 hours, until the seeds absorb water and swell. For relatively small seeds, you can use a toothpick with one end moistened with water to pick up the seeds, then stick them one by one onto the surface of the medium, with a covering depth of about 1 cm. Then place the sowing pot into water, with the water depth at 1/2-2/3 of the pot height, allowing the water to slowly soak up. For larger seeds, you can place them directly into the medium and sow them in spots at a spacing of 3×5 cm. The covering depth is about 2-3 times the size of the seed. After sowing, you can moisten the medium with a sprayer, and afterward water again when the potting soil is slightly dry. At the same time, pay attention to controlling the force of watering, so as not to wash the seeds up with too much force.