What are the key points for cedar care? These few points are crucial.
1. Placement
A sunny, well-ventilated and humid location. In summer, when temperatures are high, shade appropriately; in winter it is fairly cold-hardy, but north of the Yangtze River it should be moved indoors to overwinter.
2. Water
It has a certain tolerance for drought and dislikes waterlogging. The potting soil is best kept moist; water only after the potting soil has dried out completely, and when watering, water thoroughly. Note that water must not accumulate in the pot; drain it promptly.
3. Fertilizing
For home use, cake fertilizer is the main type. Fertilizing in April to May is ideal; note that the fertilizer solution should not be too concentrated, and it should not be applied too often, 2 to 3 times a year is enough.
4. Pruning
Carry it out during the winter dormant period, cutting off overlapping branches, crossing branches, dead branches and leggy growth. During the growing season, overly long branches can be shortened at any time, and the upright small branches on the side branches can be pinched back, so that more short branches and clustered needles sprout.
5. Repotting
Repot once every 3 to 4 years, in spring from March to April before budding. When repotting, remove about 1/2 of the old soil, cut off rotten roots, replace with loose, fertile potting soil, cover with moss and then water; place in a shaded spot for half a month, after which it will have settled in.
That is all for today's little plant care tips! Thank you for reading; if you like it, save and share Four Seasons Plants Network, and here I also wish our dear readers a happy life!
An introduction to how to make a cedar bonsai, and the points to note in its care
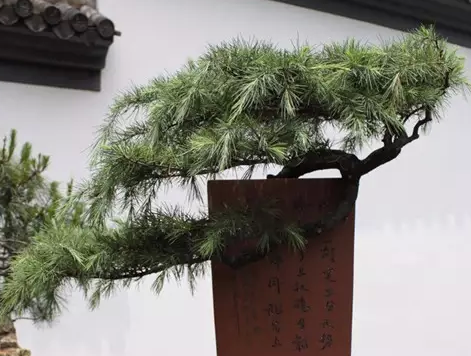
Cedar is an extremely cold-hardy plant, and its vitality is very tenacious. The cedar tree is tall, but it can be grown as a bonsai and has high ornamental value. Many flower enthusiasts enjoy growing cedar. Today I will take everyone through the cultivation methods for cedar bonsai.
Care methods
1. Water and fertilizer
Cedar has a certain drought resistance and dislikes waterlogging; keeping the soil in the pot moist is enough. Observe the potting soil often; if it is dry, water it, watering thoroughly but not allowing water to accumulate in the pot (so it is best to use one with a hole in the bottom, and to cushion it with crushed stones). Drain promptly after rain; if it cannot be dealt with in time, it may cause the cedar's roots to rot.
2. Repotting
It is best to repot once every 2-3 years, preferably in spring from March to April before budding. When repotting, replace half with loose, fertile new soil and cut off rotten roots. After repotting, first place it in a shaded spot for half a month, then return to normal care.
3. Pruning
During the care process, cedar needs attention to shaping and changing the leader. Cedar has heavy branches; if the leader is damaged or weak, strong side branches must be pulled up and tied well, later becoming the central dominant one; this process is changing the leader. The pruning method is mainly to thin out overly dense branches and leggy growth, and cut off dead branches and diseased or pest-infested branches; the tree shape is mainly based on personal preference.
4. Pests and diseases
When potted, cedar mainly needs attention to preventing and controlling leaf blight. You can spray a 500-800 times dilution of Dexon. There are many insect pests, and you can spray a 1000-1500 times dilution of 80% dichlorvos.
Points to note
1. For fertilizing cedar, it is best to use fermented, decomposed human manure and cake fertilizer; for potted cultivation, cake fertilizer is the main type. The fertilizing time is best controlled to April-May; note that the fertilizer solution should not be too concentrated, and it can be applied in 2-3 split applications.
2. To prevent the cedar from growing too tall, the terminal bud needs to be removed to eliminate apical dominance, so that the cedar can sprout more side branches.
3. On stormy summer days and plum rain days in autumn, especially take care that water does not accumulate; the pot can be moved indoors to a spot with light.
The above is the cultivation method and points to note for cedar bonsai that I have put together; I hope it can be of help to the many flower enthusiasts, and please continue to follow Succulent Flower Garden to learn more about flower care.
Points to note on the planting method for cedar
Cedar is tall and majestic, and very ornamental. In addition, cedar also has a strong ability to reduce dust, reduce noise and sterilize the air, making it very suitable for greening city streets, residential areas, industrial areas and other places. However, planting cedar is rather particular; we now describe the planting method as follows, to offer a modest contribution.
1. Planting season: autumn and spring are most suitable; early summer and winter are also used for planting. But planting in winter in northern regions should be done with caution. Generally, transplanting after the cedar's young branches have become woody is more suitable.
2. Transplanting location: before digging, first choose a good planting position for the large tree, preferably in a wind-sheltered, sunny spot. Where site conditions are poor, the soil should first be improved.
3. Digging up and hoisting/transporting cedar
1. Digging specifications: the dug root ball needs to be large enough; too small will cause overly severe damage to the cedar's root system and affect the survival rate, while too large will cause the cost of digging the tree and transport to be too high. Taking a 3 m cedar as an example, a 45 cm root ball is enough; in early spring even a 40 cm root ball can meet the need.
2. Digging the tree and packing: if there are no diseased, pest-infested or broken branches, the individual is not pruned, but it must be tied carefully so as to avoid damaging the lower branches when digging. When digging, take care not to let the root ball break apart; a cedar whose root ball has broken apart is very hard to keep alive.
3. Lifting and transport: use a crane; when hoisting and transporting, be sure not to damage the tree. Pay attention to loading and setting down gently, guard against broken roots and branches and loss of soil from the roots, and also pay attention to harm from overhead wires, buildings and other things.
4. Planting cedar
The planting pit should be more than 40% larger than the root ball, to make it easy to remove the boards. Set it down gently; after setting it down, plant with soil added in layers, tamping once per layer of at most 30 cm thickness, and it must be tamped firmly and tightly. Note that cedar is a shallow-rooted plant; do not plant the cedar too deep, as that affects growth.
After planting, build soil ridges all around the trunk to make watering easier, and set up upright posts to support the trunk. Because cedar has shallow roots, in the year of transplanting it is very hard for it to withstand the attack of strong winds. For large-specification cedars, such as a 10 m cedar, making a good support frame is very important for the cedar's growth.
5. Care work after planting cedar
After planting, water thoroughly three times in a row. Water the first time on the day of planting, the second time 2 days later, and the third time after a week. Afterwards, carry out loosening of the soil and tie the bound branches tightly. If the weather is hot, in the early stage of transplanting it is necessary to spray water on the crown once to twice in the morning and evening to keep it moist, and always pay attention to loosening the soil and weeding. After that, prune the branches 1 to 2 times each year to ensure a beautiful tree shape with good ornamental value.