Detailed Guide to Making a Caragana Bonsai, Step-by-Step Instructions
Obtaining Material
Generally choose young seedlings of Caragana grown for bonsai through cuttings or layering, because such branches are slender and supple and easy to cultivate into potted plants. Alternatively, choose old, multi-year stumps with graceful form, which can achieve the effect of rapid shaping.
Timing
As far as possible, in the dormant period or the rainy season, dig out the Caragana plant. First cut off most of the above-ground stems, then remove the soil, and according to the growth direction of the roots, carefully dig out the Caragana roots. Take care to protect the root system and do not let the roots be injured.
Potting
First place the dug-out Caragana in a semi-shaded spot, and wait until the roots are slightly dry before bending and shaping them, using the roots in place of a trunk, then plant it in a pot. Never bend the roots while they are wet, otherwise they break easily. Handled this way, once formed the roots become gnarled and intertwined, very pleasing to the eye.
Shaping
If you want the Caragana bonsai to look more beautiful, we can give the main branches and trunk appropriate shaping, while the small branches are mainly pruned to make them uneven and well-arranged. Arrange and lay out the root system, twining around each other, or use palm fibre to tie and bend them appropriately, so as to present the beautiful gnarled and intertwined root form.
If you want the Caragana bonsai shape to look more beautiful, pay more attention to care in ordinary times as well.
How to Make a Caragana Bonsai: Caragana Bonsai Making Methods
Caragana is a deciduous shrub of the genus Caragana in the legume family. How do you make a Caragana bonsai? Let's take a look below at the Caragana bonsai making methods.
1. Obtaining material: The material for making a Caragana bonsai can be propagated by sowing, cuttings, division, layering and other methods. Caragana is best sown as soon as the seeds are collected; if they have been stored dry, the seeds should be soaked to hasten germination before sowing in the following spring.
Caragana cuttings can be taken as hardwood cuttings in February-March, or as softwood cuttings in the plum rain season. Cut the cuttings to 8-12 cm, insert to a depth of 1/2, and after insertion build a frame for shade, water moderately, and after rooting remove the shade frame to give full sunlight for healthy growth; the survival rate is relatively high. Caragana division propagation is carried out in spring, in February-March.
For the stump material for making a Caragana bonsai, besides cultivating young seedlings, you can also dig up old, multi-year stumps in the wild, choosing stump material with rugged, vigorous and elegant form. The digging time can be throughout the dormant period and the rainy season.
2. Potting: To make a Caragana bonsai, first choose a pot. For a Caragana bonsai, it is best to choose a round or square purple-clay pottery pot. For a cascade-style bonsai, a tall cylinder pot should be chosen; to fully display the Caragana roots, a somewhat shallower pot may be chosen.
Second, choose suitable potting soil. For a Caragana bonsai, neutral or slightly acidic loam or light clay is suitable; alkaline soil should not be used. Ordinary potting soil or garden soil can also be used. The best time to plant a Caragana bonsai is in early spring.
3. Shaping: The main branches and trunk of the Caragana bonsai can be given appropriate bending and shaping, but pay attention to the effect on every side; do not have bends on only one plane. For the small branches, pruning is the main method; do not cut them all to the same length, so as to appear uneven and well-arranged.
When changing the soil or repotting, make use of the twisted and varied root system of Caragana: arrange and lay out the root system, twining around each other, or use palm fibre to tie and bend them appropriately, so as to present the beautiful gnarled and intertwined root form.
How to Make a Caragana Bonsai: Caragana Bonsai Growing Methods
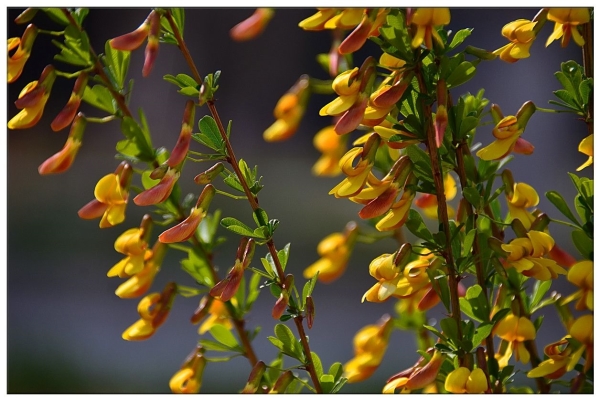
Caragana has fresh green leaves and pea-like flowers in red and yellow, with a flowering period from April to May. It is mainly used to make bonsai and is very popular. Below, we will tell you how to make a Caragana bonsai, as well as the Caragana bonsai growing methods.
How to Make a Caragana Bonsai
1. Obtaining material:
Caragana can be propagated by sowing, cuttings, division, layering and other methods. Sowing is best done as soon as the seeds are collected; if they have been stored dry, the seeds should be soaked to hasten germination before sowing in the following spring. Cuttings can be taken as hardwood cuttings in February-March, or as softwood cuttings in the plum rain season; cut the cuttings to 8-12 cm, insert to a depth of 1/2, and after insertion build a frame for shade, water moderately, and after rooting remove the shade frame to give full sunlight for healthy growth; the survival rate is relatively high. Division propagation is carried out in spring, in February-March.
For the stump material for making a bonsai, besides cultivating young seedlings, you can also dig up old, multi-year stumps in the wild, choosing those with rugged form and fine posture, which can achieve the effect of rapid shaping. The digging time can be throughout the dormant period and the rainy season. The digging method is to first cut off most of the above-ground stems, then scrape away the surface soil, clarify the growth direction of the main root, and along the course of the main root dig patiently and carefully from far to near; this helps protect the root system and reduce damage. The dug-out roots are often very long; when planting, there is no need to shorten them, but place them in a shaded spot, and wait until the roots are slightly dry before bending and shaping them, using the roots in place of a trunk, then plant them in a pot. Never bend the roots while they are wet, otherwise they break easily. Handled this way, once formed the roots become gnarled and intertwined, very pleasing to the eye.
2. Potting:
Choosing a pot: For a Caragana bonsai, it is best to choose a round or square purple-clay pottery pot. For a cascade-style bonsai, a tall cylinder pot should be chosen; to fully display the Caragana roots, a somewhat shallower pot may be chosen.
Soil: For the potting soil, choose neutral or slightly acidic loam or light clay; alkaline soil should not be used. Ordinary potting soil or garden soil can also be used.
Planting: Potting should be carried out in early spring.
3. Shaping:
The main branches and trunk can be given appropriate bending and shaping, but pay attention to the effect on every side; do not have bends on only one plane. For the small branches, pruning is the main method; do not cut them all to the same length, so as to appear uneven and well-arranged. When changing the soil or repotting, make use of the twisted and varied root system of Caragana: arrange and lay out the root system, twining around each other, or use palm fibre to tie and bend them appropriately, so as to present the beautiful gnarled and intertwined root form.
For the shaping of a Caragana bonsai, those with a single trunk and twisting branches and an antique, elegant posture are considered best. It can also be made into a form with branches and leaves drooping down in profusion; or with raised roots and exposed claws, showing its aged appearance; or with pruned and tied branches and leaves in cloud-like clusters; so as to achieve the effect of beautiful form and brilliant flowers.
Caragana Bonsai Growing Methods
Caragana bonsai likes light and tolerates drought, and should be placed in a spot with ample sunlight and good air flow. It is also relatively cold-hardy in winter; areas south of the Yellow River can overwinter it outdoors, and it is best to bury the whole pot in soil. For watering, follow the principle of "do not water if not dry, and water thoroughly when watering"; especially during the flowering period, keep the potting soil moist, which can prolong the flowering period. During the winter dormant period, apply liquid fertiliser once; before flowering in spring, water with liquid fertiliser once, which can prolong the flowering period; after the flowers open, apply a top-dressing once more to urge the branches and leaves to grow; in ordinary times, applying a moderate amount of thin fertiliser is enough.
During the winter dormant period, Caragana bonsai can be given liquid fertiliser once; before flowering in spring, water with liquid fertiliser once, which can prolong the flowering period; after the flowers open, apply a top-dressing once more to urge the branches and leaves to grow; in ordinary times, applying a moderate amount of thin fertiliser is enough. After leaf fall in winter, cut off all kinds of branches that affect the tree's shape; after flowering in spring, shorten the branches that have already flowered, to promote the growth of new flowering branches; during the vigorous growth period, prune leggy shoots at any time, and pinch back appropriately, so as to maintain the tree's graceful posture.
Repot once every 2-3 years, with early spring being the best time. When repotting, remove about 1/2 of the old soil, replace it with fresh potting soil, trim and adjust the root system, replant, place in a spot with diffused light, water thoroughly, and frequently spray atomised water over the trunk. After it has regained vigour, return to normal care.
The above is our introduction to the Caragana bonsai making methods and the Caragana bonsai growing methods. We hope it can help you. For more home knowledge, please stay tuned.