How to propagate Plumbago auriculata? A detailed guide to common propagation methods
1. Seed propagation
Advantages:
Propagating Plumbago auriculata from seed is simple, and after successful sowing it can bloom the same year.
Sowing conditions:
When propagating Plumbago auriculata from seed, choose a suitable sowing container and suitable soil; the soil must be fresh, free of insect eggs, and well draining. You can use peat, vermiculite, or choose sandy soil.
For sowing, keep the temperature between 22-23°C, pay attention to watering, and keep the soil slightly moist; generally it will germinate within a week.
After the seeds germinate, supplement light in time to ensure the seedlings get plenty of sunlight and grow healthily; water moderately to meet the water needs of the Plumbago auriculata seedlings. You can also apply fertilizer regularly to meet the nutrient needs of the Plumbago auriculata seedlings as they grow; alternating fertilizers of the three elements nitrogen, phosphorus, and potassium is best, meeting the plant's growth element needs.
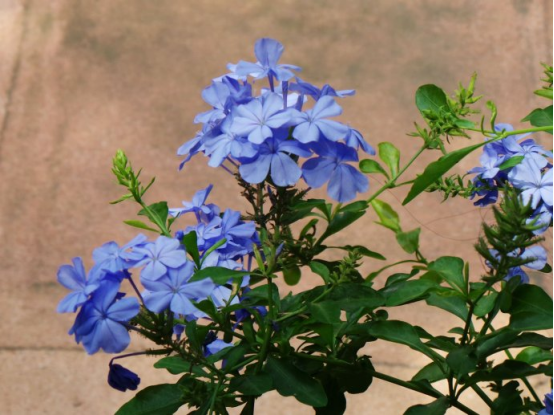
2. Division propagation
Besides seed propagation, Plumbago auriculata can also be propagated by division. When repotting in spring, take the plant out, divide it into several clumps, and replant them.
3. Cutting propagation
Advantages:
Cutting propagation is a commonly used method for many plants; this method has a short propagation cycle and is simple to do. The success rate is extremely high
Cutting conditions:
Cutting propagation of Plumbago auriculata can be done in spring, early summer, or late summer.
For spring cuttings of Plumbago auriculata, combine repotting and pruning each spring, and use the pruned branches as cuttings. For summer cuttings, choose thick, healthy young shoots, cut 10-15 cm, insert them in a sand bed, and keep the temperature at 20-25°C for best results; generally they can root within a month. After rooting, they can be transplanted into pots 3 weeks later.
Propagation methods for Plumbago auriculata
Cutting propagation of Plumbago auriculata
Cutting propagation is a common method of plant propagation; cutting propagation has a short cycle, is simple to do, and also has a high survival rate. Propagating Plumbago auriculata by cuttings is very simple.
Cutting propagation of Plumbago auriculata can be done in spring, early summer, or late summer.
For spring cuttings of Plumbago auriculata, combine repotting and pruning each spring, and use the pruned branches as cuttings. For summer cuttings, choose thick, healthy young shoots, cut 10-15 cm, insert them in a sand bed, and keep the temperature at 20-25°C for best results; generally they can root within a month. After rooting, they can be transplanted into pots 3 weeks later.
Seed propagation of Plumbago auriculata
Propagating Plumbago auriculata from seed is also fairly simple, and you can see it bloom the same year.
When propagating Plumbago auriculata from seed, choose a suitable sowing container and suitable soil; the soil must be fresh, free of insect eggs, and well draining. You can use peat, vermiculite, or choose sandy soil.
For sowing, keep the temperature between 22-23°C, pay attention to watering, and keep the soil slightly moist; generally it will germinate within a week.
After the seeds germinate, supplement light in time to ensure the seedlings get plenty of sunlight and grow healthily; water moderately to meet the water needs of the Plumbago auriculata seedlings. You can also apply fertilizer regularly to meet the nutrient needs of the Plumbago auriculata seedlings as they grow; alternating fertilizers of the three elements nitrogen, phosphorus, and potassium is best, meeting the needs for various elements.
Division propagation of Plumbago auriculata
Besides cutting propagation and seed propagation, Plumbago auriculata can also be propagated by division. When repotting in spring, take the plant out, divide it into several clumps, and replant them.
How to grow Plumbago auriculata:
1. Light
Plumbago auriculata is a plant that greatly loves light and can only bloom under long-day conditions; as long as a sufficient water supply is ensured, even the blazing midsummer sun is no problem at all. Note that when light is insufficient, the amount of blooming will markedly decrease, and the branches will become thinner and softer, showing leggy growth.
2. Watering
The leaves of Plumbago auriculata have very soft fuzz, and when short of water they are easily sunburned, so during cultivation you must ensure a sufficient water supply. If the pot is too small and dries out too quickly, besides switching to a larger pot, you can also place a tray under the pot to hold water.
3. Fertilizing
Because Plumbago auriculata blooms year-round and produces a large number of flowers, it needs a large supply of phosphorus fertilizer to bloom.
If you want to grow Plumbago auriculata into a tall shrub or even a flower wall, choose a general-purpose fertilizer with a balanced ratio of nitrogen, phosphorus, and potassium. If you want to control the plant shape of Plumbago auriculata, choose a flowering-type fertilizer high in phosphorus and potassium.
4. Pruning
Plumbago auriculata is a particularly flexible plant; its branches are thin and soft and tolerate pruning well, so whether it is a cute little herbaceous flower or a dreamy large flower wall, it is especially easy to shape. We need to promptly cut off spent flowers so the plant sends out new flowering branches faster. Cut off excess branches that exceed the size we want it to grow to, and keep shaping it.