How to grow bonsai? Mastering these care essentials is key
1. Light
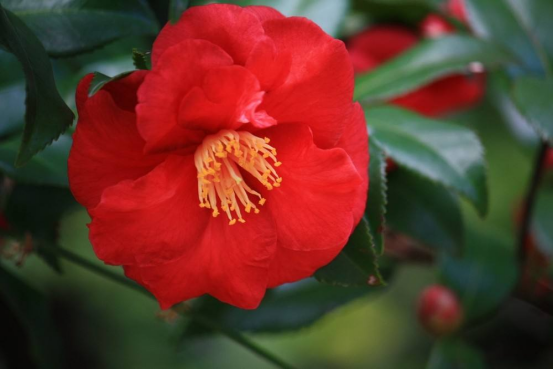
To enjoy the beauty of a Camellia sasanqua bonsai all year round, regular care is very important. Camellia sasanqua is a plant that needs to grow in a semi-shaded environment, and it also needs good ventilation. If it lacks light and ventilation over time, the leaves will lose their gloss, the flower colors will not be bright enough, and it may even produce few flowers. If the light is too strong, it will also cause the leaves to be scorched and fall off. Be careful not to move its position frequently, as this affects the normal growth of Camellia sasanqua.
2. Watering
In summer, the Camellia sasanqua bonsai should be watered frequently, once every morning or evening, and each time it should be watered thoroughly without leaving standing water. Besides watering, the leaves should also be misted regularly, generally once every 3-4 days or so; this not only increases air humidity but also washes off dust. In winter, it does not need much water; generally watering once a week is enough.
3. Fertilizing
The Camellia sasanqua bonsai needs nutrients during the flowering period, but it should not be fertilized before flowering, as this will prevent the buds from opening. Generally, we choose to apply fertilizer after flowering in spring. By June, when the spring shoots have matured, a little more fertilizer can be applied, once every 10 days. After late September, stop fertilizing.
4. Thinning buds in time
During the flowering period of Camellia sasanqua, attention should also be paid to bud thinning. The flower buds of Camellia sasanqua have a very long development period; if buds are not thinned, a lot of nutrients will be consumed, the flowers will not develop successfully, and the entire plant will also be affected.
After reading this article, are you very interested in Camellia sasanqua? In fact, growing a Camellia sasanqua bonsai is very simple. As long as you master the points above, I believe you can also grow an excellent Camellia sasanqua bonsai!
Key care points for Rhapis excelsa bonsai | Key management points for Rhapis excelsa bonsai
Key care points for Rhapis excelsa bonsai. The key management points for Rhapis excelsa bonsai are introduced as follows:1. Care and management placement location:
Rhapis excelsa is a southern plant and should be placed in a warm, humid, ventilated and fairly shaded location. In summer, a shed should be built for shade, and in winter it should be moved into a greenhouse.
Watering: Keep the potting soil moist at ordinary times, but do not let water accumulate. In summer, water in the morning and evening, and spray the leaf surfaces with water. In winter, reduce watering appropriately.
Fertilizing: During the spring and summer growing period, it is advisable to apply light fertilizer frequently, preferably decomposed cake fertilizer water. A small amount of ferrous sulfate can be added to the fertilizer to make the leaves emerald green.
Pruning: Pruning Rhapis excelsa is very simple. Mainly cut off its withered yellow leaves and diseased leaves. If the layers are too dense, thinning pruning can also be done.
Repotting: Repot once every 2 years. For newly produced plants, division planting or rearrangement can be carried out. Repotting time is best in spring from March to April. Replace more than 1B2 of the old soil and fill with loose humus soil.
Rhapis excelsa has few pests and diseases, mainly scale insects, which can be killed by manual washing and brushing. Applying a small amount of ferrous sulfate solution regularly can prevent leaf yellowing.
2. Ornamental value
Rhapis excelsa has an elegant posture, with green stems standing upright, leaves covering like an umbrella, and evergreen all year round, with very high ornamental value. If made into a forest style and further matched with rocks, it becomes even more poetic and picturesque.
Key care points for elm bonsai, how to make and care for elm bonsai
❤`•.¸¸.•´´¯`•Related recommendations:
❤Lucky bamboo
❤Money tree
❤Rockery bonsai
❤Pine bonsai
❤`•.¸¸.•´´¯`• Decorate your little home and enjoy every minute of life! This article comes from [Decoration Information]
The elm tree has a natural and upright posture, with rough bark and many vertical cracks appearing dark gray, but its small branches are soft and suitable for intertwining and climbing. Ancient elm stumps are even more graceful in appearance. Although they seem to have long been decayed by time, the branches and leaves still grow normally, giving people the sense of an old tree meeting spring again. Some elm bonsai made from them have twisted roots and gnarled branches, and some even turn decay into something miraculous, with a distinctive charm.
Making an elm bonsai:
1、Prepare a clay pot filled with plain sandy soil for planting newly dug old elm stumps, also called "growing the stump." Growing the stump is generally carried out from late autumn to spring, and the survival rate is highest about three months before the elm buds.
2、When transplanting a large tree stump, it should be brought with native soil, and it should be done before leaf sprouting in winter and spring. After planting, wrap the stem with rice straw mixed with yellow mud water, and water frequently to keep the soil and rice straw moist.
3、Before planting, the root system and branches and trunk should be pruned. Sticky sap often flows from the cut openings. At this time, note that the sticky sap must not seep out too much, otherwise the survival rate will be seriously affected. To prevent this from happening, we can seal the cuts with wax, then sprinkle fine sandy soil on them, and this can effectively avoid it.
4、After planting, compact the soil. At this time there is no need to water, then spray clean water on the branches and trunk 1-2 times a day, and later water once after another 3-4 days. Finally, as long as it is not dry, do not water, and never let the soil accumulate water.
5、According to the basic form of the old stump, shape the elm bonsai, and make different forms of bonsai through wiring, pruning and other forms. There is no particularly special period for shaping time; it can be during the dormant period after leaf fall, or during the growing period, but shaping must not be done during the budding period.
Care of elm bonsai:
1. Light:Strengthen the light for elm bonsai. Elm bonsai likes sunlight and has poor shade tolerance. The finished bonsai should be placed in a place with sufficient sunlight. With insufficient sunlight, it will only grow branches while the leaf color becomes very unattractive, and it is also prone to pest problems.
2. Watering:Although elm likes to grow in moist places, it is also afraid of waterlogging. So each watering should be thorough. In midsummer, water once in the morning and once in the evening, and be sure to keep the potting soil moist but not waterlogged.
3. Fertilizing:Elm bonsai does not need too much fertilizer. Applying it once each in early spring and early autumn every year is enough.
4. Pruning:Because elm has extremely strong growth ability, we need to prune diligently to maintain the ornamental value of the elm bonsai. Branch pruning and shaping can be done in autumn, cutting off useless branches and diseased branches, then carrying out branch training.
5. Pests and diseases:Elm bonsai is often harmed by aphids, scale insects and others. We can use omethoate diluted with 1000 times water and spray it to kill them.
Conclusion:Elm stumps are not only used for bonsai viewing, but can also be used as decorative trees in courtyards. A single tree forms a scene, with excellent effect. In the Jiangnan region, it has even become the saying "where there is a village, there must be an elm." The above is the editor's introduction. After reading it, do you know how to make an elm bonsai? How much do you know about its care? Friends who like bonsai, hurry up and plant one!
▣ Desert rose cultivation ▣ The flower language of blue enchantress ▣ Gardenia leaves turning yellow ▣ Rose planting techniques▣ How to grow Cuban oregano ▣ The flower language of narcissus ▣ Rose planting techniques ▣ Kalanchoe cultivation methods ▣ Hibiscus cultivation methods