How to Grow Blue-Eyed Daisy (Arctotis)? Detailed Care Methods and Tips
1. Temperature
The suitable growing temperature for the blue-eyed daisy is somewhat different from that of other plants. The most suitable growing temperature for the blue-eyed daisy is between 20-25°C. Temperatures that are too high or too low will directly reduce the seed germination rate, so when growing blue-eyed daisies we must control its growing temperature.
2. Watering
In our daily care when sowing blue-eyed daisy seeds, we must control the soil moisture well; water is crucial to the growth of the blue-eyed daisy. When watering the blue-eyed daisy, the water force should not be too strong; a strong impact force will damage the soil surface of the blue-eyed daisy, which will also affect the root area of the blue-eyed daisy.
3. Light
I believe flower lovers all know that the blue-eyed daisy is a plant that dislikes heat. So how do you grow the blue-eyed daisy in summer? Because summer is too hot, we must provide shade care for it in summer. In other seasons it can be placed outside to receive light, to avoid leggy seedlings.
4. Fertilizing
I believe flower lovers who have grown the blue-eyed daisy all know that the blue-eyed daisy has a long flowering period, so they think it needs sufficient nutrients to support it. In fact, we only need to apply a light fertilizer once before the flowering period to support the healthy growth of the blue-eyed daisy during the flowering period. In addition, in the overly cold winter, applying fertilizer once to resist the severe cold is enough.
The above has introduced the question of how to grow the blue-eyed daisy. Below let us look at the pest and disease control of the blue-eyed daisy!
How to Grow Blue-Eyed Daisy: Key Points for Growing Blue-Eyed Daisy
The blue-eyed daisy is a very good ornamental flower. Growing the blue-eyed daisy requires certain techniques. How do you grow the blue-eyed daisy? Below let us look at the key points for growing the blue-eyed daisy.
Introduction to the Blue-Eyed Daisy
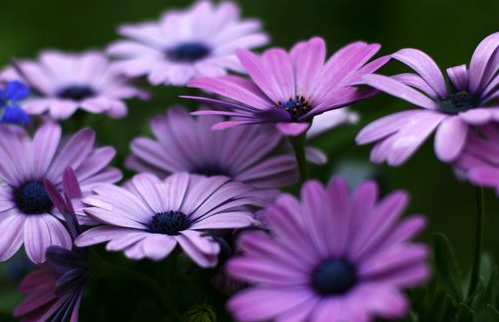
The blue-eyed daisy is also known as the African daisy and the large-flowered blue-eyed daisy. It is native to South Africa and is not cold-tolerant. It dislikes heat, with a suitable temperature of 18°C-26°C, likes sunny environments, and prefers well-drained soil. The blue-eyed daisy plant height is 20-60cm, with basal leaves clustered, stem leaves alternate, usually pinnately lobed. The capitulum is solitary, the involucre has fuzz, the ray florets are white with a pale purple back, and the disk center is blue-purple. The achene has ribbed grooves and long soft hairs. The blue-eyed daisy is a semi-shrub or perennial herbaceous plant, with a plant height of 20-60 cm. Basal leaves are clustered, stem leaves alternate, pinnately lobed. The blue-eyed daisy has terminal capitula, with blue-purple tubular florets in the center, ligulate florets, and flower colors including white, purple, pale colors, orange, etc. The blue-eyed daisy is an annual herbaceous plant with a plant height of 50-80 cm, smooth stems, and many branches in the upper part with leaves pinnately deeply lobed into linear shapes. The capitulum is terminal, with a slender peduncle, ray florets in a single whorl, and the middle-lower part is red-brown. The flowering period is summer and autumn.
Key Points for Growing the Blue-Eyed Daisy
1. Temperature
Give appropriate temperature according to the requirements of the specific variety. The germination temperature of most seeds is between 20-25°C. Too high or too low a temperature will directly affect the seed germination rate.
2. Humidity
Water management after sowing is very crucial. When raising seedlings in winter and the night soil temperature is low, water loss is small, so no or little supplemental water is needed during the seedling stage; if the soil temperature is relatively high, spray supplemental water according to actual needs during the seedling stage. When raising seedlings in summer, water evaporates especially quickly, so water must be replenished at any time according to the actual situation. If the seeds are very fine, to avoid being washed away by water, the bottom-watering method can be used to replenish water.
3. Light
Except for a few varieties such as cyclamen, which need darkness during germination, most seeds germinate better under light conditions. After the seeds germinate, they must receive light, otherwise the seedlings will become leggy.
4. Removing the Cover
After the seeds germinate, the cover should be removed in time. For 60%-70% of seeds, the film should be removed after the cotyledons unfold, to prevent the seedlings from becoming leggy. At the same time, the moisture of the substrate should still be maintained, so that the cotyledons of the ungerminated seeds can successfully extend from the seed coat.
5. Transplanting
When the seedlings grow to a suitable size for transplanting, they should be pricked out or planted in time, otherwise it is easy to cause leggy seedlings and delays in production. The transplanting time for various seedlings is different and must be determined according to the actual situation.
Blue-Eyed Daisy Arctotis stoechadifoli var. grandis Blue-Eyed Daisy Illustrated Guide: How to Grow Blue-Eyed Daisy / How to Propagate Blue-Eyed Daisy
Blue-Eyed Daisy ProfileBlue-Eyed Daisy Arctotis stoechadifoli var. grandis
How to Grow Blue-Eyed Daisy and Precautions: Introduction to the Blue-Eyed Daisy
The blue-eyed daisy is also known as the African daisy and the large-flowered blue-eyed daisy. It is native to South Africa, is not cold-tolerant, dislikes heat, has a suitable temperature of 18°C-26°C, likes sunny environments, and prefers well-drained soil.
The blue-eyed daisy plant height is 20-60cm, with basal leaves clustered, stem leaves alternate, usually pinnately lobed. The capitulum is solitary, the involucre has fuzz, the ray florets are white with a pale purple back, and the disk center is blue-purple. The achene has ribbed grooves and long soft hairs.
Morphological Characteristics of the Blue-Eyed Daisy
The blue-eyed daisy is a semi-shrub or perennial herbaceous plant, with a plant height of 20-60 cm. Basal leaves are clustered, stem leaves alternate, pinnately lobed. The blue-eyed daisy has terminal capitula, with blue-purple tubular florets in the center, ligulate florets, and flower colors including white, purple, pale colors, orange, etc.
The blue-eyed daisy is an annual herbaceous plant with a plant height of 50-80 cm, smooth stems, and many branches in the upper part with leaves pinnately deeply lobed into linear shapes. The capitulum is terminal, with a slender peduncle, ray florets in a single whorl, and the middle-lower part is red-brown. The flowering period is summer and autumn.
Ecological Habits of the Blue-Eyed Daisy
The blue-eyed daisy is native to South Africa and is not cold-tolerant. It dislikes heat and likes sunny environments. It prefers well-drained soil.
The blue-eyed daisy plant height is 40-60cm, with basal leaves clustered, stem leaves alternate, usually pinnately lobed. The capitulum is solitary, about 7.5cm in diameter, the peduncle is 15-30cm long, the involucre has fuzz, the ray florets are white with a pale purple back, and the disk center is blue-purple.
The blue-eyed daisy achene has ribbed grooves and long soft hairs.
The blue-eyed daisy likes sufficient sunlight and cool climatic conditions, has strong cold resistance, and has no special requirements for planting soil.
Sowing can be done in both spring and autumn. In northern regions, sowing in March and April means flowering in May and June; autumn sowing is usually in late September. Before winter, a little covering is enough for overwintering. Propagation is mainly by sowing.
The stems and leaves of the snake's-eye daisy are bright and slender, and the small flowers are light and elegant, full of wild charm. Because of its strong self-seeding ability, it blooms continuously from spring to autumn, and is suitable for planting and beautifying home gardens.
Cultivation Techniques of the Blue-Eyed Daisy: Sowing Preparation
1. Seedling Raising
For blue-eyed daisy pot seedling raising, it is recommended to use plug trays or seedling pots, and not to sow directly in the ground. If sown directly in the ground, there are more soil-borne pests and diseases, the ground temperature is lower, and water and humidity are not easy to control, affecting the germination rate. Raising seedlings in plug trays also makes it easier to count the germination rate.
2. Seedling Substrate
The blue-eyed daisy seedling substrate requires loose soil, good air permeability, water and fertilizer retention, cleanliness and freedom from disease, and good fertility. Commonly used substrates include peat soil, coconut coir, perlite, and vermiculite, generally mixed together. For example, peat soil 85% + perlite 10% + vermiculite 5%. The peat should not be too fine; perlite particles with a diameter of 3-4 mm and vermiculite particles with a diameter of 3-5 mm are ideal. Some fertilizer can be appropriately added to the substrate. Most seeds germinate well on a substrate with a pH of 5.5-5.8, but scarlet sage, geranium, marigold, and French marigold require a pH of 6.2-6.5.
3. Filling Pots
After the blue-eyed daisy substrate is mixed evenly, fill the pots. The substrate does not need to be compacted during the filling process; simply level it gently, otherwise the physical properties of the substrate will be changed and its air permeability will be reduced.
4. Watering
Use a fine nozzle to water thoroughly until the bottom water is reached. The size of the water droplets should be such that they do not impact the soil surface and keep the soil surface level. After watering, water once more with a fungicide; the commonly used agent is chlorothalonil.
5. Seed Soaking
Proper seed soaking can promote germination and increase the germination rate. Seeds with soft, thin seed coats can be soaked in cold water; seeds with thicker seed coats can be soaked in warm or hot water; very small seeds do not need soaking. For example, sweet pea and black-eyed Susan can be soaked overnight in advance to increase the germination rate and make germination faster.
Sowing Principles
1. Sowing Density
For plug tray sowing, 1 or more seeds can be sown per cell according to the actual situation. For seedling pot sowing, general varieties can be sown at 1-2 thousand seeds per square meter. First divide the seeds evenly into several portions according to the area of the seedling pots, one portion per pot.
2. Sowing
Larger seeds can be evenly broadcast on the substrate, or sown in rows. Smaller seeds such as petunia and snapdragon can first be mixed evenly with clean fine sand before sowing. Especially large seeds such as sweet pea and cyclamen can be sown by dibbling.
3. Sowing Depth and Covering Soil
The sowing depth is determined by the size of the seed and the seed's light requirement for germination. Generally, the sowing depth of seeds is 2-3 times the seed diameter. Some varieties such as petunia, Torenia, star flower, and wax begonia need light for germination and do not need to be covered with substrate; sow them directly on the soil surface. Some varieties need slight covering, such as scarlet sage, snapdragon, and Cuphea. Some seeds should be covered a little more thickly and sown deeper, such as ornamental millet. The recommended covering material is coarse vermiculite, which has good water retention and air permeability.
4. Spraying Water
After sowing or covering, spray water once more with a fine mist nozzle, watering thoroughly, so that the seeds fully contact the substrate and covering material.
5. Covering
Covering the blue-eyed daisy sowing pot with glass, plastic film, or plastic sheeting can maintain air humidity, and in winter can also keep warm and increase temperature. In summer, the film may be omitted; if covered with film, it must not be sealed, and both sides must be ventilated.
6. Shading
If sowing in summer, shading must be provided, otherwise the light is too strong, water evaporates vigorously, and seed germination will be affected.
Sowing Methods
1. Prepare the sowing soil, preferably using Cuiyun sowing soil.
2. For sowing fine seeds, the soil is best sifted first. Just use the common household colander for draining fruits and vegetables. Put the fine soil that falls through aside. First use the twigs and debris removed by sifting to line the bottom, because the bottom of seedling trays all have bottom holes the size of a little finger, and fine soil is easy to lose. This is exactly the chance to make use of these large pieces. Then fill the cells with fine soil until full. The fine soil is placed on the surface to better blend with the small seeds, which is beneficial for germination. Actually, if using Cuiyun sowing soil, it is not a big problem not to sift it; Cuiyun sowing soil itself is already relatively fine.
3. The moisture of the sowing soil should be appropriate: it should form a ball when squeezed in the hand and scatter when the hand is opened. Some people may ask, isn't it the same to spray water after the seeds are put into the soil? It really is not the same. Those who have used it all know that the culture soil is very light, dry soil has very poor wettability, and once sprayed with water it floats up and is very difficult to moisten. So first water a little less, stir and mix the soil well.
4. Put the coarse soil left after sifting at the lower part of the seedling tray cells, and put the fine soil on top.
5. Spray water: fully moisten the soil surface. If you have No. 1 water on hand, you can spray it with a 500-fold dilution, which is beneficial for germination.
6. Sowing: dip a toothpick in water and use it to pick up the seeds, one at a time, and place them in the center of the cell. Coated seeds are best pressed slightly into the soil. Fine seeds are generally light-loving and do not need to be covered with soil; preferably one seed per cell. After sowing, place the seedling tray in a bottom tray with water and let the water slowly seep through. Large seeds dislike light, so the seeds must be covered with soil, and before germination they are best placed in a cool, dark place. (Petunia dislikes light, so the plastic film used for covering can be black film.) Seedling trays are only suitable for sowing fine seeds; plants such as geranium, blue-eyed daisy, and nasturtium are best sown directly in small seedling pots.
7. After the seeds are sown, spray water again until the soil is completely soaked, then cover with plastic film. Do not remove the plastic film before germination; preferably spray a little water once a day, until after germination, then remove the plastic film and give the seedlings normal light. Make yourself a small home greenhouse. Put the seedling tray into such a small home greenhouse. Cover the lid well until germination. When the temperature is high, place the greenhouse in a cool place; when the temperature is low, it can be placed outside during the day to bask in the sun and brought back indoors at night. Note that once any seedling germinates, it must be allowed to bask in the sun, otherwise it may become leggy in just one or two days. When most of the seedlings have emerged, take out the seedling tray and let the seedlings receive sunlight in a well-ventilated place; preferably allow one or two days for the soil to go through a wet-dry cycle. Blue-eyed daisies sown in a large pot should be spaced 2-3CM apart, one seed per spot, and after germination they can be moved out, one seedling per pot. Seedlings from small seeds are generally relatively tolerant of transplanting, so you can wait until the seedlings are slightly larger before moving them. When transplanting, it is best to bring some soil, and after transplanting, pay attention to providing appropriate shade for a few days.
8. After sprouting, ventilation and sunlight are needed, and the soil must not remain constantly wet, otherwise the stems are very likely to rot. The first summer rain arrived, and the blue-eyed daisy also sprouted tender yellow shoots. If large seeds are directly sown as a single plant, that is also fine; if multiple seeds are mixed and sown, that is best.
Later Management
1. Temperature
Give appropriate temperature according to the requirements of the specific variety. The germination temperature of most seeds is between 20-25°C. Too high or too low a temperature will directly affect the seed germination rate.
The germination temperature of the blue-eyed daisy is 18-20 degrees, and sowing does not require covering with soil.
2. Humidity
Water management after sowing the blue-eyed daisy is very crucial. When raising seedlings in winter and the night soil temperature is low, water loss is small, so no or little supplemental water is needed during the seedling stage; if the soil temperature is relatively high, spray supplemental water according to actual needs during the seedling stage. When raising seedlings in summer, water evaporates especially quickly, so water must be replenished at any time according to the actual situation. If the seeds are very fine, to avoid being washed away by water, the bottom-watering method can be used to replenish water.
3. Light
Except for a few varieties such as cyclamen, which need darkness during germination, most seeds germinate better under light conditions. After the seeds germinate, they must receive light, otherwise the seedlings will become leggy.
4. Removing the Cover
After the seeds germinate, the cover should be removed in time. For 60%-70% of seeds, the film should be removed after the cotyledons unfold, to prevent the seedlings from becoming leggy. At the same time, the moisture of the substrate should still be maintained, so that the cotyledons of the ungerminated seeds can successfully extend from the seed coat.
5. Transplanting
When the seedlings grow to a suitable size for transplanting, they should be pricked out or planted in time, otherwise it is easy to cause leggy seedlings and delays in production. The transplanting time for various seedlings is different and must be determined according to the actual situation.
How to Grow the Blue-Eyed Daisy: Care Management
1. Safety Through Summer.
The blue-eyed daisy is said to be afraid of heat, but last year two plants placed on the windowsill both got through it safely.
2. Early Flowering Period and Considerable Flower Quantity.
The blue-eyed daisy on the windowsill showed flowers about half a month earlier than the one outdoors; the reason may be that the outdoor temperature was lower. As for the flower quantity, just look at the photos and you will know. This is a picture from half a month ago, and the flower quantity was already considerable at that time.
3. Long Blooming Period for a Single Flower, and Flowers Close Later When Light Is Sufficient.
I paid special attention to the first flower on the windowsill; it continued blooming for 17 days before fading! The reason should be that there is less wind and rain on the windowsill. If it were the one outdoors, it would fade in no more than a week.
In addition, the windowsill is close to the indoors, and if indoor lights are turned on early, it can extend the flowering time of the blue-eyed daisy. One night after 8 p.m. I still saw it blooming, which startled me.
4. No Need for Direct Sunlight (this is one of the key points for choosing flowers for the windowsill).
The blue-eyed daisy only needs sufficient light. It can bloom on a windowsill without direct sunlight, and on cloudy days it can also bloom if there is enough scattered light.
Key Points for Growing
1. Temperature
Give appropriate temperature according to the requirements of the specific variety. The germination temperature of most seeds is between 20-25°C. Too high or too low a temperature will directly affect the seed germination rate.
2. Humidity
Water management after sowing is very crucial. When raising seedlings in winter and the night soil temperature is low, water loss is small, so no or little supplemental water is needed during the seedling stage; if the soil temperature is relatively high, spray supplemental water according to actual needs during the seedling stage. When raising seedlings in summer, water evaporates especially quickly, so water must be replenished at any time according to the actual situation. If the seeds are very fine, to avoid being washed away by water, the bottom-watering method can be used to replenish water.
3. Light
Except for a few varieties such as cyclamen, which need darkness during germination, most seeds germinate better under light conditions. After the seeds germinate, they must receive light, otherwise the seedlings will become leggy.
4. Removing the Cover
After the seeds germinate, the cover should be removed in time. For 60%-70% of seeds, the film should be removed after the cotyledons unfold, to prevent the seedlings from becoming leggy. At the same time, the moisture of the substrate should still be maintained, so that the cotyledons of the ungerminated seeds can successfully extend from the seed coat.
5. Transplanting
When the seedlings grow to a suitable size for transplanting, they should be pricked out or planted in time, otherwise it is easy to cause leggy seedlings and delays in production. The transplanting time for various seedlings is different and must be determined according to the actual situation.
Propagation Methods of the Blue-Eyed Daisy
The blue-eyed daisy is propagated by sowing or cutting.
Spring sowing is done in March and autumn sowing in September. For ground planting, choose a spot with sufficient sunlight; for pot planting, use half loam and half leaf mold, and add an appropriate amount of river sand. The blue-eyed daisy can be used in flower borders or as a cut flower, and it lasts a relatively long time in water.
Growing and Propagating
1. Prepare the sowing soil.
2. For sowing fine seeds, the soil is best sifted first. Just use the common household colander for draining fruits and vegetables. Put the fine soil that falls through aside. First use the twigs and debris removed by sifting to line the bottom, because the bottom of seedling trays all have bottom holes the size of a little finger, and fine soil is easy to lose. This is exactly the chance to make use of these large pieces. Then fill the cells with fine soil until full. The fine soil is placed on the surface to better blend with the small seeds, which is beneficial for germination. Actually, if using Cuiyun sowing soil, it is not a big problem not to sift it; Cuiyun sowing soil itself is already relatively fine.
3. The moisture of the sowing soil should be appropriate: it should form a ball when squeezed in the hand and scatter when the hand is opened. Some people may ask, isn't it the same to spray water after the seeds are put into the soil? It really is not the same. Those who have used it all know that the culture soil is very light, dry soil has very poor wettability, and once sprayed with water it floats up and is very difficult to moisten. So first water a little less, stir and mix the soil well.
4. Put the coarse soil left after sifting at the lower part of the seedling tray cells, and put the fine soil on top.
5. Spray water to fully moisten the soil surface. If you have water on hand, you can spray it with a 500-fold dilution, which is beneficial for germination.
6. For sowing, dip a toothpick in water and use it to pick up the seeds, one at a time, and place them in the center of the cell. Coated seeds are best pressed slightly into the soil. Fine seeds are generally light-loving and do not need to be covered with soil; preferably one seed per cell. After sowing, place the seedling tray in a bottom tray with water and let the water slowly seep through. Large seeds dislike light, so the seeds must be covered with soil, and before germination they are best placed in a cool, dark place. (Petunia dislikes light, so the plastic film used for covering can be black film.) Seedling trays are only suitable for sowing fine seeds; plants such as geranium, blue-eyed daisy, and nasturtium are best sown directly in small seedling pots.
7. After the seeds are sown, spray water again until the soil is completely soaked, then cover with plastic film. Do not remove the plastic film before germination; preferably spray a little water once a day, until after germination, then remove the plastic film and give the seedlings normal light. Make yourself a small home greenhouse. Put the seedling tray into such a small home greenhouse. Cover the lid well until germination. When the temperature is high, place the greenhouse in a cool place; when the temperature is low, it can be placed outside during the day to bask in the sun and brought back indoors at night. Note that once any seedling germinates, it must be allowed to bask in the sun, otherwise it may become leggy in just one or two days. When most of the seedlings have emerged, take out the seedling tray and let the seedlings receive sunlight in a well-ventilated place; preferably allow one or two days for the soil to go through a wet-dry cycle. Blue-eyed daisies sown in a large pot should be spaced 2-3CM apart, one seed per spot, and after germination they can be moved out, one seedling per pot. Seedlings from small seeds are generally relatively tolerant of transplanting, so you can wait until the seedlings are slightly larger before moving them. When transplanting, it is best to bring some soil, and after transplanting, pay attention to providing appropriate shade for a few days.
8. After sprouting, ventilation and sunlight are needed, and the soil must not remain constantly wet, otherwise the stems are very likely to rot. The first summer rain arrived, and the blue-eyed daisy also sprouted tender yellow shoots. If large seeds are directly sown as a single plant, that is also fine; if multiple seeds are mixed and sown, that is best.
The language of flowers of the blue-eyed daisy
The language of flowers of the blue-eyed daisy is silence.
The blue-eyed daisy, also known as the African daisy, is native to South Africa. It is not cold-tolerant and dislikes intense heat, preferring a sunny environment. The underside is light purple, and the disk center is blue-purple.
Blue-eyed daisy pictures