How to grow Frangipani (Plumeria)? Detailed care measures and precautions
I. Temperature
Frangipani loves high temperatures; the more sunlight, the better it grows. So when the temperature drops below 10 degrees, it should be moved indoors for cultivation, so that the Frangipani will not wither.
II. Watering
Frangipani likes a moist environment but is not tolerant of waterlogging, so watering must be controlled properly, with no standing water; just keep the soil moist.
III. Fertilizing
Frangipani loves fertilizer, so it should be fertilized regularly, which can promote its growth.
IV. Pest and disease control
Frangipani is prone to pest outbreaks, so as soon as they are found, insecticide should be sprayed immediately; do not wait until the infestation worsens to deal with it.
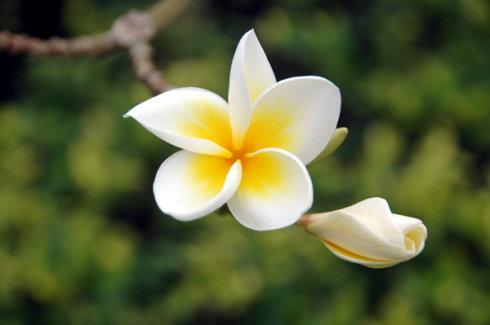
Well, that is the Frangipani growing technique introduced to you above; have you learned it? Thank you for reading!
An introduction to the common diseases of Frangipani and their control measures
Frangipani is a common ornamental flower, often used for landscape decoration, and is deeply loved by many flower enthusiasts. Its flowers are beautiful in shape, pure in color, and charming in fragrance, often attracting many visitors to stop for it. So, do you know what the methods and precautions for pest and disease control of Frangipani are? Let's learn about them together.
I. Frangipani angular leaf spot
Main symptoms: occurs on the leaves. The lesions begin as small brown spots; after expanding, the lesions become polygonal to irregular, with dark black edges and dark brown interiors; in the later stage the lesions dry up, and under humid conditions black granular matter appears on the lesions. Cause: a fungal disease. The pathogen survives in the growing medium and on diseased plant debris. It occurs mostly in spring, can cause repeated infection indoors, and is more severe from July to August. Control methods: (1) Strengthen care, repot in time to renew the medium, increase phosphorus and potassium fertilizer, and improve plant vigor. (2) In early spring, spray once every 7-10 days with 0.5% Bordeaux mixture, or 70% mancozeb wettable powder at 400 times dilution, or carbendazim at 600 times dilution.
II. Red spider mite
Control by spraying with 100-200 times dilution of diesel oil emulsion.
III. Powdery mildew
A fungal disease that harms Frangipani in environments with high temperatures, poor ventilation and relatively high humidity. A powdery white appearance shows on young leaves. Control: spray with 50% thiophanate-methyl·sulfur suspension concentrate at 800 times dilution, or 20% triadimefon emulsifiable concentrate at 2500 times dilution, once every 10 days, for 2 to 3 consecutive times.
IV. Scale insects
Can be controlled by spraying with 25% buprofezin wettable powder at 2000 times dilution.
V. Rust disease
Orange-yellow pustules appear on the underside of the leaves, with corresponding small pale yellow lesions on the upper surface. Control: 25% triadimefon at 1500 to 2000 times dilution can be used.
The above is all the content I have learned about Frangipani today. I hope it will be helpful to flower enthusiasts after reading this article. To learn more about Frangipani, please continue to follow Duorou Huapu, and we will provide you with more related knowledge!
How to grow Clivia and precautions, key care points
1. Daily growing methods for CliviaClivia likes partial shade, with 10 to 25 degrees being the most suitable temperature, and it is suitable for growing in loose, fertile, slightly acidic organic soil. For daily care of Clivia, how should you water, fertilize, adjust light, and repot? See >> Growing methods and key care points for CliviaIn South China, Clivia can be used for flower beds or as cut flowers; in East China and areas north of the Yangtze River basin, it is grown as an indoor potted plant for foliage and flowers.
Clivia is native to the tropics. It likes partial shade, with 10 to 25 degrees being the most suitable temperature, and it is suitable for growing in loose, fertile, slightly acidic organic soil.
Under normal conditions, Clivia blooms once a year; if the indoor growing temperature is suitable, it can bloom around the Spring Festival. Known as the flower of wealth and honor, Clivia generally blooms once a year once mature; blooming twice a year is rare, and blooming three times is extremely rare.
I. Soil selection
The roots of Clivia are fleshy roots, suitable for growing in loose, fertile soil with good aeration, so the soil used for cultivating Clivia should meet the above requirements.
II. Fertilizing
Clivia has the fastest vegetative growth in winter and needs the most nutrients, so applying winter fertilizer well is very important. Before bringing the pot indoors, use bone meal, fried sesame, cooked soybeans, etc., or compound fertilizer, applied with water once every 15 to 20 days; you can also water the roots with a soak of animal and plant residues. Fertilizer must be fully decomposed and applied dilute to prevent concentrated fertilizer from causing damage.
Fertilizing Clivia should be determined specifically according to the size, variety, and growth and development of the plant. Too much or too little fertilizer is no good. Too much will burn the roots; too little will cause nutrient deficiency, and the leaves will noticeably narrow and fail to stand upright.
III. Watering
Clivia has fleshy roots and likes air but fears waterlogging. In addition, Clivia leaves have a waxy layer, and in winter when temperatures are low, transpiration and evaporation of water are low. Therefore, do not water too much; just water along with fertilizing and keep the potting soil moist. Never flood-irrigate, which can cause root rot and plant death.
Remember the watering principle: do not water if not dry; when watering, water thoroughly. Never give just a little at a time; that kind of skimming-the-surface approach is especially harmful to Clivia. Also pay attention to watering time; it is best in the morning or evening. At noon in summer, the temperature is very high, so watering is not suitable. Another point is that watering should avoid the heart of the plant, to prevent heart rot.
IV. Keeping warm
The most suitable growing temperature for Clivia is 15°C to 25°C; growth stops at 10°C, and freezing damage occurs at 0°C. Therefore, in winter it must be kept warm and protected from freezing. After the flower stem emerges, maintaining about 18°C is suitable. If the temperature is too high, the leaves and flower scape will grow leggy and thin, the flowers will be small and poor in quality, and the flowering period will be short; if the temperature is too low, the flower stem will be short, and it is prone to "arrow clamping" and premature flowering, affecting quality and reducing ornamental value.
V. Light adjustment
Clivia likes scattered light and avoids direct strong light. When cared for indoors in winter, the pot should be placed in a place with sufficient light. Especially before flowering, there should be good light, which helps the flower buds develop plump and strong. After flowering, appropriately lower the temperature, avoid strong light, and maintain good ventilation, which helps prolong the flowering period.
VI. Leaf protection
Fat leaves make strong flowers; green leaves make bright flowers. Short, broad, thick, green, glossy, and upright leaves are the characteristics of a healthy Clivia, and are the basis for promoting flowering and improving ornamental value. To maintain strong leaf quality, in addition to providing reasonable fertilizer and water, the leaf surface must be kept clean to improve photosynthetic efficiency. Methods for protecting leaves: first, regularly wash the leaves, spraying and rinsing with the same clean water or wiping dust off polluted leaves to keep the leaf surface clean; second, spray fungicide in time to prevent leaf spot, leaf blight, and stem rot, ensuring the leaves stay green and the flowers stay gorgeous.
VII. Repotting
When Clivia grows larger, it needs a bigger pot; this is "repotting and changing the soil." The best time to change the soil is spring and autumn, because Clivia grows vigorously then and will not be affected by the soil change. The most critical point when changing soil is to fill the soil firmly around the roots; otherwise, if there is no soil around the roots, water and nutrients cannot reach the roots, easily causing root rot.
Home care of Clivia should mainly start with temperature and humidity, soil, water, light, and nutrition. >> Home care knowledge and key points for CliviaClivia is suitable for indoor cultivation, mainly determined by its internal structure and physiological functions. Clivia is an evergreen perennial herbaceous plant with strong shade tolerance, thick large dark green leaves. The leaf mesophyll contains a large amount of chlorophyll and can absorb carbon dioxide and water in sunlight, synthesizing organic matter for its own growth and development needs while releasing oxygen. In addition, on Clivia's broad, thick leaves there are many stomata and hairs that can secrete a large amount of mucus; during gas exchange, they can absorb a large amount of indoor dust, dirt, and harmful gases, making indoor air cleaner. Therefore, Clivia is also praised by people as an "absorption machine" and "dust collector," a guardian of human health. So how can you make this health guardian grow healthily in your home too? Home care of Clivia should mainly start with temperature and humidity, soil, water, light, and nutrition.
Because Clivia originated in the mountain forests of South Africa, where the natural environment is like spring all year round, all parts and organs of the Clivia plant have adapted to this neither-cold-nor-hot natural environment. Therefore, in daily care, the temperature should be controlled between 15-25 degrees. When the temperature drops below 10 degrees, Clivia's growth and development slow down, and below 0 degrees it will freeze to death. Likewise, when the temperature reaches or exceeds 30 degrees, it will also seriously affect Clivia's normal growth and development.
Water is an important component of Clivia. According to measurements, Clivia contains 60%-80% water, and especially its fleshy roots have a strong water-storage function and relatively strong resistance to drought.
Clivia likes neutral water; clean, pollution-free tap water, well water, river water, etc. can all be used for watering, but because fresh tap water and well water are lower in temperature than the soil and contain some impurities, they should be left to stand for 1-2 days before use. As for watering, there are also many finer points. For Clivia seedlings, the best method is to use a spray bottle. Point the nozzle upward and spray onto the leaves; the advantage is that besides achieving the purpose of watering, it can also wash off dust, while leaving mist droplets on the leaf surface to ensure a certain humidity, and in sunlight the evaporation of water can lower the leaf surface temperature and prevent sunscald. However, for Clivia that is blooming, spray watering cannot be used, to prevent water from entering the leaf sheath and causing heart rot; for Clivia in the flowering period, water can only be poured into the pot. So when to water and how much water is appropriate? This mainly depends on the environmental temperature where the Clivia is kept.
The general watering principle is "wet then dry, do not water if not dry, water thoroughly when dry." Watering thoroughly means making all of Clivia's root system be at the same moisture level. To judge whether water has penetrated thoroughly, you cannot decide only based on whether water flows out of the bottom of the pot. Because sometimes after the potting soil dries it hardens and shrinks into a ball; after watering, water quickly flows from the pot wall to the bottom and runs out through the drainage hole. The central part of the potting soil may not have been touched by even a little water. If watering is stopped at this time, Clivia leaves may wilt, and when the arrow is emerging it may form "arrow clamping."
A simple and effective watering method is to immerse the whole pot in a basin or bucket full of water, soak for half a minute, and then take it out. However, the disadvantage of this is that nutrients in the soil are relatively easily lost, so if you want Clivia to have deep roots and large leaves, you must also pay attention to replenishing nutrients in time. The nutrient elements Clivia needs mainly come from organic fertilizer, such as soybean cake, peanut oil cake, animal offal, etc. Generally, applying once in spring and once in autumn within a year is enough. In spring, apply once around late April to early May after flowering; in autumn, after the fruit is harvested, apply once more around mid-September to late October.
Clivia is a moisture-loving plant and has relatively high requirements for the humidity of the growing environment. Its most suitable humidity range is 70%-80%. Clivia grown in such an environment has tender green leaves, clear veins, and short, wide, neat leaves with high ornamental value. However, limited by home environmental conditions, ordinary households find it difficult to reach this standard. This is also the main reason many people cannot grow Clivia well. Clivia is a day-neutral plant and does not have strict light requirements; as long as the temperature is suitable, it can bloom normally whether the light duration is a little longer or shorter, and short-day conditions in winter and spring are more favorable for flowering. Good light is an important condition for ensuring large, brightly colored Clivia flowers. But it still prefers relatively weak light and especially dislikes strong light.
Clivia leaves are phototropic; if kept in one place indoors for a long time, the leaves will definitely turn toward the direction of the sun, and as far as plant shape is concerned, it will be difficult to achieve the ornamental effect of forming a line when viewed from the side and opening like a fan when viewed from the front.
Clivia must be placed in a north-south direction; if not, the leaves will grow crooked. What should you do if the leaves grow crooked? You can align two leaves and clip them together; you can surround them with a playing card so the leaves are not damaged. Normally, the leaves will be corrected in 15-20 days.
Clivia's thick fleshy roots store sufficient water and at the same time place higher demands on the soil it relies on for survival. Only nutrient soil with good aeration, loose texture, and rich humus is suitable for the growth of Clivia's fleshy roots.
Clivia-tolerant rotten leaves or pine needles must be fermented before use; they cannot be used unfermented. If not fermented, they easily burn and rot the roots. Clivia must have its soil changed once a year.
The time and frequency of repotting and changing soil for Clivia depend on the size of the seedling and the season. Mature Clivia like these need their soil changed once a year. The best time to change soil is spring and autumn, because Clivia grows vigorously then and will not be affected by the soil change. Take the Clivia out of the pot, cut off rotten roots and old roots with no absorption capacity, and remove spent soil. Cover the drainage hole of the pot with a piece of broken pot, add 2-5 cm of nutrient soil inward, grab a handful of soil and fill the interior of the roots firmly, then place the plant in the pot, fill with nutrient soil to half the pot height, and gently press down along the pot edge with your hand, so that the roots all stand in the pot and are not easily bent. The key point of changing soil is to fill the soil firmly around the roots. Otherwise, if there is no soil around the roots, water and nutrients cannot reach the roots, easily causing root rot and arrow clamping. After changing the nutrient soil, water thoroughly.
Actually, in the final analysis, Clivia care knowledge is far more than this, and much care knowledge still depends on Clivia growers exploring and accumulating it in practice. But you do not need to worry, because many Clivia enthusiasts also know that growing Clivia well is quite difficult, but killing it is also not easy. Although this is a joke, it also shows from another side that Clivia is not so delicate. As long as you are normally hands-on and attentive, you will certainly be able to cultivate Clivia with lush branches and leaves and bright flowers and red fruits, and life will naturally gain a bit more beauty and pleasure.
2. Four-season care for Clivia
Clivia is generally repotted once every 1-2 years before being taken outdoors in spring (flowering plants are best repotted in autumn). Clivia avoids direct strong light; after summer begins, move the pot to a shady place in time. In autumn, light intensity gradually weakens, so gradually increase light duration to favor flower bud differentiation. In winter, indoor air humidity is best kept at 60%-70%. >> Detailed key points for four-season management and care of Clivia
Detailed key points for four-season management and care of Clivia:
1. Clivia is generally repotted once every 1-2 years before being taken outdoors in spring (flowering plants are best repotted in autumn). Because Clivia's roots are relatively long, a deep pot is suitable, and a layer (3-4 cm) of coal ash slag or coarse sand should be placed at the bottom as a drainage layer, with a small amount of bone meal applied as base fertilizer (do not apply block-shaped base fertilizer, to prevent root rot). After repotting, spray some water on the plant, but do not water immediately, to avoid infection of root wounds; wait 2-3 days before watering thoroughly. After being taken outdoors, place it in a semi-light, wind-sheltered place for care. Watering should be done to keep the potting soil moist.
2. Clivia avoids direct strong light; after summer begins, move the pot to a shady place in time, and water according to the principle of seeing dry and seeing wet. Summer temperatures are high and sunlight is strong; the key to summer management of Clivia is to prevent direct strong sunlight and strive to create a cool environment so it can pass the summer safely. If light, water, and fertilizer management are not well controlled at this time, it is easy to scorch leaves or cause root rot. For this reason, in summer the pot should be placed where it can see light in the morning and evening, and moved to a shady place or an indoor place with bright scattered light around noon, while frequently sprinkling water on the ground to increase humidity and lower temperature. When the temperature is above 25 degrees, fertilization should be paused.
3. In autumn, light intensity gradually weakens, so gradually increase light duration to favor flower bud differentiation. At the same time, apply phosphorus- and potassium-rich liquid fertilizer 2-3 times. To promote winter flowering, it must go through a low-temperature stage before flowering, that is, in mid-autumn do not rush to move it indoors; place it in a sunny spot, water less, do not fertilize, and let it undergo about half a month of low-temperature training at about 5 degrees, then bring it indoors. After bringing it indoors, place it in a place with sufficient sunlight and pay attention to appropriate ventilation. The room temperature should not be lower than 15 degrees during the day and not lower than 5 degrees at night. About once a week, wipe the leaves once with clean water close to room temperature.
4. In winter, indoor air humidity is best kept at 60%-70%, and the potting soil only needs to be kept moist. Before mature Clivia sends up the flower stem, pay attention to raising the room temperature and strengthening fertilizer and water management, and it can bloom on time.
Spring:
Spring sunlight is soft and the temperature is suitable, making it the best period for Clivia growth. Doing spring care for Clivia well in a timely manner is crucial for growth and development and bud formation and flowering that year and afterward. >> Spring care methods and key points for Clivia
Spring sunlight is soft and the temperature is suitable, making it the best period for Clivia growth. Doing spring care for Clivia well in a timely manner is crucial for growth and development and bud formation and flowering that year and afterward.
Taking it outdoors in time:
For Clivia overwintering indoors, as spring temperatures rise, it should be moved outdoors for care in time. The suitable time to take it outdoors is generally around Qingming Festival in temperate regions, and about half a month later in cold regions. It can also be done when the temperature is above 15°C. One or two days before taking it outdoors, open windows for ventilation; after taking it outdoors, first place it in a wind-sheltered, semi-shady place, and after it gradually adapts to the external environment, move it to a sunny, airy place to fully receive light.
Repotting and division:
The repotting time for mature Clivia is generally after flowering in spring; plants that do not bloom in spring can be repotted when taken outdoors. After removing from the pot, remove the old soil and dead roots, and replace with new growing soil to increase nutrients and permeability. Established plants are still cultivated in pots of the original size, while growing plants use pots one size larger. For plants with tiller buds at the base, with 3-4 leaves and a plant height above 10 cm, division should be carried out together with repotting. Those that can retain roots are cut away from the mother plant with a sterilized knife; those that cannot retain roots are broken off by hand, and the wounds are coated with sulfur powder or plant ash for antisepsis. Single plants with roots are planted in small pots; those without roots are first cultivated in fine sand and potted for care after rooting.
Watering and fertilizing:
Because spring temperatures continuously rise and the plant has entered the early growth stage, water demand increases day by day. The frequency and amount of watering should go from less to more, but keep the potting soil moist as the standard. After slow growth in winter, Clivia has little nutrients left in its body, especially after sending up the arrow and flowering, when its nutrients are almost exhausted, so nutrients must be supplemented timely and appropriately to meet the requirements of spring growth and development. In spring the plant is in the stage of sending out new leaves and leaves growing wider, so fertilization should mainly be nitrogen fertilizer. After being taken outdoors, generally apply a dilute liquid fertilizer once about every 10 days, with the concentration flexibly controlled according to growth vigor and temperature. For example, compound fertilizer should be applied at the pot edge, and the amount should preferably be small rather than large.
Promoting buds and flowering:
For Clivia that has the habit of sending up the arrow in late winter and early spring and blooming in early spring, to avoid arrow clamping at this time due to low temperature and other reasons and affecting flowering, 2-3 weeks before the arrow emerges, increase the indoor temperature and increase the amount of watering, apply liquid fertilizer once every 7-10 days or a phosphorus- and potassium-based compound fertilizer once every half month. You can also water the soil with water at 20°C-25°C and spray the leaves with water at 25°C-30°C, and keep the indoor temperature at 10°C-15°C as much as possible; this can promote the plant to quickly send up the arrow and form buds and bloom on time. Once the flower opens, water less, stop fertilizing, and move the plant to a low-temperature place to prolong the viewing time.
Pest and disease control:
As temperatures rise, pests and diseases in the dormant period begin to become active and spread, harming the plant and affecting its growth and development. Lime sulfur mixture at 0.3-0.5 degrees Baumé can be used to spray the plant leaves and bulbs once every 10 days, for 2-3 consecutive times; it can both prevent disease and kill overwintering pests.
Summer:
Summer management of Clivia is crucial; effective measures must be taken to ensure Clivia passes the summer safely: shade from sunlight, lower temperature and increase humidity, water appropriately, and control fertilization. >> Growing methods for home potted Clivia to pass the summer safelyClivia is a valuable potted flower grown for both flowers and foliage, belonging to the Amaryllidaceae family. Clivia leaves are elegant in form, shaped like swords, so it is also called sword-leaf stone pistil. The leaf bases overlap into scale-like layers, like a thick fountain gushing out from the ground, and are glossy. Clivia flowers are broadly funnel-shaped, in umbel-like inflorescences, with 10 to 18 flowers gathered into a ball shape; the flower stem is drawn out from the leaf cluster and grows upright, the petals are 6-lobed, the flowers are orange-red, and the flowering period is winter and spring, lasting up to one month. Clivia varieties are generally divided into narrow-leaved Clivia, large-flowered Clivia, and nodding Clivia; the latter two are commonly cultivated.
Clivia is native to southern Africa and grows beneath large trees, so it fears both heat and cold, likes a semi-shady and humid environment, and fears strong direct sunlight. The best growing temperature is between 18-22; below 5°C or above 30°C, growth is inhibited. Clivia likes a ventilated environment and prefers deep, fertile, loose soil, and is suitable for indoor cultivation.
Summer management of Clivia is crucial; effective measures must be taken to ensure Clivia passes the summer safely.
Shade from sunlight
In summer, Clivia should be placed in a well-ventilated environment without direct strong light. Clivia is a medium-light flower, suitable for the soft light of spring and autumn, and not suitable for scorching sun exposure. In summer, it is best to place the potted plant under a shade shed; sunlight coming through the gaps of the shade shed lets the plant receive weaker light. If it can be placed where direct sunlight is blocked at noon while sunlight can be seen in the morning and evening, that is most ideal. Generally, summer shading should reach 60%-70% or more.
Lower temperature and increase humidity
In summer, place Clivia in a ventilated place. If the environmental temperature is above 35°C, water in the soil evaporates too quickly, making Clivia's water and nutrient supply fall short of demand. Therefore, it is best to place the Clivia pot on a water pool or water basin (raised with a wooden board), and frequently spray water around the plant and on the leaf surface to improve Clivia's temperature and humidity environment, so it can grow in a small environment below 25°C with humidity reaching 60%-70%, which helps it pass the summer safely and can promote Clivia's summer growth.
Water appropriately
Clivia originated in the primitive forests of South Africa, which gave it special characteristics in form and physiological functions. Clivia leaves are broad and tender in texture, requiring relatively high soil water content and relatively high air humidity. In the hot summer, Clivia grows slowly and the root system absorbs little water, but leaf surface water evaporation is very large. Therefore, Clivia cannot lack water; otherwise the fleshy roots shrink, the leaf shape becomes thin and weak, and it loses luster. When watering, adhere to the principle of watering when half dry, and watering thoroughly when watering. But do not water as soon as the surface soil looks dry. Otherwise, if the potting soil remains wet for a long time, it is very easy to cause root rot and yellow leaves. When watering, be very careful not to let water run into the heart of the leaves, to avoid heart rot disease and cause "beheading."
Watering is an important part of Clivia cultivation. For watering Clivia, generally choose in the following order: living water, magnetized water, natural precipitation, well water, tap water.
The amount of watering can be based on the following principles: for small pots and small flowers, high temperatures, good ventilation, fast transpiration, vigorous growth, and good soil aeration, water more; otherwise water less. Many people think Clivia easily rots roots, so both watering and fertilizing should be kept small, resulting in Clivia being short of water and fertilizer all year round and growing slowly. Experience has proven that Clivia must have "heavy water and heavy fertilizer"; you cannot wait until the potting soil is completely dry before watering. Water when the potting soil is half dry, so the potting soil remains moist often. If the potting soil is too dry and cannot be watered thoroughly at once, place the pot in a water basin with water depth at 1/3 of the pot. Let the potting soil slowly become wet.
It is better to use a watering can for watering, and spray evenly. Small and medium Clivia can be watered directly on the leaf surface; for adult Clivia, especially before and after the arrow emerges, never water the leaves, to prevent arrow rot. For this, a sprayer can be used to spray, but do not let water flow into the heart of the plant, to prevent heart rot, arrow rot, or even head rot.
Clivia has well-developed fleshy roots that can store relatively more water and have a certain drought tolerance. General experience holds that a soil water content of about 30% is suitable; water when the potting soil surface looks dry. In winter, water once every 3-5 days; in spring and autumn, water once every 1-2 days; in summer, appropriately increase watering frequency. Seedlings need less water, and the flowering period needs more water. When watering, do not pour water on the leaves to prevent rot. If dust is found on the leaves, gently wipe the leaf surface with a soft cloth, or gently brush with a soft-bristled brush; do not rinse and scrub the leaves with water.
Control fertilization
Clivia likes fertilizer, but too much fertilizer will cause root rot. In addition to applying base fertilizer, topdressing should use the method of "light fertilizer, frequent application." Apply base fertilizer when repotting. In spring and autumn, apply fermented solid fertilizer once a month, and apply liquid fertilizer once a week; in winter and summer, it is best not to topdress, and the whole plant can rely on nutrients accumulated in spring and autumn to grow slowly. When applying solid fertilizer, open the potting soil and bury it 2 cm deep, not directly touching the root system, to avoid burning; when applying liquid fertilizer, for small seedlings fertilizer:water=1:40 is better, and for large and medium seedlings 1:20 is better. Fertilizing time is best in the early morning, and avoid splashing on the leaves. After applying liquid fertilizer, water once promptly, but the water need not be too much; on the one hand it dissolves the fertilizer, and on the other hand it can rinse the newly grown fleshy roots to prevent damage to new roots. Different seasons emphasize different fertilizer types. In winter and spring, apply more phosphorus and potassium fertilizer, such as bone meal; in autumn, apply more nitrogen fertilizer, such as soybean cake water; in summer, often use foliar topdressing, spraying the leaf surface with 0.1% potassium dihydrogen phosphate or superphosphate, etc. Foliar topdressing can be carried out all year round.
Clivia is suitable for soil rich in humus; this kind of soil has good aeration, good water permeability, and is fertile, with slight acidity (pH6.5). Mixing about 20% sand into humus soil is beneficial for root growth. When cultivating, use pots gradually increased as the plant grows. For cultivating one-year-old seedlings, a 3-inch pot is suitable. In the second year, change to a 5-inch pot, and afterward change to a pot one size larger every 1-2 years; repotting can be done in spring and autumn.
Summer temperatures are high, and Clivia is in a semi-dormant or dormant state. Therefore, fertilization should be controlled, and as little as possible or none should be applied. Because during this period its root absorption capacity is weak, if fertilizer is applied or slightly too much fertilizer is applied, fertilizer accumulating around the roots for a long time easily causes root rot and stem rot. However, during this period, if the temperature of Clivia's growing environment is lowered below 25°C, then some dilute liquid fertilizer can be appropriately applied to promote growth and shorten its dormant period; if the temperature drops below 20°C and humidity also meets the requirements, then fertilizer can be applied as usual.
Autumn:
After the Start of Autumn, it is the golden stage for Clivia growth. In management, the following points must be done well: first, bring it indoors in time; second, repot in time; third, prepare the potting soil well; fourth, break off buds and divide pots; fifth, pay attention to fertilizing; sixth, control watering; seventh, increase light. >> Seven key points to grasp in autumn management of Clivia
After the Start of Autumn, it is the golden stage for Clivia growth. In management, the following points must be done well:
First, bring it indoors in time
In order to make Clivia bloom normally, do not rush to move it indoors in autumn; it should undergo low-temperature treatment at about 5°C outdoors for about 10 days. During this period, water less and stop fertilizing, and give appropriate sunlight during the day. Clivia can endure short periods of low temperature around 0°C, and short periods around 5°C will not harm it. After low-temperature treatment, move it indoors and care for it at 10-15°C in a place without direct sunlight.
Second, repot in time
Growing a large plant in a small pot is not conducive to plant growth. Based on many years of experience, Clivia with 2-4 leaves should use a 10 cm pot, 5-8 leaves a 13 cm pot, 9-12 leaves a 17 cm pot, 13-16 leaves a 23 cm pot, and 17 leaves or more a 27-33 cm pot. Do not use plastic pots, porcelain pots, or Nanni pots; it is best to use simple-style pottery tile pots.
Third, prepare the potting soil well
For Clivia potting soil, it is best to use a mixed soil prepared from leaf mold, river sand, and furnace ash in a 6:2:2 ratio. If there is no leaf mold, horse manure soil, river sand, and furnace ash can also be mixed in a 5:3:2 ratio for potting soil. Do not use clay or alkaline soil.
Fourth, break off buds and divide pots
If mature Clivia has grown buds and already has 5 leaves, take advantage of autumn repotting to break off the buds, coat the wounds with charcoal powder or fine furnace ash, and then divide and pot them.
Fifth, pay attention to fertilizing
In autumn Clivia grows vigorously and needs a relatively large amount of fertilizer. In addition to placing some fermented soybean cake residue, bone meal, fried hemp seed, or rabbit manure at the bottom of the pot as base fertilizer when repotting, you can also place some fried perilla, dried sesame, pig blood powder, etc. on the upper part of the potting soil. If conditions permit, apply fermented soybean cake water or fishy water once every half month.
Sixth, control watering
Compared with summer, the amount of watering for Clivia in autumn should be relatively reduced; keep the potting soil moist, do not water unless it is dry through, and too much water easily causes root rot.
Seventh, increase light
After the Start of Autumn, remove the summer shading facilities and let Clivia see as much sunlight as possible. If indoors is shady and there is too little sunlight, artificial light can be used to supplement 1-2 hours; red light is best, not white light.
Winter:
For potted Clivia in winter, special attention should be paid to strengthening fertilizer and water management, soil management, temperature management, and adjusting light. >> Potted Clivia needs strengthened management in winterClivia likes warmth and light and is not cold-tolerant. For potted Clivia in winter, special attention should be paid to strengthening the following management.
Fertilizer and water management
Apply less nitrogen fertilizer and more phosphorus and potassium fertilizer. Eggshell powder and fermented fish waste water are excellent phosphorus fertilizers, while rice husk ash and soot are readily available potassium fertilizers. You can also apply a nitrogen, phosphorus and potassium compound fertilizer to encourage more new shoots and leaves to sprout. Fertilization must be done in moderation, and never apply concentrated fertilizer or raw, unfermented fertilizer, otherwise it can easily cause scorched or rotting leaf tips. In winter, if spots appear on new leaves and the root system turns yellow, it indicates over-fertilization; while new leaves that are narrow, thin and especially pale in color are a sign of fertilizer deficiency.
Soil management
The soil should not be too dry or too wet. Each watering must soak through thoroughly, and after buds appear, water a bit more. About every 20 days, combine watering with a feeding of fermented soybean cake water, diluted fish waste water or water from soaking water chestnuts, combining watering and fertilizing. When room temperature is low, control watering to prevent the potting soil from becoming too wet, which can cause root rot and death.
Temperature management
The suitable temperature for Clivia miniata in winter is 15°C to 20°C, and it is best not to let it drop below 10°C. After the flower scape emerges, the temperature should be kept at around 18°C, with a day-night temperature difference of about 10°C; otherwise the flower scape will bloom before reaching proper height, easily forming "stuck scape". Therefore, when the outdoor temperature at night drops below 10°C, it should be moved indoors. When the indoor temperature falls below 10°C, besides covering the surface of the potting soil with a 1 cm thick layer of charcoal powder for insulation, it should also be placed in a warm, sunny spot indoors. When the indoor temperature is especially low, a plastic film can be placed over the pot to raise the temperature, but the temperature under the cover must not exceed 25°C; if it does, ventilate to cool it down.
Adjusting light
After Clivia miniata is brought indoors, light is restricted, so the pot must be moved manually to adjust it. Usually, during the day it should be placed in a sunny spot indoors so it receives sunlight. Before flowering, at night it should also be placed under a fluorescent lamp for supplemental indoor lighting. Since the two rows of leaves of Clivia miniata are opposite each other, if the light stays in one position for a long time, the leaves will grow unevenly, affecting the ornamental effect. For this reason, when adjusting the light, pay attention to the direction of the leaves, and change the side facing the sun about every 10 days.
3. Hydroponic Clivia miniata
To grow Clivia miniata hydroponically, first choose a good container. Generally, a transparent glass container is best. If growing a single seedling, just a glass jar is enough. For specific methods, see >> Methods and care key points for hydroponic Clivia miniataClivia miniata can also be grown hydroponically, and the method is as follows:
Container selection
To grow Clivia miniata hydroponically, first choose a good container. Generally, a transparent glass container is best. If growing a single seedling, just a glass jar is enough. If growing a large number hydroponically, you can use fine iron wire to make a metal mesh with holes 1 cm in diameter, and make a glass hydroponic box slightly smaller than the metal mesh; or use a goldfish tank instead. Then place the metal mesh over the hydroponic box, insert the Clivia miniata seedlings through the mesh holes into the nutrient solution respectively, with the depth of the flower roots in the culture solution limited to not covering the pseudobulb at the base of the roots. Nutrient solution preparation: Nutrient solutions fall into inorganic and organic types. The inorganic nutrient solution can be prepared in the following proportions: calcium 1.5 g, ferrous sulfate O. 01 g, urea g, monopotassium phosphate 1 g, magnesium sulfate 0.5 g. After these 5 inorganic salts are all prepared, dissolve them in 1000 g of water and it is ready to use. The organic nutrient solution is prepared as follows: 100 g of roasted hemp seed meal, 100 g of bone meal (made from unsalted fresh bones), 150 g of soybean cake meal, 50 g of roasted sesame powder, then dissolve in 1000 g of water. Comparing the two nutrient solutions above, the organic fertilizer has rich ingredients but low nutrient content, while the inorganic fertilizer has relatively simple ingredients but strong fertilizer effect and quick results. To make up for each other's shortcomings, the two can be used in combination. If used alone, apply the inorganic fertilizer once a week, and the organic fertilizer once every 5 days.
Water use
For hydroponic Clivia miniata, do not use tap water directly; you must use water that has been "aged". So-called "aged" water means putting tap water in a container and leaving it in the sun for 3-5 days, so that chlorides such as bleaching powder, which are harmful to Clivia miniata roots, settle out. For "aged" water, from the appearance, the sediment changes from strip-like to clump-like, and the water color is best when green. After the water is well aged, when submerging the root position, it must not submerge the pseudobulb. If the water level is too shallow, Clivia miniata cannot get a sufficient water supply; if the water level is too deep (submerging the pseudobulb), it will cause the roots to rot. During cultivation, pay attention to observing changes in water quality. If the roots are somewhat yellow or turning black, it indicates that the water is both low in oxygen and low in nutrients, and the water must be changed immediately.
Air, sunlight, temperature Whether the ventilation of the roots of hydroponic Clivia miniata can be handled well is the key to success or failure in hydroponics. After a period of cultivation, a layer of green moss grows on the roots of hydroponic Clivia miniata. When the moss is too thick, it seriously affects root respiration and corrodes the culture solution. At this time, use a soft, clean bristle brush to gently brush away the moss layer on the roots (it need not be brushed very clean, since a small amount of moss on the roots has little effect).
In addition, frequently check whether the oxygen in the water is sufficient. The method of checking is: put two or three small fish into the hydroponic box. If the small fish swim freely in the water, it indicates the water is not lacking oxygen; if the small fish always float to the surface, with mouth and gills exposed to breathe, it indicates the water is lacking oxygen. After discovering oxygen deficiency in the water, oxygen must be replenished. There are two methods: one is changing the water, and the other is using a small oxygen pump to supply oxygen to the water. In terms of sunlight treatment, Clivia miniata is a semi-shade, semi-sun plant, so pay attention to light. Especially in summer, avoid direct strong sunlight and let it receive scattered light.
According to the light-facing characteristic of Clivia miniata leaves, pay attention to making the leaves receive light evenly; otherwise the leaves will be of uneven length and their growth direction will also be staggered front and back. Generally, adjust the light angle once every two or three days. In terms of temperature treatment, the environmental temperature for adult Clivia miniata is best at 11°C-25°C, while small seedlings can be a bit higher, 20°C-35°C is fine. When growing Clivia miniata in water, master the day-night temperature difference. In winter, keep it around 20°C during the day and not lower than 15°C at night.
4. Pest and disease control of Clivia miniata
Clivia miniata root rot
Clivia miniata root rot can occur in all four seasons, but it occurs mostly in summer, mainly caused by the specific environment of high temperature and high humidity and the lack of care knowledge of the grower. >> Causes of Clivia miniata root rot and rescue methods
Clivia miniata root rot can occur in all four seasons, but it occurs mostly in summer, mainly caused by the specific environment of high temperature and high humidity and the lack of care knowledge of the grower.
Causes of Clivia miniata root rot:
During potting, the wound was not disinfected, and root rot pathogens invaded through the wound;
During transplanting or repotting, the root system was damaged;
Improper fertilization during the growth period caused reverse osmosis, leading to dehydration, drying and death of the root system;
Too much accumulated water in the pot caused root rot; soil alkalization, compacted potting soil, poor water permeability and air permeability, etc.
Some people, for the sake of appearance, grow Clivia miniata in ceramic pots, plastic pots or purple clay pots, which have poor air and water permeability. After watering in summer, because the pot has poor permeability and air circulation is difficult, root respiration is blocked, causing root rot.
Although some people plant Clivia miniata in clay pots, they fear water and fertilizer shortage in summer, so they water as soon as the pot surface soil looks dry (though the potting soil is actually still wet), and often apply concentrated fertilizer. When root respiration is suffocated, concentrated fertilizer burns the roots, and certain harmful bacteria multiply quickly in summer, root rot results.
Whether Clivia miniata is in the vegetative growth stage (seedling stage to before flowering) or the reproductive growth stage (after flowering begins), its suitable growth temperature is 5-25°C. Generally, home cultivation of Clivia miniata lacks the necessary equipment, so one should proceed from the actual situation. In the hot, humid summer, besides taking measures such as shading, ventilation and cooling, one should proceed from the perspective of controlling its growth (keeping the plant in a dormant or semi-dormant state, which is beneficial to growth and development in other seasons) and strengthen root care in summer. The methods are: first, use clay pots for growing Clivia miniata; second, do not fertilize in summer or apply only a little diluted liquid fertilizer; third, control watering in summer and insist on not watering until the soil is completely dry. To prevent excessive water in summer from suffocating the roots, you can use a large wooden box filled with wet sawdust and bury the flower pot in it (do not water inside the pot), then check frequently and spray water when the sawdust dries.
Solutions for Clivia miniata root rot
If root rot occurs accidentally, rescue it quickly. First knock the Clivia miniata with root rot out of the pot, remove the soil, cut off the rotted roots, wash the roots with clean water, then apply a potassium permanganate aqueous solution to the rotted root areas, then wrap all the leaves with white paper, exposing the roots, face the roots toward the sun, and sun them for half an hour, using ultraviolet rays to kill pathogens. After the above treatment, if only a few roots of the diseased plant have rotted, it can be planted directly into disinfected nutrient soil, water less for the first half month, and growth can recover in one and a half months; if more than half or all of the roots of the diseased plant have rotted, it should be planted in a pot filled with fine sand and placed in a cool place to sprout new roots. After about two months, when new roots have grown, replace with nutrient soil and normal management can be carried out.
Spring is the season of vigorous growth for Clivia miniata, but due to improper water and fertilizer management, root rot easily occurs. The main reasons are as follows: first, overwatering; second, the soil is too raw; third, the fertilizer was not well fermented; fourth, excessive fertilization causing root rot; fifth, using ceramic pots or plastic pots with very poor air permeability to grow Clivia miniata; sixth, the temperature is too high. >> Causes and control methods of Clivia miniata root rot in spring
Spring is the season of vigorous growth for Clivia miniata, but due to improper water and fertilizer management, root rot easily occurs. The main reasons are as follows:
First, overwatering
Whether small seedlings or large plants, water must not be applied in excess. If there is too much water, the temperature is high, and ventilation is poor, Clivia miniata will certainly develop root rot.
Second, the soil is too raw
Whether using leaf mold soil, horse manure soil or peat soil to prepare nutrient soil, it must be fully fermented. If some raw soil is placed in the pot, under high temperature conditions, this raw soil will generate high temperatures after fermentation, burning the fleshy roots.
Third, the fertilizer was not well fermented
When applying soybean cake, hemp seeds, fish waste water, etc. to Clivia miniata, they must all be fully fermented. If some raw fertilizer is applied to the potting soil, it will also generate high temperatures and burn the fleshy roots.
Fourth, excessive fertilization causing root rot
In particular, chemical fertilizers must not be applied in excess, because chemical fertilizers are too irritating. Although they can promote rapid leaf growth in the short term, excessive fertilization damages the fleshy roots too much and can easily cause shrinkage and root rot.
Fifth, using ceramic pots or plastic pots with very poor air permeability to grow Clivia miniata
Because air permeability is poor, the rhizomes are suffocated and rotted.
Sixth, the temperature is too high
Especially during the seedling stage, keeping the bottom temperature at 22°C is sufficient, but some people leave seedling pots and boxes on a hot kang or radiator for a long time, and as a result the seedlings quickly rot at the roots.
Based on the above situations, if we pay attention to targeted prevention, Clivia miniata root rot can be avoided.
But if by accident you find that Clivia miniata already has root rot, there is no need to worry. Just knock the plant out of the pot, cut off the rotted roots, apply wood charcoal or soot to the cut surfaces, then replace the soil and repot. If the fleshy roots have all rotted, it does not matter either: remove all the rotted roots, then wash the rhizome clean with clean water, then place it in coarse sand to encourage rooting, and cut off part of the leaves.
Clivia miniata leaf rot
When Clivia miniata leaves rot, first take the Clivia miniata with rotten leaves out of the flower pot and remove the soil attached to the root crown. Then peel off the outer rotten leaves of the Clivia miniata, sprinkle a layer of clean plant ash on the wound, let it dry slightly, then repot it with culture soil. >> Rescue measures for Clivia miniata rotten leaves (yellow leaves)When Clivia miniata leaves rot, first take the Clivia miniata with rotten leaves out of the flower pot and remove the soil attached to the root crown. Then peel off the outer rotten leaves of the Clivia miniata, sprinkle a layer of clean plant ash on the wound, let it dry slightly, then repot it with culture soil.
Be sure to leave the root crown and wound exposed outside the soil, and place it in a warm, ventilated place for treatment. When watering, be sure not to let water submerge the wound. After repotting, once a week you can use 50% tebuconazole etc., or wash the leaf surface to disinfect and sterilize.
When watering, never pour water into the leaves; pour water at the roots, otherwise the leaves will turn yellow and rot. Clivia miniata has a fleshy stem and can store water, so it does not need frequent watering. Experienced growers usually tap the flower pot with a finger; if the sound is dull, it indicates sufficient water and no need to water. Conversely, if it is crisp and loud, it must be watered immediately.
Also, when watering, it must be thorough at one time. Never water superficially, just a little each time; this is equivalent to not watering and is extremely harmful to Clivia miniata. Clivia miniata likes shade and must not be placed in direct sunlight, otherwise the leaf surface will turn yellow. Clivia miniata must be placed in a well-ventilated environment, with ventilation in both morning and evening.
Clivia miniata not blooming
Some Clivia miniata have been cultivated for a year but still do not bloom. The reasons may be three: first, the winter temperature is too high; second, too much nitrogen fertilizer was used; third, the summer light duration is too long and the light intensity is too strong. >> Causes of abnormal flowering in Clivia miniata and solutions
Some Clivia miniata have been cultivated for a year but still do not bloom. The reasons may be three:
First, the winter temperature is too high, affecting dormancy;
Second, when too much nitrogen fertilizer is used and phosphorus fertilizer is lacking, bud formation and flowering are also affected;
Third, in summer, too long light duration and too strong light intensity are also very unfavorable to bud formation and flowering.
For this, when cultivating Clivia miniata, care should be taken to give a slightly lower temperature in winter, with room temperature preferably 11-17°C. To increase the bottom temperature of the potting soil, move the flower pot onto a radiator at night (maintaining 25°C), and move it back to a sunny windowsill during the day, letting it get sufficient dormancy.
In summer, it should be placed in a slightly shaded place. Starting from June, gradually move the flower pot back from the sunny window; in August it can be 1 m away from the windowsill, sometimes placed on the ground; in October put it back on the sunny windowsill, always avoiding strong direct sunlight. In fertilization, attention should be paid to appropriately applying phosphorus fertilizer.
5. Still have questions?
What kind of flower pot is best for growing Clivia miniata? What kind of soil is best for cultivating Clivia miniata? What should be noted when watering Clivia miniata? What fertilizer is good for Clivia miniata? ... To see the answers to these questions, go to >> How to grow Clivia miniata: FAQ1. What kind of flower pot is best for growing Clivia miniata?
Answer: Clivia miniata has fleshy roots and strong drought resistance, but fears waterlogging, so it not only requires loose soil with good water permeability and air permeability, but also requires flower pots with excellent water permeability and air permeability. Clay tile pots, also called unglazed pots, fully possess these two conditions. Therefore, clay tile pots are best for planting Clivia miniata.
2. What kind of soil is best for cultivating Clivia miniata?
Answer: According to the physiological characteristics of Clivia miniata, the soil is required to be loose and airy, with good water retention and fertilizer retention, and relatively fertile, to suit the root growth of Clivia miniata. Leaf mold soil possesses these characteristics. Therefore, leaf mold soil is best. Leaf mold soil includes oak leaf soil, oak leaf soil, hazel leaf soil and larch needle soil, etc. Natural decomposed leaf soil must be used, and it must not contain other impurities. According to different needs, different screens can be used to sift out suitable particle sizes. Use small particles for planting seedlings, and larger particles for adult Clivia miniata.
3. What should be noted when watering Clivia miniata?
Answer: Water is the source of all things and also a necessary condition for growing Clivia miniata well. First, choose a good water quality, requiring neutral to slightly acidic pH. When using tap water to water flowers, age the water, that is, leave the water in a container for two or three days before use. It is best to put it in sunlight to sun it. Well water or other water should also preferably be left for one or two days in the flower cellar or where the flowers are placed, so that the water temperature is consistent with the flower soil temperature before watering the flowers, so as to avoid too large a temperature difference between water and soil causing harm to the flowers. The best time to water is in the morning or evening. The interval between waterings should be determined according to the dryness and wetness of the potting soil, and cannot be formulaic. You can water directly onto the stems and leaves of the plant. For large flowers, especially those with emerging scapes or large flowers in bloom, do not water directly onto the leaves, as this will cause the flower scape to rot or affect pollination results. In summer, when the temperature is high and the weather is hot, the leaf temperature of the flowers is very high, so do not water the leaves at noon, to prevent Clivia miniata from catching a "cold" and the leaves from being damaged.
4. What fertilizer is good for Clivia miniata?
Answer: Clivia miniata is a flower that likes fertilizer. Fertilizer is crucial to the growth of Clivia miniata, and organic fertilizer is best for Clivia miniata. Organic fertilizer is made by composting and fermenting raw materials and applying them after decomposition. Those with relatively high nitrogen content include soybean cake, castor seeds, soybeans, hemp seeds, forest, etc. oil crops. Those with relatively high phosphorus content include bone meal, fish scales, rice bran and poultry manure, etc. Those with relatively high potassium content include plant ash, wood charcoal, straw ash, etc. The growth of Clivia miniata cannot do without the three elements nitrogen, phosphorus and potassium. You can also mix some fine furnace slag, river sand, eggshells, etc. into the soil to increase the content of trace elements.
5. How to compost fertilizer for Clivia miniata?
Answer: Organic fertilizer must undergo a composting and fermentation process, so that raw materials can be turned into fertilizer. Unfermented raw materials cannot be used directly as fertilizer. Before composting fertilizer, the raw materials should be crushed and subjected to high-temperature treatment such as steaming and boiling. This not only sterilizes but also shortens fermentation time. The composted nitrogen, phosphorus and potassium fertilizers are best placed in different containers, with 1/3 raw materials and 1/3 water; do not fill it full, to avoid overflow from the container during fermentation. Do not cover the lid too tightly, so that gas can be discharged from the container during fermentation. It is best to use wide-mouth plastic buckets as containers, because plastic buckets do not rust and are convenient to take from when wide-mouthed. You can also mix and compost nitrogen, phosphorus and potassium compound fertilizer in certain proportions. The fermentation time depends on the temperature; high temperature means fast fermentation, and summer is a good time to ferment fertilizer. To judge whether the fertilizer is well fermented, see whether it smells foul, and for things like soybeans that were not crushed, see whether there is still a hard core. Well-fermented fertilizer smells foul and is sticky, smooth and fine. Such fertilizer is ready to use.
6. How to add base fertilizer for Clivia miniata?
Answer: Adding base fertilizer means that when changing pots and soil, add some roasted or boiled oil crops with shells, such as hemp seeds, perilla seeds, sunflower seeds, castor seeds and bone meal granules, etc., to the bottom of the flower pot. This is commonly called solid fertilizer. The method of adding base fertilizer is: first put a layer of soil at the bottom of the pot, evenly sprinkle a layer of raw materials on the soil, then cover with another layer of soil, then plant the flower directly on top, and the whole process of adding base fertilizer is complete. Remember not to let the raw materials come into direct contact with the roots. The characteristic of adding base fertilizer is that the fertilizer effect is long-lasting and uniform, and the fertility slowly seeps out from the cracks in the oil crop shells and is absorbed by the flower root system. Generally, the method of adding base fertilizer is mostly used when changing soil in autumn.
7. How to add side fertilizer for Clivia miniata?
Answer: The so-called side fertilizer uses the same raw materials as base fertilizer, only that side fertilizer means that after the flower is planted in the pot, a ring of soil is pulled aside at the edge of the pot, and shelled oil crops are evenly scattered around the pot edge, but they must not directly contact the flower pot. A layer of soil should be placed between them, and they should not be right next to the pseudobulb of the flower, nor buried too deep, and must not directly contact the roots; then cover with another layer of soil on top. The characteristic of side fertilizer is that the solid fertilizer does not directly contact the roots, and slowly seeps from top to bottom. It can be used when changing soil in both spring and autumn. Family growers can use the method of adding base fertilizer or side fertilizer to prevent the odor of water and fertilizer from polluting the home environment.
8. How to apply liquid fertilizer as a top dressing for Clivia miniata?
Answer: Clivia miniata is a flower that likes fertilizer, especially in the peak growth seasons of spring, autumn and winter, when water fertilizer must be applied as a top dressing. The top dressing method is to dilute the composted fertilizer stock solution with 10-25 times water. Top dressing methods: one is to directly water the diluted fertilizer water into the pot. The steps are: first dilute the fertilizer stock solution 10-15 times, water the soil in the flower pot once with a spray pot to moisten it, then pour the diluted water directly into the pot, then splash water over the pot once more, and the whole top dressing process is complete. The other is fertilizer soaking, also called bottom soaking. The steps are: dilute the fertilizer stock solution 20-25 times, place it in a large container, immerse the flower pot directly in the fertilizer water, use a spoon to repeatedly pour the fertilizer water into the pot until it is thoroughly soaked, then take it out and splash water over the flower pot once, and after draining, the whole bottom soaking process is complete. The former method is suitable for top dressing with water fertilizer over a large area, while the latter method adds fertilizer water more evenly but is more time-consuming and troublesome, suitable for small areas or home cultivation and for cultivating some high-grade, key varieties in flower cellars.
9. Why does adult Clivia miniata not bloom?
Answer: There are many reasons why adult Clivia miniata does not bloom. First, the soil has not been changed for a long time, and the soil is seriously lacking phosphorus fertilizer and other elements. Second, root rot causes poor nutrient absorption, leading to failure to bloom. Third, long-term drought and water shortage lead to failure to bloom. The improvement methods are: adult Clivia miniata must be repotted with soil changed and more phosphorus-containing fertilizers such as bone meal and fish scales added. For adult Clivia miniata with root rot, focus on root care, and mix more sand or fine furnace slag into the soil so that the root system recovers as soon as possible. For those suffering long-term drought and water shortage, be sure to soak the whole pot, to prevent the illusion that a large amount of water is poured but all flows out from drought cracks while the soil is still dry rather than thoroughly watered. As long as the above methods are adopted, adult Clivia miniata will surely open beautiful flowers.
10. What causes stuck scape in Clivia miniata, and what should be done?
Answer: Stuck scape when adult Clivia miniata blooms is a common problem encountered by growers. So-called stuck scape means the scape stalk has not emerged while the flowers have already opened. There are many causes of stuck scape, and different measures should be taken to improve each cause. First, the temperature difference is small, especially for Clivia miniata cultivated indoors at home, where daytime and nighttime temperatures are similar, with a temperature difference of only 2-3 degrees, which is not conducive to scape emergence. The improvement method is to place it on the windowsill during the day and in a place 5-10 degrees lower than the windowsill temperature at night. This creates an artificial small temperature difference environment, and the scape can emerge. Second, too much water and fertilizer keeps the root system in an oxygen-deficient state, and too much fertilizer easily damages the roots. The improvement method is to change the soil, wash the roots and dry them, wash the root system with clean water and dry it in a cool place for 4-5 hours, then replace with new nutrient soil, and after a few days the scape can emerge. Third, root rot and root withering are caused by long-term failure to water thoroughly. The improvement method is to replace with new soil and water thoroughly, cultivate new roots, and after new roots grow, the scape will emerge accordingly. Other causes such as too high temperature or too low temperature can be improved by treating the specific cause. The stuck scape phenomenon caused by physiological defects shared by varieties such as Quelan and Huanglan currently has no good solution, and this is a new topic in scientific research on Clivia miniata cultivation.
================About That Garden================
"That Garden" is a website that shares plant knowledge, a complete collection of flower pictures and names, flower-growing knowledge, garden design and flower arranging art.