What are the precautions for growing water lilies in water?
1. Water lilies need plenty of light; plants grown in sunlight are healthier and their flowers will be more vivid.
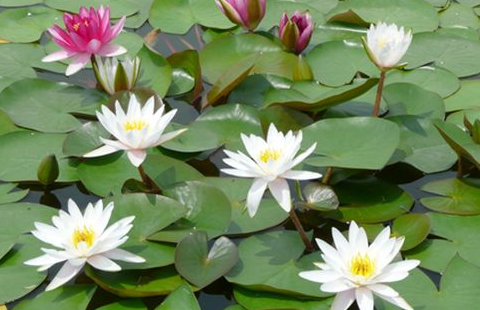
2. Water lilies have different water level requirements at different growth stages. In the early growth stage, the leaf stalks are relatively short, so the water level should be as shallow as possible, and it is best not to let the leaves be exposed to the air; as they grow more and more vigorously, the water level should be raised continuously; in winter, when the water surface freezes, the terminal buds must be kept below the ice layer for the plants to survive the winter.
3. During the peak growth period, pay attention to removing dead leaves and algae on the water surface to help the plants grow better.
Can water lilies be grown entirely in water?
Can water lilies be grown entirely in water?
Answer: Yes.
Methods for growing water lilies entirely in water:
Preparation: seeds, nutrient solution, hydroponic containers, etc. All of these can be purchased directly online.
Step 1: Before planting, inspect each seed to make sure each one has a small opening; otherwise, the seed will not germinate.
Step 2: First soak the seeds in clean water for about one day. The water will become a bit cloudy; there is no need to worry. Just pour out all the water, replace it with clean water, and continue soaking. Soaking takes three days.
Step 3: After soaking for 3 days, you will find that the seeds have sprouted small shoots. At this point, any that have not sprouted can be taken out and discarded, because such seeds are already useless and will not germinate.
Step 4: Replace the water with clean water again and add about 14 to 16 drops of nutrient solution to the water.
Step 5: After about 3 days, you will find that the small shoots have gradually grown larger, and then you can add about 14 to 16 drops of nutrient solution once every 3 days.
Step 6: After some more time, lotus leaves will grow. At this point, you can place some stones or other things that sink to the bottom of the water to weigh down the seeds and keep them fixed. Of course, fixing them is not absolutely necessary.
Step 7: After some more time, one seed will grow more lotus leaves, and gradually lotus flowers will bloom.
Precautions:
Water lilies grow healthily only when exposed to sunlight, so when choosing where to place water lilies, be sure to choose a sunny spot.
It is recommended to put only two seeds in one flowerpot.
Bowl lotus cultivation techniques and precautions
Right now is the season when lotuses are in full bloom. Besides going outside to watch lotuses in lakes, is there no other way to see them? Today, the editor of Huinong Network introduces a lotus that can be grown at home - the bowl lotus.
Bowl lotus usually refers to the small and medium types of lotus. It is also known as pot lotus, bowl lotus, and table lotus. It belongs to the water lily family and is a perennial aquatic plant with multi-noded rhizomes. The flowering period is from June to September. The number of days a single flower stays open varies by variety, from as few as 3-4 days to more than 10 days. Bowl lotus is very suitable for home cultivation, so what should you know when growing it?
Water requirements for bowl lotus
1. Water with a neutral pH value
According to the growth habits of bowl lotus, use water suitable for its growth to cultivate it. Generally, neutral water is used, which is more conducive to the growth of bowl lotus.
2. Tap water needs to be stored before use
Generally, the tap water used in our homes can also be used to grow bowl lotus, but note that before using the water, it must be stored for 1-2 days first, because tap water contains a lot of chlorine, which will affect the growth of bowl lotus, or may cause root damage, leaf damage, and so on.
3. Balanced water temperature
After using the two kinds of treated water mentioned above to grow bowl lotus, pay attention to regulating the water temperature. You can prepare a vat in advance, fill it with tap water, and place it outdoors. This can ensure that the water temperature in the vat is basically no different from the water temperature in the pot. With balanced water temperature, bowl lotus can also grow steadily.
Whether bowl lotus needs to have its water changed regularly
For this question, the general answer is no. Under normal circumstances, water-grown bowl lotus does not need a water change. Doing so can ensure that nutrients in the water are not lost, so that bowl lotus has nutrients for growth. However, over time, the water will still evaporate, so add water to the container on time and in the right amount. Sometimes after exposure to the sun, a lot of green algae may make the water color dirty. This is actually not a problem. In this case, the bowl lotus and the algae will help each other grow, so there is no need to change the water.
Bowl lotus cultivation steps
1. Seed treatment
Because the seed shell of bowl lotus is relatively hard and dense, it needs to be treated before sowing. Before soaking the seeds, you can make an artificial opening. The method is relatively simple: one end of the lotus seed has a small pointed tip, while the other end is round. You can rub the round end open on rough cement ground or use a small knife to file it open. However, be sure not to damage the kernel inside the lotus seed, and do not peel the shell off directly.
2. Soaking seeds to promote germination
After the lotus seeds are opened, you can soak them to promote germination. The specific operation is: place the cracked seeds in warm water at about 20-40°C, then change the water 2-3 times a day. Generally, after two days there will be signs of germination, and in about five days the sprout will be one cm long. At this point, the bowl lotus can be given some sunlight appropriately to speed up its growth.
3. Transplanting sprouts and seedlings
When transplanting, you can first choose a clay pot or plastic flowerpot without a drainage hole. Add garden soil or unpolluted river pond mud to the pot, and add water to soak it two weeks in advance. Do not apply fertilizer. When transplanting, you can press the fine roots of the small lotus seedlings into the mud, one plant per pot. After transplanting, add an appropriate amount of water, with the standard being that the water does not submerge the small lotus leaves.
4. Decorative embellishment
After the bowl lotus has grown, if you feel the pot is lacking something, you can first buy some sand from an aquarium shop and sprinkle it little by little onto the mud in several rounds. After the water settles, sprinkle another round, until the whole vat is evenly covered. With this sand, the water will quickly become clear. After replacing it with clean water, you can also keep a few small fish in the pot. Not only can the fish eat insects in the water, but their waste can also serve as fertilizer, achieving two benefits at once.
The above are the bowl lotus cultivation techniques compiled for you by the editor of Huinong Network. We hope they are helpful to you.