Detailed steps for taking fuchsia cuttings, even beginners can learn
1. Cutting time
Fuchsia has extremely strong survival ability and can be propagated from cuttings in all four seasons, but spring is best, because spring is the season of the most vigorous growth for fuchsia, and the temperature is neither cold nor hot, so the survival rate from cuttings is also the highest. Winter is the least suitable time for cuttings, and failure is very easy.
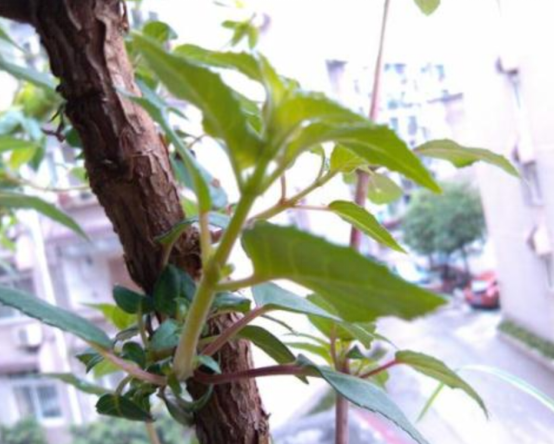
2. Choosing materials
For the fuchsia cutting method, you first need to choose the materials well. Take a well-growing branch from a fuchsia plant, and leave two leaves on the branch. This kind of branch is full of vitality and very easy to root successfully. Then prepare a potassium permanganate solution and a small knife, and finally prepare soil mixed with garden soil and river sand at a ratio of 1:1.
3. Treating the branch
After preparing the materials, you first need to treat the branch. Cut the lower end of the branch at an angle with a small knife, then soak it in the potassium permanganate solution for 30 to 60 seconds, and finally place the branch in a cool place to let the wound dry, to prevent root rot during the cutting process and cause the cutting to fail.
4. Starting the cutting
Insert the treated branch into the prepared soil. There is no need to fertilize it, because the branch is very fragile during this period, and fertilizing will cause it to die. Just keep the soil moist. It needs to be kept in a cool place, and once the branch and leaves take root and sprout, it can be grown normally.
II. Notes on caring for the new plant after cutting
1. Fertile soil
Fuchsia is a plant that needs nutrients extremely much, so loose, breathable, well-drained, fertile soil should be chosen. After the cutting succeeds, the amount of fertilization can be appropriately increased.
2. Watering frequency
The new plant can appropriately have its watering frequency increased at the time of cutting, but the amount of water should be controlled. After the plant is fully mature, water according to the habits of fuchsia. In spring and autumn, spray water on its branches and leaves once a day, while in summer fuchsia needs to be moved to a cool place and then watered twice a day. In winter, water should be controlled, and finally watered once every 10 days.
3. Environmental temperature
Fuchsia is suitable for growing at 10 to 28°C, and cannot be lower than 5°C. In summer, it needs shade and frequent watering, otherwise fuchsia will wither and die.
The fuchsia cutting steps are just these four steps. Isn't it simple? Flower lovers can try it at home according to the methods in the article. Practice more, and pay attention in daily life to the temperature, soil, humidity, and so on for fuchsia. Only in this way can you grow fuchsia with beautiful form. I hope everyone can successfully root fuchsia cuttings and have more fuchsia plants with rich posture, elegance, and beauty!
How to take fuchsia cuttings, complete the cutting in 6 steps
In fact, fuchsia can be propagated by cuttings. Apart from the summer dormant period, fuchsia cuttings can be taken in other seasons. Let's look below at how to take fuchsia cuttings.
How to take fuchsia cuttings 1. Cutting timeApart from the summer dormant period, as long as the temperature is suitable, fuchsia cuttings can be taken at other times. Of course, the period from November each year to the first ten days to middle ten days of April of the following year is better.
2. Preparation of cutting pot and soilFor the soil used for fuchsia cuttings, it is recommended to use screened fine river sand, and it should also be scalded and washed with boiling water for disinfection. The cutting bed can generally use a shallow basin or wooden box, and it is recommended to spray it in advance with a 0.1% potassium permanganate solution for disinfection.
3. Branch selectionFor the cuttings, generally choose branches of the current year that have not yet become woody, preferably with tender tips. The length of the cuttings is generally 6 to 10 cm, and the lower leaves should be cut off. In addition, when taking the cuttings, be sure to use sterilized scissors so that the cut on the cutting is neat and smooth. Never directly pinch off the cutting from the plant with your hands.
4. Cutting methodWhen taking cuttings, flower lovers are advised to first soak the fuchsia cuttings in vitamin B12 for 20 minutes, and use a thin bamboo stick to make a small hole in the sand, then insert the cutting into the sand hole. A depth of 3 to 4 cm is suitable, and the spacing between cuttings should be kept at about 8 cm, so as to facilitate potting after rooting. After the branches are inserted, water thoroughly once and cover with plastic film to maintain the humidity of the cutting bed.
5. Management after cuttingAfter taking fuchsia cuttings, place the cutting bed indoors in a place with scattered light. It is recommended not to expose it directly to sunlight at first, and keep the room temperature at about 20°C. After a week, let it receive some light.
In addition, after taking fuchsia cuttings, water should often be sprayed inside the cutting bed. Generally, spray once a day in winter, and once each morning and evening in spring, so that the humidity inside the cutting bed remains above 80%. In winter, rooting generally takes about 25 days, while in spring it can root in about 20 days.
6. Potting and transplanting of seedlingsAfter the cutting seedlings have rooted, they should be potted in time. The potting soil should use fertilizer-free sandy loam, and both the pot and the cultivation soil should be disinfected. Use broken pot pieces at the bottom of the pot to make a drainage layer. When transplanting, use a small bamboo shovel to gently lift the seedling and place it into a small hole made in advance in the pot. After positioning it upright, cover the roots with soil. Do not press the soil with your hands, so as to avoid damaging the root seedlings from too much force.
After the young seedlings are planted, water thoroughly once immediately so that the soil naturally becomes compact. Then place the pot in a shaded place for cultivation. If there is no wilting of the leaves after three days, it can be allowed to receive light. After one month, apply a small amount of dilute liquid fertilizer and enter normal management.
A detailed introduction to the methods and steps of fuchsia cutting propagation
When it comes to fuchsia, I believe everyone is familiar with it. Fuchsia is a common herbaceous flower with extremely high ornamental value, deeply loved by many flower lovers. So, do you know what the methods and steps of fuchsia cutting propagation are? Today, the editor will give everyone a detailed introduction to the related knowledge.
1. Cutting time
Apart from the summer dormant period, fuchsia can be propagated by cuttings at other times as long as the temperature is suitable, but the period from November each year to the first ten days to middle ten days of April of the following year is better. Because this period is exactly the peak growing season for the plant, stronger and more vigorous cuttings can be selected, and because the temperature is cooler, the cuttings are less likely to rot, so the survival rate is higher.
2. Selection of cuttings
For the cuttings, it is suitable to choose branches of the current year that have not yet become woody, preferably with tender tips. The length of the cuttings is generally 6 to 10 cm, and the lower leaves should be cut off. It should be noted that when taking the cuttings, be sure to use sterilized scissors so that the cut on the cutting is neat and smooth. Never directly pinch off the cutting from the plant with your hands.
3. Preparation of cutting medium and cutting bed
For the cutting medium, it is best to use screened fine river sand, but it must be scalded and washed with boiling water for disinfection. The cutting bed can use a shallow basin or wooden box, and it should also be sprayed in advance with a 0.1% potassium permanganate solution for disinfection.
4. Cutting method
When taking cuttings, first soak the cuttings in vitamin B12 for 20 minutes, use a thin bamboo stick to make a small hole in the sand, then insert the cuttings into the sand holes. A depth of 3 to 4 cm is suitable, and the spacing between cuttings should be kept at about 8 cm, so as to facilitate potting after rooting. After cutting, water thoroughly once and cover with plastic film to maintain the humidity of the cutting bed.
5. Management after cutting
After cutting, the cutting bed should be placed indoors in a place with scattered light, and must not be exposed directly to sunlight. Keep the room temperature at about 20°C, and only after a week can it receive some light. After cutting, water should often be sprayed inside the cutting bed. In winter, spray once a day, and in spring, spray once each morning and evening, so that the humidity inside the cutting bed remains above 80%. In winter, rooting generally takes about 25 days, while in spring it can root in about 20 days.
6. Potting of seedlings
After the cutting seedlings have rooted, they should be potted in time. The potting soil should use fertilizer-free sandy loam, and both the pot and the cultivation soil should be disinfected. Use broken pot pieces at the bottom of the pot to make a drainage layer. When transplanting, use a small bamboo shovel to gently lift the seedling and place it into a small hole made in advance in the pot. After positioning it upright, cover the roots with soil. Do not press the soil with your hands, so as to avoid damaging the root seedlings from too much force. After the young seedlings are planted, water thoroughly once immediately so that the soil naturally becomes compact. Then place the pot in a shaded place for cultivation. If there is no wilting of the leaves after three days, it can be allowed to receive light. After one month, apply a small amount of dilute liquid fertilizer and enter normal management.
The above is all the content I have learned today about fuchsia. I hope flower lovers will find it helpful after reading this article. If you want to learn more related knowledge about fuchsia, please continue to follow Succulent Flower Garden, and we will provide you with more related knowledge!