What are the disease prevention and control methods for Spathoglottis pubescens?
1. Coleosporium rust fungus
Symptoms: The pathogen usually appears on the leaves, rarely on the stems, producing raised small pustules containing yellow, orange, or rust-colored powdery spores. Although Coleosporium rust fungus does not cause plant death, it hinders plant growth.
Prevention and control methods: First, promptly cut off diseased leaves. A 65% zineb powder 500-600 times dilution can be sprayed for prevention and control.
2. Southern blight
Symptoms: Southern blight mostly occurs during the plum rain season. In the early stage of the disease, the leaf bases are covered with white mycelium. In severe later stages, the rhizome rots and causes plant death.
Prevention and control methods: Promptly replace the potting soil. Before repotting, sterilize the soil at high temperature and sprinkle some lime on it. Promptly pull out and burn severely affected plants. During care, pay attention to ventilation and air circulation, and water moderately.
That is all for the cultivation methods and disease prevention and control methods for Spathoglottis pubescens. We hope the above methods are helpful to everyone.
Pests and diseases of Spathoglottis pubescens and their prevention and control methods
Diseases of Spathoglottis pubescens and their prevention and control methods
Coleosporium rust fungus
It usually occurs on the upper and lower surfaces of leaves, rarely on stems, producing raised small pustules that contain yellow, orange, rust-colored, or even purplish-black powdery spores.
Coleosporium rust fungus does not cause plant death, and the leaves do not fall off either, but the overall growth rate of the plant slows down and its vigor weakens.
Prevention and control methods
After discovering Coleosporium rust fungus on the leaves, promptly cut off the affected leaf surfaces.
A 65% zineb powder 500-600 times dilution or a copper-containing fungicide can be sprayed.
Southern blight
This disease mostly occurs during the plum rain season. In the early stage of onset, the leaf bases are covered with white mycelium. In severe later stages, the rhizome rots and the plant dies.
Prevention and control methods
Promptly replace the potting soil. Before repotting, sterilize the soil at high temperature and sprinkle on quintozene powder or lime.
During usual care, pay attention to providing more ventilation and more light, and keep the potting soil's drainage system in good condition.
Promptly pull out severely affected plants and burn them.
Anthracnose
It can occur in all four seasons, and is more common in hot and rainy seasons.
The lesions spread from the leaf tip toward the rhizome. They are initially brown, then gradually expand and increase, with many dry black spots appearing, and in severe cases the plant dies.
Prevention and control methods
During the disease period, first spray with a 50% thiophanate-methyl wettable powder 800-**** times dilution, once every 7-10 days; then supplement with 1% equal-strength Bordeaux mixture, once every half month, spraying 3-5 times continuously.
Pests of Spathoglottis pubescens and their prevention and control methods
Scale insects
Commonly known as "orchid lice," they reproduce fastest under conditions of high temperature, high humidity, and poor air circulation.
They suck the sap from the leaves of Spathoglottis pubescens, causing leaves to fall off, the plant to grow slowly, and in severe cases the plant to die.
Prevention and control methods
During the scale insect hatching period, spray with 1% omethoate or a 1500 times dilution of 50% malathion.
If the number of Spathoglottis pubescens kept at home is small, they can be removed manually by brushing.
How to grow Spathoglottis pubescens: cultivation methods for Spathoglottis pubescens
How to grow Spathoglottis pubescens? Many people are not very familiar with Spathoglottis pubescens. Spathoglottis pubescens is distributed in China, northeastern India, Myanmar, Cambodia, Vietnam, Laos, and Thailand. This flower is cultivated. Below, let us learn about Spathoglottis pubescens in detail.
Introduction to Spathoglottis pubescens
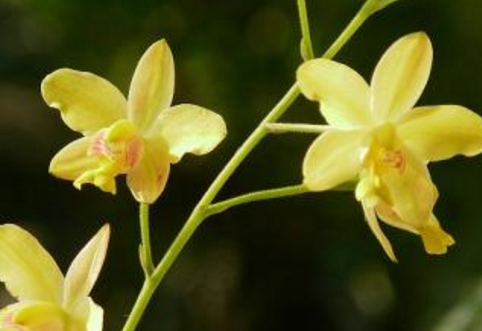
Spathoglottis pubescens (scientific name: Spathoglottis pubescens Lindl.): pseudobulbs flattened spherical, usually 1-2.5 cm thick, covered with leathery scale-like sheaths, with 1-3 leaves at the apex. Leaves strap-shaped or narrowly lanceolate, hairless on both surfaces. Scape slender or stout, up to 50 cm long, densely covered with soft hairs, the lower part covered by several tubular sheaths closely clasping the inflorescence stalk; raceme 2-9 cm long, loosely bearing 2-8 flowers; flowers yellow; sepals elliptical, with 7 veins, covered with soft hairs on the back; petals broadly oblong, equal in length to the sepals, 9-10 mm wide, apex obtuse, with 5-6 main veins, the outer main veins branched, hairless on both surfaces; lip about equal in length to the petals, 3-lobed. Flowering period July-October.
Spathoglottis pubescens grows in mountain slope grasslands or under sparse forests at an altitude of 380-1700 m. It is distributed in China, northeastern India, Myanmar, Cambodia, Vietnam, Laos, and Thailand. This flower is cultivated and has relatively high horticultural value.
I. Morphological characteristics
Stem: The pseudobulbs of Spathoglottis pubescens are flattened spherical, usually 1-2.5 cm thick, covered with leathery scale-like sheaths, with 1-3 leaves at the apex.
Leaves: The leaves of Spathoglottis pubescens are strap-shaped or narrowly lanceolate, up to 43 cm long, 1-1.7 (-4-5) cm wide, apex acuminate, base narrowed into a slender petiole, hairless on both surfaces.
Scape: The scape of Spathoglottis pubescens is slender or stout, up to 50 cm long, densely covered with soft hairs, the lower part covered by several tubular sheaths closely clasping the inflorescence stalk; raceme 2-9 cm long, loosely bearing 2-8 flowers; floral bracts lanceolate or ovate-lanceolate, 5-9 mm long, covered with soft hairs; pedicel and ovary 2-2.5 cm long, densely covered with soft hairs; flowers yellow; sepals elliptical, usually 12-17 mm long, 5-7 mm wide, apex slightly obtuse or acute, with 7 veins, covered with soft hairs on the back.
Petals: The petals of Spathoglottis pubescens are broadly oblong, equal in length to the sepals, 9-10 mm wide, apex obtuse, with 5-6 main veins, the outer main veins branched, hairless on both surfaces; lip about equal in length to the petals, 3-lobed; lateral lobes erect, falcate-oblong, about 2 times as long as wide, apex rounded or truncate, the area between the two lateral lobes concave and saccate; mid-lobe obovate-cuneate, about 1.3 cm long, apex subtruncate and emarginate, base clawed; claw short and broad, with a pair of semicircular, fleshy appendages on top, sometimes each side of the base with 1 slightly raised obtuse tooth; disc with 3 longitudinal keels, the central one raised into a fleshy lamella; column 8-10 mm long; rostellum nearly circular.
The flowering period of Spathoglottis pubescens is July-October.
II. Ecological habits
Spathoglottis pubescens generally grows on mountain slopes and valley walls in deep mountains and secluded valleys, on sloped hillsides or in rock crevices with good water permeability and water retention, beside sparse mountain grasses, and under the shade of secondary mixed woods. Or in places with shade, short sunlight duration, or only scattered filtered light. In places with high air humidity and air circulation, it sometimes also grows on cliffs beside mountain streams. Orchids are suitable for planting in an environment with air circulation. They are shade-loving, averse to direct sunlight, moisture-loving, and averse to dryness, and grow best at 15°C to 30°C. Growth is poor above 35°C. Severe cold below 5°C affects their growth vigor, and at this time orchids are often in a dormant state. If the temperature is too high coupled with exposure to the sun, leaf scorching or withered tips will appear within one or two days. If the temperature is too low and they are not moved indoors in time, frost damage will occur. Orchids have fleshy roots and are suitable for sandy loam rich in humus. Drainage must be good. Leaf mold or mountain soil with more humus should be selected. Slightly acidic loose soil or iron-containing soil is suitable, with a pH of 5.5-6.5 being appropriate.
Cultivation methods for Spathoglottis pubescens
I. Cultivation techniques for Spathoglottis pubescens
1. Orchid shed
The orchid shed and orchid room should be chosen in a location facing east with its back to the west, with open space to the southeast and a high wall or large tree to the west and north. It should be able to receive the early sun while blocking the scorching sun. The surrounding small environment should have clean air and a courtyard with a certain guarantee of humidity. Pay attention to ventilation, exposure to dew, avoiding the scorching sun, and avoiding smoke, etc. If built on a rooftop or a balcony on an upper floor, in addition to shade above, curtains should mainly be hung on the northwest side to prevent the slanting light of the afternoon setting sun from burning the grass leaves. Under the orchid shed, it is best to use mud ground or set up a clean water pool below to keep the air around the orchid shed humid. Also pay attention to ground cleanliness to prevent the breeding of pests and diseases. When the outdoor temperature drops to around 0°C, the orchid pots must be moved indoors to prevent frost damage to the orchid roots. In winter, if the weather is clear, the temperature in the orchid room can exceed 15°C. Only when the room temperature drops in cloudy, rainy, snowy, or windy weather should heating and supplemental lighting be used to keep the room temperature at 15°C. No heating is needed at night; maintaining 5°C is sufficient. Heating can be carried out in late autumn and early winter, with the purpose of prompting the new plants of the year to fully mature. After mid-December to the end of January, heating is not needed; just keep the room temperature no lower than 5°C and let vegetative growth remain in a very slow state. Starting in February, increase humidity, raise temperature, and provide full light to make the orchids enter the growth period ahead of time. After heating, new shoots sprout ahead of time; generally, after 45 days of heating, new shoots emerge from the soil. After another 90 days, they can become mature plants. By mid-June, a second batch of new shoots emerges from the soil, thereby achieving the effect of growing two batches of new seedlings in one year. When heating in winter, note that lighting must be added, but never heat continuously for 24 hours so that there is no temperature difference. In addition, heating should not be too high; exceeding 25°C is harmful and not beneficial.
2. Potting
The time for potting (or repotting) is generally March-April in spring or October-November in autumn. Flower pots with a small mouth, deep body, and large bottom hole are best. Wild seedlings newly dug from the mountains need to be planted in clay pots (mud pots), so that the orchid soil dries easily, has good aeration, and roots form easily; only after 2-3 years can they be moved into purple clay pots or porcelain pots. The method of planting orchids (in pots) is different from that of general flowers. Especially for famous orchid varieties, roots must be washed when repotting and moving pots. The method is to soak the roots in clean water and gently scrub with an old toothbrush or writing brush; never use too much force and damage the roots; use scissors to cut off residual leaves, yellow leaves, broken roots, and blackened, rotted roots, being careful not to damage young buds. Then place the treated plant in a cool, ventilated place to dry. After the roots turn white and show fine wrinkles and become soft, plant them in the pot.
Method one
After preparing the orchid pot and planting medium, hold the orchid plant upside down (roots up, leaves down) and place it under a faucet to rinse with slow water, but the water pressure must not be too strong, so as not to damage the orchid roots and leaves. Grasp the orchid head with the thumb and index finger, brace the rim of the pot with the little finger, and use bamboo chopsticks to secure the roots. When putting it into the pot, try not to let the roots touch the pot wall. Pour bean-sized mixed gravel into the bottom of the pot to one third of its depth. Then pour in medium-grained planting medium to four fifths of the depth, filling it firmly and trying not to leave spaces. Pull out the bamboo chopsticks and shake the pot to settle the planting medium. After filling the planting medium firmly, use large-grained planting medium to fill up to 1.5 cm from the pot rim. Finally, pour in bean-sized planting medium until the pseudobulbs are completely buried in the soil, then shake thoroughly to settle. Use a soil-pressing tool to gently press the planting medium and level the surface. After planting is complete, it is best for the planting medium in the pot to be slightly higher in the center.
Method two
Pay attention to drainage at the bottom of the pot. For mud pots, fill with broken tiles; for purple clay pots, a perforated nylon gauze must be used to cover the bottom of the pot. Before planting, first spread coarse stones in the pot, occupying about 2/5 of the pot depth; coarse stone culture soil, 3-5 cm thick; then place the orchid grass. When potting, make sure the roots spread out naturally and cannot curl. When planting famous orchid varieties, be sure to place old grass toward the edge and new grass in the center, so that there is room for new grass to grow. When planting, hold the orchid grass with the left hand and add soil with the right hand (be careful to prevent soil from entering the leaf center), then lift the orchid plant slightly so that the roots spread naturally. Then add soil while shaking the pot, so that the soil and roots are in close contact. Then use your hands to press the soil around the stem firmly, and finally make the pot surface slightly mound-shaped (that is, slightly lower in the center and around it). Spread a layer of moss or fine stones on top, so that the potting soil is not easily compacted and water evaporation can be reduced. After potting, water immediately. The first watering must be sufficient. Finally, place the orchid pot in a shady place. Within one month, it should not be exposed to direct sunlight, and watering should be controlled; it should not be too wet. After that, the placement location should be chosen in a place with half shade and half sun, ventilation and air permeability, and morning sunlight.
3. Watering
During the peak growth period of orchids, once there is a water shortage in summer, potted orchids grow poorly. Orchids need eight parts dry and two parts wet. Watering should follow the principle of "water when dry, stop when wet, and appropriately on the dry side." Watering must be thorough, not half-way. The frequency of watering can depend on the planting medium of the potted orchid. For hard, water-permeable planting media such as volcanic stone, red brick granules, and pumice, water can be supplied once a day; for planting media with strong water absorption such as pond mud and humus soil, water can be supplied once every two or three days. Watering is generally carried out in the early morning or evening. Never water at noon or pour water directly onto the crown. Clean, pollution-free, slightly acidic water (pH 5.5-6.5) is best. Orchid root rot, black spots on leaf surfaces, leaf bud rot, and other pathological conditions are mostly related to improper water supply.
After flowering plants are planted, the first watering is called "settling water." The settling water must be sufficient and thorough. Generally, after potting, water twice in succession. For the first watering, after seeing water flow out from the bottom hole of the pot, water again. Choose a suitable watering method. Usually, the spray watering method is used, which can both increase air humidity and wash dust from the leaf surface. However, for flowers with fuzzy leaves or those currently blooming, spray watering is not suitable. Instead, place the entire flower pot in a water basin, making sure the water does not cover the pot rim, and use seepage through the bottom hole of the pot to keep the potting soil moist. Pay attention to water temperature. If the water temperature differs greatly from the soil temperature (more than 6°C), in winter first place the water indoors for a period of time, or add a little warm water to raise the water temperature to about 15°C before watering the flowers; in summer, avoid watering under exposure to the scorching sun and at noon when temperatures are high. Watering time. In spring, autumn, and winter, around 10 a.m. and after 4 p.m. are the most suitable times for watering flowers.
4. Fertilization
Farmyard manure is a very good organic fertilizer, but it must be piled and fully decomposed for more than one year before it can be applied. This kind of fertilizer liquid can be diluted 10-20 times with water and applied, as much as possible along the pot edge, not touching the roots and not adhering to orchid leaves. When applying chemical fertilizers, pay attention to the balance of nitrogen, phosphorus, and potassium, and strictly control the concentration. For variegated-leaf seedlings, the synthesis of chlorophyll should be controlled, so nitrogen fertilizer should not be applied, nor should fertilizers containing manganese and magnesium (such as calcium magnesium phosphate fertilizer, etc.) be applied, because manganese and magnesium elements can accelerate chlorophyll synthesis. For flowering orchids, if cultivating large-petaled flowers, an appropriate increase in nitrogen fertilizer can be applied. Foliar feeding is the main method. Foliar feeding can both supplement the orchid plant's nutrition through absorption by orchid leaves and avoid fertilizer damage caused by fertilizer contacting the roots. For orchids, it is one of the best fertilization methods. As long as during the growth and development period, foliar feeding is maintained about once every 10 days, orchids can be grown very well, and there is no need to fertilize into the pot. A 1:1000 potassium dihydrogen phosphate and 1:1000 boron fertilizer can be used, and aloe liquid can also be used. Because aloe contains a large amount of nutrients such as polysaccharides and amino acids, and contains more than 20 kinds of minerals, it can meet the nutrients needed by orchids, and aloe contains aloe tincture, which can kill almost all bacteria and viruses, so after application there is no need to apply pesticides for disease prevention. Fertilization should be frequent and light, with small meals more often: orchids do not need much fertilizer during the growth and development period. For robust orchid plants with vigorous growth, a dilute liquid fertilizer can be applied once every 10-15 days. Natural organic matter is mainly used. Natural organic fertilizer has relatively comprehensive nutrient elements, so there is no need to apply other fertilizers, and it is mild in nature and has no side effects on plants, while chemical fertilizers easily compact the substrate, and most chemical fertilizers are acidic. Long-term application will cause the substrate to become too acidic and cause diseases.
II. Propagation methods for Spathoglottis pubescens
Division propagation
It can be carried out in both spring and autumn, generally dividing once every three years. Any plant that grows robustly and has dense pseudobulbs can be divided. After division, each clump must retain at least 5 pseudobulbs connected together. Before division, reduce watering to make the potting soil relatively dry. When potting after division, first cover the bottom hole of the pot with broken tile pieces, then spread coarse stones, occupying 1/5 to 1/4 of the pot depth, then place coarse-grained soil and a small amount of fine soil, and then plant with sandy loam rich in humus. The planting depth should be such that the pseudobulbs are just buried in the soil, leaving a 2 cm rim at the edge of the pot, spread with Selaginella uncinata or fine stones on top, and finally water thoroughly, place in a shady place for 10-15 days, keep the soil moist, gradually reduce watering, and carry out normal care.
III. Disease prevention and control for Spathoglottis pubescens
(I) Disease prevention and control
1. Coleosporium rust fungus
Usually on the upper and lower surfaces of leaves, less often on stems, raised small pustules appear, containing yellow, orange, rust-colored, or even purplish-black powdery spores. Rust disease is not fatal, and the leaves do not die either, but it makes the plant grow weak. In addition to cutting off diseased leaves, the prevention and control method can use a 65% zineb powder 500-600 times dilution or a copper-containing fungicide for spraying.
2. Southern blight
Mostly occurs during the plum rain season. At the initial onset, the leaf bases are covered with white mycelium, causing the rhizome to rot. Prevention and control methods: remove the infected potting soil and sprinkle on quintozene powder or lime. Radical treatment method: pay attention to ventilation and light transmission, and good potting soil drainage. Severely diseased plants should be burned.
3. Anthracnose
It occurs year-round, and is more rampant in hot and rainy seasons, with Cymbidium ensifolium being especially susceptible. The lesions first extend from the leaf tip toward the rhizome, initially brown, then gradually expand and increase, with many dry black spots appearing, and in severe cases causing the entire plant to die. Prevention and control methods: In addition to actively improving environmental conditions, during the disease period, first spray with a 50% thiophanate-methyl wettable powder 800-**** times dilution, once every 7-10 days; then supplement with 1% equal-strength Bordeaux mixture, once every half month, spraying 3-5 times continuously.
(II) Pest prevention and control
Scale insects
Commonly known as "orchid lice." Under conditions of high temperature, high humidity, and poor air circulation, they reproduce fastest. During the hatching period, spray with 1% omethoate or a 1500 times dilution of 50% malathion. If the number of pots is not large, they can also be removed manually by brushing.