How does the bird's nest fern reproduce? A detailed guide to common propagation methods
Spore propagation
When spring arrives, sterilize the prepared sowing soil, then put it into a pot. After that, evenly sprinkle mature spores onto the potting soil, then immerse the entire pot in water so the potting soil is thoroughly moistened. Cover it with a glass pane to retain moisture, and finally place it in a shady spot. After about a week, new shoots can germinate; after one month, green prothalli can grow; after 3 months, several true leaves can grow, and then they can be potted up for cultivation.
Division propagation
In late spring and early summer, when new shoots are about to grow, choose relatively robust new shoots and carefully use a knife to cut apart the part of the plant that needs to be divided into 2-4 sections, then shorten the leaves by about one third. Each section must have some leaves and rhizome, and finally place them separately into pots for cultivation so they become independent plants. Place the pots in a semi-shady spot at a temperature above 20°C to help the wounds heal as quickly as possible.
Now that you know how to grow bird's nest fern, right? Everyone can try it out.
Propagation methods for bird's nest fern
Bird's nest fern is usually propagated by spore sowing and division. In March or July to August, scrape mature spores off the leaves (the spores of bird's nest fern can be seen in the accompanying image in this article), mix 2 parts leaf mold and 1 part fine sand as a substrate, put it into a small flower pot, spread it flat and press it firm, sterilize it, then place it in shallow water to moisten it thoroughly, evenly sow the spores, and cover with a glass slide to retain moisture. At 24°C, with 12 h of light per day and a light intensity of 3000Lx, the spores germinate in about 6-8 days. After 2 months, the antheridia and archegonia of the prothallus mature; at this time, pay attention to spraying water to create conditions for fertilization. Soon a large number of young sporophytes will be produced, and they can be transplanted when 3-4 leaves have grown. http://www.yuhuagu.comBecause bird's nest fern rarely produces branches through division propagation, the method of separating daughter plants cannot be used. Division propagation is simple and easy, but it easily damages the plant shape, and recovery is very slow. In mid-to-late April, cut a robustly growing plant from the base into 4 sections, and shorten the leaves by 1/3 to 1/2, so that each section has some leaves and rhizome, and pot them separately to become new plants. After potting, place them in a spot above 20°C, semi-shady, and with relatively high air humidity, so the wounds heal as quickly as possible. Keep the growing medium in the pot slightly moist, not too wet, otherwise it easily rots. After new leaves grow, the original shape can gradually be restored.
How to grow bird's nest fern: teaching you the cultivation methods for bird's nest fern
Bird's nest fern gets its name because its leaves grow radially around a short rhizome, hollow in the middle like a bird's nest. So how do you grow bird's nest fern? What are the cultivation methods for bird's nest fern? Below, the editor will introduce this in detail for everyone. Let's take a look.
I. Introduction to bird's nest fern
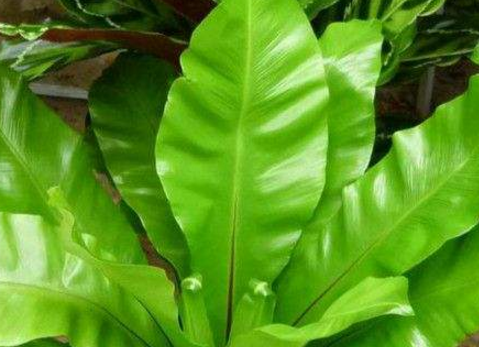
Bird's nest fern, also known as nest fern, nest bird's nest fern, mountain bird's nest fern, crown fern, seven-star sword, sparrow bird's nest fern, sharp knife ruyi san, eagle seven, and so on, is an epiphytic fern native to eastern Australia, Indonesia, eastern Asia, and other places, with plants 100-120 cm tall. Bird's nest fern grows attached to tree trunks, rock walls, and other places, and many fallen leaves of other tree species accumulate at its base, making it look like a bird's nest, hence the name. The rhizome of bird's nest fern is short and thick, and the marginal leaves cluster from the underground stem, spreading out from the center to form a nest shape. Bird's nest fern likes high temperatures and cannot tolerate strong light, and especially likes to attach to tree trunks in Yulin or monsoon forests or to rocks under the forest.
II. How to grow bird's nest fern?
Bird's nest fern likes a warm and humid environment and cannot tolerate high temperatures or cold. When the temperature is above 30°C, spray more water and increase ventilation. Bird's nest fern likes a high-humidity environment and cannot tolerate dryness, so spray water frequently to increase air humidity. Bird's nest fern has relatively strong shade tolerance, but it also needs scattered light to grow better. Do not keep bird's nest fern in a place without light for a long time, and when the sunlight is strong, also prevent exposure to direct sun. Under conditions of high temperature and high humidity in summer, spray more water and spray the leaf surfaces thoroughly to maintain relatively high air humidity, which is beneficial for growing bird's nest fern. As the leaves of bird's nest fern grow larger, the leaves often cover all the growing medium in the pot, so when watering, be sure to water thoroughly through the pot to avoid dry and curled leaves caused by lack of water.
III. Cultivation methods for bird's nest fern
1. Propagation: Bird's nest fern can be propagated by sowing or by division. Generally, the division method is used. In late spring and early summer, before new shoots grow, slowly cut apart the part of the plant that needs to be divided with a sharp knife, and then plant them separately.
2. Planting: For bird's nest fern grown for 2-3 years, the plant shape opens up and the roots fill the pot stand, so it can be removed from the pot, part of the residual roots and the withered spore leaves at the base removed, the plants taken out, and each replanted separately in a pot. When repotting in spring, add leaf mold and moss to the pot, and add a small amount of crushed stone.
3. Light: After planting, bird's nest fern should be placed in a courtyard under tree shade that blocks about 50% of sunlight for care. Every 5-7 days, rotate the direction of the flower pot once so the plant receives light evenly and all parts develop in balance, promoting robust growth of bird's nest fern. In summer, provide shade, or place it in a spot with thin shade under a large tree to avoid direct strong sunlight. This is beneficial for the growth of bird's nest fern and makes the leaves glossy. Indoors, place it in a bright spot for cultivation, and do not keep it in a dark place for a long time.
4. Temperature: The suitable temperature for the growth of bird's nest fern is 22-27°C. In winter, bird's nest fern can be placed in a greenhouse or in a sunny spot indoors, with the temperature kept above 16°C so bird's nest fern continues to grow, but the lowest temperature cannot be below 5°C. The indoor temperature during the day is best above 20°C, and at night it should also be above 15°C. When the temperature is low, bird's nest fern stops growing.
5. Soil: For potted bird's nest fern, mountain soil and pond mud mixed with an appropriate amount of crushed wood shavings are commonly used as the growing medium, plus a little base fertilizer. Bean cake can be used as base fertilizer, and if conditions permit, fern roots, moss, or crushed tree bark can be used as potting material.
6. Watering: Bird's nest fern has relatively strict water requirements. Check the water and fertilizer situation frequently. Normally, water frequently to keep the potting soil moist, and also spray water on the leaves and surrounding area several times a day to maintain a relative humidity above 80%. However, water must not accumulate in the pot, otherwise bird's nest fern easily rots at the roots and dies.
7. Fertilizing: During the growing season, fertilize bird's nest fern once about every 20 days. Generally, fertilizing 4-6 times per year is enough. When the temperature is between 15-26°C, diluted fertilizer water can be applied, which is extremely beneficial for the growth of bird's nest fern.
8. Pruning: Bird's nest fern needs timely pruning of withered branches and leaves to keep its plant shape attractive.
IV. Precautions for growing bird's nest fern
1. Because bird's nest fern likes water, it is better for the potting soil to be wet rather than dry, and a certain degree of moisture needs to be maintained. Do not set a fixed watering schedule.
2. Under conditions of high temperature and high humidity in summer, the growth of new leaves in bird's nest fern requires more water spraying, and maintaining air humidity is beneficial for spore germination.
3. Growing bird's nest fern does not require too much sunlight; an appropriate amount is enough.
4. During the growing season, bird's nest fern should be watered thoroughly. When the indoor temperature is low in winter, keep the potting soil moist. When the temperature is high, water more frequently, once a day or every other day; under low-temperature conditions, water once every 3-5 days.