Detailed Explanation of the Preparation Method for Fermented Mushroom Bags of the Shaggy Ink Cap Mushroom and Its Cultivation Techniques
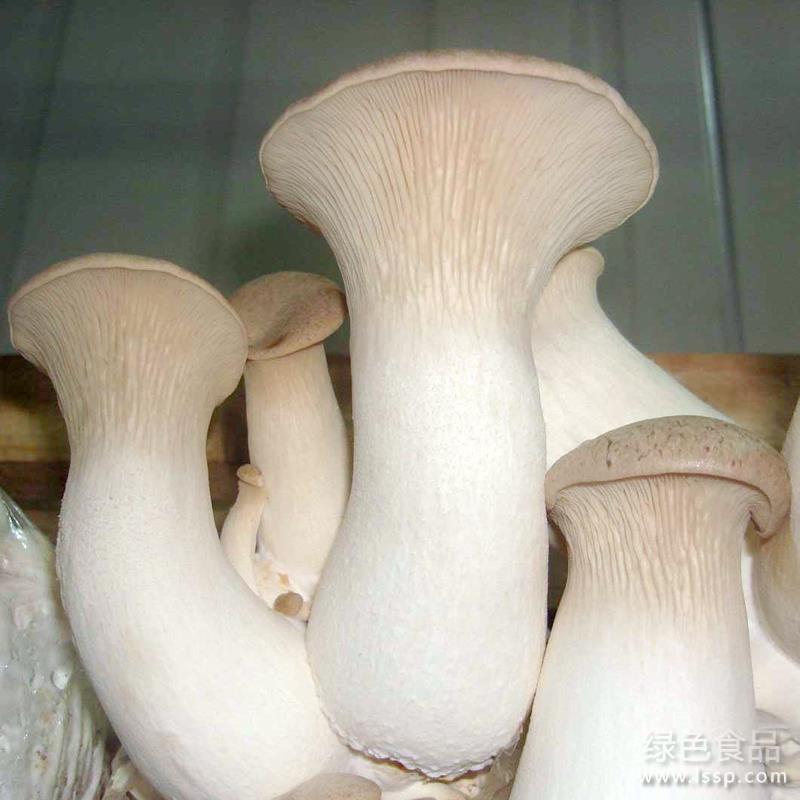
Shaggy Ink Cap Mushroom
The shaggy ink cap mushroom has a unique flavor and is regarded as a delicious delicacy. Its flesh is thick, its taste is savory, and it is rich in nutrients. Moreover, it has notable therapeutic effects on diabetes, stomach ailments, and lowering blood pressure, making it very popular among consumers.
I. Cultivation Materials and Preparation for the Shaggy Ink Cap Mushroom
The shaggy ink cap mushroom has strong adaptability and is one of the edible fungi in our country with the simplest and most flexible cultivation methods and the most abundant raw materials. For example: corncobs, corn stalks, rice straw, sorghum stalks, bean stalks, and sorghum husks are all good raw materials for cultivating the shaggy ink cap mushroom.
Preparation of the culture medium:
1. Corncobs 80%, rice bran 20%, gypsum 1%, phosphate fertilizer 1%, quicklime 3%, urea 0.2%, carbendazim (content 50%) 0.1%, water content between 60% and 65%.
2. Corn stalks 80%, rice bran 20%, phosphate fertilizer 1%, quicklime 3%, gypsum 1%, urea 0.2%, carbendazim (content 50%) 0.1%, water content between 60% and 65%.
3. Bean stalks 40%, corncobs 40%, rice bran 20%, gypsum 1%, phosphate fertilizer 1%, quicklime 3%, urea 0.1%, carbendazim (content 50%) 0.1%, water content between 60% and 65%.
4. Rice straw 80%, rice bran 20%, gypsum 1%, phosphate fertilizer 1%, quicklime 3%, urea 0.1%, carbendazim (content 50%) 0.1%, water content between 60% and 65%.
5. Corncobs 40%, corn stalks 40%, rice bran 20%, gypsum 1%, phosphate fertilizer 1%, quicklime 3%, urea 0.1%, carbendazim (content 50%) 0.1%, water content between 60% and 65%.
Note: The corncobs and stalks in the above formulas are all crushed to the size of corn kernels, and the pH value is between 8 and 9.
II. Mixing the Materials and Pile Fermentation
For each pile of 250 to 500 kg, mix the phosphate fertilizer and quicklime into the rice bran, then mix and stir thoroughly with the other materials. Dissolve the urea and carbendazim in water, then add to the materials and mix well. Pile them into a heap 1.5 m wide, 1 to 1.2 m high, and of unlimited length, and press down slightly. Then, around the pile, use wooden sticks to make two rows of holes every 40 cm, with a diameter of 5 cm and extending down to the bottom of the pile, for aerobic fermentation. After about 3 to 5 days, the temperature inside the materials can reach around 60°C, and the first turning of the pile begins. After that, turn the pile once every 2 days, for a total of 3 to 4 turnings, so that the culture material produces a small amount of white feather-like thermophilic actinomycetes. The fermentation time is 12 to 16 days.
Shaggy Ink Cap Mushroom
III. Making and Cultivating the Mushroom Bags
1. Selecting the bags
For the cultivation bags, plastic bags with a folded width of 2.5 to 2.6 cm and 1 to 2 layers can be selected, then cut to a length of 45 cm, with one end tied off for later use. Such bags require about 18 kg for every 5000 kg of material.
2. Filling the bags and inoculating
The day before filling the bags, seal the greenhouse tightly, and for every 50 m shed use 500 ml of formaldehyde and 250 ml of dichlorvos, add 15 kg of water, and spray comprehensively. Then burn 2.5 kg of sulfur and keep it sealed for 24 hours to kill contaminating bacteria and pests in the shed. Before filling the bags, spread out the well-fermented material pile and let the material temperature drop below 30°C before starting to fill the bags. Break the spawn into pieces the size of kidney beans. First place a layer of spawn at one end of the bag, put a layer of about 8 cm of culture material on top, then place another layer of spawn (the middle spawn is placed around the bag), for a total of 4 layers of spawn and 3 layers of material, and finally place a layer of spawn at the bag opening and tie it off, with slightly more spawn at both ends.
3. Spawn running
Stack the filled bags for cultivation, with a stack height of 6 to 7 layers. The temperature inside the material should be kept at 20 to 26°C, and must not exceed 30°C at the highest. After about 5 days, use a needle to make 8 to 10 small holes at both ends of the mushroom bag and at the middle spawn layer. During the cultivation period of the mushroom bags, turn and inspect the stack 2 to 3 times, that is, turn the stack once every 8 to 10 days. When turning the stack, make sure to swap the top and bottom, the inner and outer, and the lateral positions with one another, in order to let the mushroom bags uniformly contact air and temperature and make the spawn running balanced. During the cultivation period of the mushroom bags, attention should be paid to ventilation and air exchange, which can be combined with temperature regulation. When the air temperature is high, the spawn-running shed should strengthen ventilation and cooling; when the spawn temperature is high, ventilate frequently. For example: lift the edges of the mushroom shed and the coverings, open all ventilation openings to create air convection, thereby increasing air flow, lowering the temperature, and raising the finished-product rate of spawn running.
During the cultivation period of the mushroom bags, attention should be paid to moisture prevention and light avoidance. The water needed by the mycelium inside the bag does not need to be supplied from outside, but is provided by the existing moisture in the culture medium. For this reason, the spawn-running shed should be dry, and the air humidity should be kept at around 70%. If the site is damp and the air humidity is too high, it will cause contamination by stray bacteria and lead to contamination of the mushroom bags. Therefore, the spawn-running shed should be dry rather than damp. The mycelium growth stage does not need light; under dark conditions it grows faster than under light exposure. Therefore, during the mycelium growth stage, the spawn-running shed should avoid light as much as possible, so that the mycelium will be rapid, neat, uniform, and thick. Stronger light has an inhibitory effect on the mycelium. According to the above management methods, the mushroom bags can be fully covered in about 20 to 30 days.
IV. Preparation of the Casing Soil
1. Because the shaggy ink cap mushroom has the characteristic of not fruiting without casing soil, casing soil is an extremely important task in its cultivation. Whether the casing soil material is well prepared and whether the disinfection treatment is thorough directly affects the yield and quality of the mushrooms.
2. The selection and physical and chemical properties of the casing soil material should all meet the growth needs of the shaggy ink cap mushroom. The basic requirements are a loose structure, high porosity, good aeration performance, and a certain crumb structure, such as clay loam, vegetable garden soil, river mud, etc.
3. Preparation of the casing soil material. Clay loam or river mud 75%, furnace ash slag 25%, phosphate fertilizer 0.5%, quicklime 1%, carbendazim 0.1%, dichlorvos 0.1%, pH value 8 to 9, with an appropriate amount of water. The soil can be squeezed into a ball in the hand and crumbles upon touch.
V. Bed Treatment and Removing the Bags for Casing Soil
1. Bed treatment
Level the bed, irrigate heavily, leave a passage in the middle, and use the soil from the bed to build ridge embankments about 25 cm high, then scatter a small amount of quicklime for later use.
2. Removing the bags and applying casing soil
After removing the bags from the well-colonized mushroom bags, arrange them lengthwise into the already treated bed. Fill the gaps with treated nutrient soil, and cover the mushroom logs with 3 to 5 cm of nutrient soil. After applying the casing soil, cover with plastic film to keep warm and retain moisture. The temperature should be kept at 12 to 25°C. Pay attention to keeping the soil layer moist and strengthening ventilation and air exchange. After about 15 to 20 days of casing soil, the mycelium can penetrate the casing soil layer and primordia appear to form fruiting bodies, at which time spray water once. During the growth stage of the fruiting bodies, maintain relatively high humidity and a certain amount of diffused light, but do not spray large amounts of water; just keep the ground moist. Strengthen ventilation and air exchange, and in management mainly control temperature and humidity. If the temperature inside the shed exceeds 25°C, focus on cooling and humidifying, spraying mist-like water to keep the ground moist. When ventilating, avoid strong wind blowing directly into the bed, so as not to affect the color and quality of the shaggy ink cap mushroom. The amount of ventilation can be flexibly controlled according to the amount of fruiting. In low-temperature seasons, ventilate daily from 11:00 to 14:00; in high-temperature seasons, ventilate in the morning and evening every day; and in cloudy and rainy weather, increase the amount of ventilation. The fruiting temperature should be controlled between 8 and 25°C, with the optimum temperature between 14 and 18°C, and the humidity kept between 80% and 90%.
When the fruiting bodies grow to a cylindrical or bell shape, and the color changes from light to dark, and the cap and ring have not yet separated or have just begun to loosen, they should be harvested at the proper time. After the first flush of mushrooms is harvested, promptly clean up the dead mushrooms and mushroom roots, replenish the casing soil, replenish the water all at once, manage temperature and humidity well, and cultivate the next flush of mushrooms.