Detailed Explanation of Key Techniques for High-Yield Cultivation of the Button Mushroom
The button mushroom, also known as the white mushroom, cultivated mushroom, or common mushroom, is the most widely artificially cultivated species. Its flesh is tender and delicious, rich in protein and a variety of essential amino acids and trace elements, and it has certain medicinal value, which is why it is increasingly popular. 1. Cultivation season...
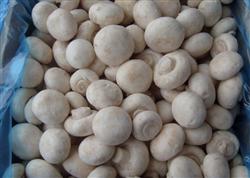
The button mushroom, also known as the white mushroom, cultivated mushroom, or common mushroom, is the most widely artificially cultivated species. Its flesh is tender and delicious, rich in protein and a variety of essential amino acids and trace elements, and it has certain medicinal value, which is why it is increasingly popular.
1. Cultivation season and site: Generally, cultivation can be carried out from autumn and winter through to early spring. Plastic greenhouses, disused warehouses, idle cold storage rooms, etc. can be used for cultivation.
2. Selection and preparation of the compost
1. Main materials: Crop straw with few pests and diseases and no mold (such as wheat straw, corn stalks, corn cobs, etc.) and livestock and poultry manure. 2. Supplementary materials: Urea, cake fertilizer, lime, gypsum, superphosphate. 3. Preparation: Generally, for a cultivation area of 100 sq m, 500 kg of wheat straw, 500 kg of horse manure (dry manure), 20 kg of cake fertilizer, 10 kg of urea, 15 kg of superphosphate, and 15 kg of gypsum powder are needed.
3. Stacking and fermentation of the compost
1. Pretreatment: One week before stacking, wet the sun-dried manure with water and pile it into a heap about 1 m high and 2 m wide. Turn the heap once every 3-4 days, with a heap temperature of about 55°C. If using wet manure, this should be done about 20 days before stacking, generally without adding water. The heap should be loose, and turned once every 5 days or so. 2-3 days before stacking, if using wheat straw, because it has a lot of wax and the stems are relatively hard, it must be flattened and pre-wetted. It can be placed in a pool to soak, or spread on the ground and watered layer by layer while treading on it. If using cake fertilizer, mix it with 0.5% dichlorvos the day before use and cover with plastic sheeting to kill insect pests.
2. Building the stack: When stacking, first spread a layer of wheat straw 30 cm thick and 2.5 m wide on the bottom layer, then spread a layer of manure about 2 cm thick on top. The manure and straw should be spread flat. In this way, one layer of straw and one layer of manure, about 10 layers each, with a stack height of about 1.5 m. Cover the top with a layer of manure. Starting from the fourth layer, add cake fertilizer, urea, and lime, and water it. After the stack is built, make 2-3 ventilation holes in the middle with wooden sticks, and cover with straw mats or woven bags. Cover with plastic sheeting on rainy days and remove it immediately after the rain. On the second day after stacking, measure the material temperature, measuring the temperature within 50 cm. Usually, 2-3 days after stacking, the material temperature will rise to 70°C. 6-7 days after building the stack, carry out the first turning. Shake the wheat straw loose, turn the inside to the outside and the top to the bottom, and spread the manure and straw flat. Starting from the fourth layer, add lime and superphosphate again. The focus of this turning is to water thoroughly. 48 hours after turning, the material temperature can reach 75-80°C. After another 5 days, carry out the second turning, thoroughly turning the inside, outside, top, and bottom, and add superphosphate and lime layer by layer. At this turning, be sure not to water too much; generally, when the compost is squeezed tightly by hand, 3-4 drops of water should be squeezed out. On rainy days, prop up the plastic sheeting with wooden sticks to allow air circulation in the material. When the material temperature reaches 60-65°C, wait another 4-5 days, and when the material temperature reaches about 60°C, carry out the third turning. If there are lumps of manure, break them up, and add lime again. 4 days after the third turning, carry out the fourth turning. At this time, check the water content; when the compost is squeezed tightly by hand, 1-2 drops of water should drip from between the fingers. If the moisture is not suitable, adjust it with 1% lime water, and at the same time pay attention to pest control. After another 3-4 days, when the temperature inside the stack remains at about 50°C and tends to stabilize, carry out the final turning. Measure the pH value at 7.8-8 and the water content at 60-63%.
This fermentation takes about 30 days. The final standards that should be reached: 1. Soft texture that forms a ball when squeezed by hand and breaks apart with a shake. 2. A rich compost aroma. 3. The wheat straw breaks with a snap. 4. The color is brown. 5. No pests or contaminating fungi.
3. After-fermentation. If carrying out a second fermentation, after the third turning, while the material is still hot, transport it to the mushroom house, close the doors and windows, and place the material centrally on the middle tiers of the bed frames to increase thickness and maintain temperature. Do not heat it immediately. After 5-6 hours, when the material temperature no longer continues to rise, then heat it. Water can be boiled outside the shed, and steam sent into the shed to raise the temperature. Raise it to 60-62°C and maintain for 6-8 hours. When the material temperature drops to 50-55°C, maintain for 6-8 days, then cool it down gradually to 45-50°C, open the doors and windows, and let the material temperature drop rapidly to about 25°C to finish.
4. Spawning
For mushroom houses that do not carry out after-fermentation, disinfection must be carried out before bringing in the material. Spray the surrounding area of the compost heap with 1:800 carbendazim and cover with film to fumigate for 24 hours. The mushroom house should be sprayed once with thick lime water, fumigated with formaldehyde for sterilization, or disinfected with sulfur. After disinfection is finished, open the doors and windows and turn the shelves. For compost that has undergone secondary fermentation, when the material temperature drops below 40°C, the shelves can be turned. Divide the material onto several tiers of bed frames, spreading it evenly and flatly from top to bottom and inside to outside, 15-20 cm thick, with a water content of 60-63%. If it is too dry, adjust with 1:800 carbendazim water; if too wet, open the doors and windows for ventilation until suitable.
Before spawning, the room temperature should be below 20-25°C, and the material temperature should be stable below 28°C. Spawning tools should be wiped and disinfected with 0.1% potassium permanganate solution. The spawning rate is 5-6 bottles of spawn per sq m (500 ml canning jars).
Use your fingers to make holes 3 cm deep, put in a piece of spawn, and cover with the surrounding material. The hole spacing is 10 cm x 10 cm. After spawning one bed, sprinkle the remaining spawn on the surface, spread a layer of material on top, and cover the material with newspaper or woven bags (disinfected with 0.1% potassium permanganate), and remove after about 7 days.
5. Management during the mycelial growth period
Control the temperature at 25-26°C and the relative air humidity at about 75%. 3-5 days after spawning, the doors and windows should be closed. If the temperature exceeds 28°C, ventilate at night.
About 7 days after spawning, remove the newspaper. When the mycelium has basically covered the surface, carry out ventilation and air exchange. When the mycelium has penetrated to 1/2 the depth of the material, loosen the material that has begun to harden and clump, then level the material and strengthen ventilation to promote downward growth of the mycelium.
In addition, frequently check whether contaminating fungi or insect pests have appeared. If found, take timely measures. Under normal conditions, about 20 days after spawning, the mycelium can basically fill the compost.
6. Casing soil
Before casing, keep the surface of the material dry. Do not spray water on the surface of the material. If there is contaminating fungus, sprinkle a layer of lime powder on the contaminated area. If there are insect pests, use 0.5% dichlorvos for heavy control. The surface of the material should be scratched by hand to carry out "scratching", then leveled, and gently pressed with a wooden board. Carry out casing only when the mycelium has grown to the bottom.
Use garden soil from the cultivated layer, add an appropriate amount of rice bran, lime, or wood ash, adjust the pH to 7.5-8, sterilize with carbendazim, cover with film and let it sit for 24 hours, then turn and mix once more before use. The casing soil should be uniform in thickness, 2-2.5 cm thick. When the mycelium forms small white dots in the soil layer and forms primordia, cover once more with a small amount of soil, about 1 cm thick. Within 2 days after casing, spray about 5 kg of water per sq m, applying it to the soil layer in 4-5 sessions, so that the soil layer is moist from top to bottom. When spraying water, open the windows for ventilation. On the third day, close the doors and windows to induce the mycelium to grow into the soil layer. When primordia form, cover with a layer of half-dry, half-moist soil or dry soil. Do not cover with wet soil. After covering this layer of soil, also regulate water, first dry then wet, spraying frequently and lightly, gradually allowing the fine soil to increase in moisture.
7. Management during the fruiting period
Generally, fruiting occurs 15-18 days after casing. For autumn fruiting, spray the fruiting water well, spraying into the air, onto the walls, and onto the ground, so that the relative air humidity reaches about 90%. In the early stage, when the temperature is relatively high, ventilate in the morning and evening. In the later stage, when the temperature is relatively low, ventilate at noon, and close the doors and windows in the morning and evening, paying attention to heat preservation. After picking one batch of mushrooms, promptly clean the bed surface, remove dead mushrooms and mushroom bases, and fill in the mushroom holes. Generally, 4-5 flushes of mushrooms can be picked in autumn.
In winter, the temperature drops noticeably. If continuing to produce mushrooms, heating facilities must be provided so that the minimum indoor temperature is guaranteed to be above 8°C, and reaches 15-17°C during the day. In addition to doing a good job of heat preservation, appropriate ventilation and air exchange are also needed. If conditions for mushroom production are not available, tidy the bed surface well, cover the soil with a layer of thick straw, and also pile straw or stalks against the back wall and the east and west walls outside the mushroom house to do a good job of heat preservation, waiting for mushroom production when the temperature is suitable in spring.
When the temperature gradually rises, begin management for spring mushrooms. In the early stage, do a good job of heat preservation, clean up the covering materials on the bed surface, and clean the inside and outside of the mushroom house. Whitewash the inside of the mushroom house with thick lime water (15-20% concentration). When the temperature inside the mushroom house stabilizes above 10°C, use water reasonably according to conditions. As the mushrooms grow, increase the frequency of water spraying and maintain the relative air humidity at about 90%. In addition, do a good job of topdressing to increase later yield.
8. Harvesting
Harvest in a timely manner. Gently pinch the mushroom cap with the thumb, index finger, and middle finger, and twist it off. The action should be light and quick. If there is a cluster of mushrooms and most have already grown large, they can be picked as a whole. If only individual mushrooms are large, a knife can be used to cut off the large fruiting bodies.