Technique for Reusing Pleurotus nebrodensis Spent Substrate to Cultivate Oyster Mushrooms
Pleurotus nebrodensis, also known as Ferula mushroom, Ferula pleurotus, or Ferula mushroom. Pleurotus nebrodensis has tender flesh and a delicious taste, with high edible value. Its cap is thick-fleshed, fine-textured, crisp and tender, with a delicious flavor resembling abalone. It does not fall apart even after long cooking and retains its unique flavor. It is known as the "porcini of the grasslands" and a pleurotus species, and is quite popular with consumers...
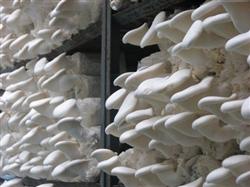 Pleurotus nebrodensis has developed rapidly in recent years. Since Pleurotus nebrodensis generally produces only one flush of mushrooms, the nutrients are not fully utilized. To make full use of this spent substrate, we conducted experiments and found that Pleurotus nebrodensis spent substrate can be used with some added supplements to produce oyster mushrooms.
1. Variety selection. Vigorous, robust spawn should be selected according to the season. Spawn should be purchased from reputable research institutions, and the physiological characteristics of the purchased spawn should be thoroughly understood. Never purchase spawn blindly.
2. Preparing the substrate.
(1) Raw material treatment: The Pleurotus nebrodensis spent substrate should be free of contaminating microorganisms and pests. Supplementary materials such as corncobs should also be fresh and free of mold. The Pleurotus nebrodensis spent substrate should be crushed to the size of peanut kernels.
(2) Production formulas: A. 50% Pleurotus nebrodensis spent substrate, 40% corncobs (crushed to the size of soybean grains), 4% wheat bran, 1% phosphate fertilizer, 1% gypsum, 4%-6% quicklime; B. 50% Pleurotus nebrodensis spent substrate, 40% cottonseed hulls, 5% soybean meal powder, 1% gypsum, 4%-6% quicklime; C. 55% Pleurotus nebrodensis spent substrate, 35% crop straw such as soybean stalks or corn stalks (crushed), 2% wheat bran, 5% soybean meal powder, 1% gypsum, 4% quicklime. All three formulas should have 0.1% fungicide such as prochloraz added for sterilization and disinfection, and about 0.1% insecticide such as beta-cypermethrin added to kill pests.
(3) Mixing: First dissolve the various chemicals in water, then add them to the main ingredients and mix thoroughly. The amount of water added should bring the substrate moisture content to 65%-70%.
(4) Fermentation: Pile the mixed substrate into a heap 1.5-2 m wide and of unlimited length, with the pile oriented north-south for best results. When the temperature 20 cm below the surface of the pile reaches above 60°C, maintain it for 12 hours, then turn the pile. Generally turn the pile 2-3 times over a period of 7-8 days. During fermentation, if the pile is found to be losing moisture severely, add 0.1%-0.2% water at each turning, and spray insecticide regularly. Insecticides may include phoxim, beta-cypermethrin, avermectin, etc. Dichlorvos is prohibited because it easily causes oyster mushroom fruiting bodies to become allergic and deformed. When the substrate is well fermented, it should be coffee-colored, form a ball when squeezed in the hand but crumble when dropped, and have a smell similar to distiller's grains. The pH should preferably be 8-9.
3. Bagging and spawning. Plastic bags should be double-sided 3-gauge, in the specification 25-288 by 45-50. Use larger specifications when temperatures are low and smaller specifications when temperatures are high. Mixed spawning may be used, with a spawn rate of 20%; layered spawning may also be used, with spawn placed in 4 layers: the middle 2 layers account for 40% of the total spawn, and the two ends account for 60%. Micro-pores should be punched around the bags for ventilation.
4. Spawn run management. After filling, the bags should be arranged reasonably; at high temperatures they may be placed in a single layer. During the spawn run, keep the environment as dark as possible, and pay special attention to ensuring the substrate temperature in the bags does not get too high. Generally, the substrate temperature peaks about 8-10 days after bagging. When the substrate temperature in the bags reaches 33°C, the bags should be turned. Check the substrate temperature frequently. Throughout the entire spawn run period, strictly pay attention to pest control. Regularly spray highly effective, low-residue insecticides to strictly prevent fungus gnats, armyworms, mushroom mites, springtails, etc. from damaging the bags in the later stage of spawn run, especially fungus gnats. This pest has white larvae, mature larvae are orange-red, and adults closely resemble small mushroom flies. Its incidence has been particularly high in recent years, so control should be especially strict. After about 20 days, the bags will be fully colonized and can immediately enter the fruiting management stage.
5. Fruiting management. Arrange the fully colonized bags in the mushroom house with 1 m between rows. Ensure fresh air in the mushroom shed, provide a temperature difference stimulus of more than 5°C, and maintain suitable scattered light. Mushrooms will appear in about one week.
6. Management during the fruiting period. Oyster mushrooms should be harvested when they reach 70%-80% maturity. During the fruiting body growth period, regularly spray disease-resistant and yield-increasing agents such as Guyufeng No. 1 and Guduosheng. After the first flush is harvested, stop watering for 5-6 days, clean the substrate surface, maintain appropriate ventilation, and keep humidity at 70%-80% to promote the second flush. Removing the bags and casing with soil is an effective measure to increase yield. After the first flush is finished, remove the plastic film from the bags and bury them in pre-prepared beds 80-100 cm wide and 30 cm deep, with 10 cm between logs and 40-50 cm reserved for walkways. Fill the gaps tightly with soil, then irrigate with a small amount of water. Do not use a heavy flow of water when irrigating, to prevent the bags from floating up. When irrigating, an appropriate amount of nutrient fertilizer may be added to the water.