Detailed Explanation of Pure White Enoki Mushroom Bag Cultivation Technology
1. Process flow: cutting bags → mixing substrate → filling bags → sterilization → inoculation → mycelial growth → primordia induction → fruiting. 2. Production technology. 1. Cutting bags: Cut plastic tube bags used for cultivating mushrooms into small sections 30-35 cm long, tie one end with string to form a bag. Each ton of substrate requires 12-13 kg of bags. 2. Mixing substrate: Raw material formula...
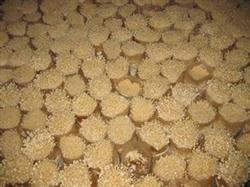
1. Process flow
Cutting bags → mixing substrate → filling bags → sterilization → inoculation → mycelial growth → primordia induction → fruiting
2. Production technology
1. Cutting bags: Cut plastic tube bags used for cultivating mushrooms into small sections 30-35 cm long, tie one end with string to form a bag. Each ton of substrate requires 12-13 kg of bags.
2. Mixing substrate: Raw material formula: cottonseed hulls 40-42.5 kg, wheat bran 7.5-10 kg, gypsum 0.5 kg, lime 0.5 kg, water 65-67.5 kg. Mix the raw materials evenly, pile them into a heap 70-75 cm high, let the heap sit covered for 24 hours, then fill bags.
3. Filling bags: While filling the substrate, press it firmly with your hands along the sides of the bag. When the substrate reaches a height of 17-18 cm, fold the empty portion of the bag toward the center along the top surface of the substrate into a bundle shape, and press down hard to expel the air from the bag, finally tie the bag opening with plastic string into a slip knot. Such a substrate bag can hold about 0.4 kg of dry substrate and about 1 kg of wet substrate. Place the filled bags under 100°C conditions for sterilization for 14 hours.
4. Inoculation: Select white and dense enoki mushroom spawn for use. The ratio of spawn bottles to substrate bags should preferably be 1:25. Place the sterilized substrate bags into an inoculation box. Before placing the spawn bottles into the inoculation box, wipe the outer walls of the bottles with 3% Lysol solution or 0.2% potassium permanganate solution; before inoculation, wipe the mouth of the spawn bottle with a 70% alcohol cotton ball. Then inoculate the spawn into the substrate bags according to the ratio. During inoculation, the spawn should be spread over the surface of the substrate bag as much as possible. Finally, place into an aerosol box and fumigate sealed for 20 minutes for sterilization. After each bottle of spawn is inoculated, the tools used for taking spawn must be sterilized once to avoid cross-contamination.
5. Temperature and humidity control: The mushroom shed should be ventilated before use. Before arranging the spawn bags, fumigate the shed with 10 mL formaldehyde and 8 g potassium permanganate per cubic meter for 24 hours, then open the vents for air exchange. After the spawn bags are arranged, the mushroom shed must be kept ventilated and dry. During the mycelial growth stage, the shed temperature is controlled at 20-25°C, with frequent ventilation; when the shed temperature is below 16°C, open during the day and close at night. Humidity is generally controlled at around 65%. During the primordia induction stage, the shed temperature is controlled at 13-20°C, humidity increased to around 85%, slight ventilation, and scattered light provided. During the fruiting stage, the shed temperature is controlled at 6-8°C, humidity maintained at 80%-85%, no ventilation, creating a dark environment.
6. Pest prevention: Pay attention to pest prevention. In addition to installing screen windows on the vents, continuously spray 90% dichlorvos 1000-fold solution on the ground and surroundings inside the shed.