Detailed Explanation of the Key Points of Wild-Simulated Cultivation Techniques for the Shaggy Mane Mushroom
The growing temperature for wild-simulated shaggy mane mushrooms is between 10°C and 24°C, with fruiting in spring from March to June and in autumn from September to November. If wild-simulated cultivation is carried out in plastic greenhouses, sowing can be done from October of the current year to March of the following year, and fruiting can occur from November of the current year to June of the following year, allowing 2 production cycles per year. Each cultivation cycle can produce 5 to 6 flushes of mushrooms, ...
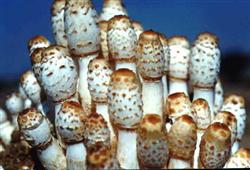
The growing temperature for wild-simulated shaggy mane mushrooms is between 10°C and 24°C, with fruiting in spring from March to June and in autumn from September to November. If wild-simulated cultivation is carried out in plastic greenhouses, sowing can be done from October of the current year to March of the following year, and fruiting can occur from November of the current year to June of the following year, allowing 2 production cycles per year. Each cultivation cycle can produce 5 to 6 flushes of mushrooms, and the biological efficiency can reach over 300%. The yield is high and the returns are good.
Production process: Build the mushroom shed → Prepare the substrate → Heap and ferment the substrate → Fill bags and inoculate → Spawn-running management → Cover the spawn bags with soil → Fruiting management → Harvest at the appropriate time.
Building the mushroom shed: Open ground, wasteland, and shaded areas under trees can all serve as sites for building a mushroom shed. The mushroom shed is built in the same way as a vegetable greenhouse, and an idle winter-warm vegetable greenhouse can also be used. Every 500 kg of dry substrate requires 30 sq m of mushroom shed area.
Preparing the substrate: 1000 kg corncobs, 100 kg wheat bran, 30 kg soybean cake, 30 kg lime, 30 kg phosphate rock powder, 20 kg gypsum. First mix the substrate dry, then mix it wet. Before mixing, crush the corncobs. After pre-wetting, build the substrate into layers in a heap so that the moisture content reaches 70%.
Heap fermentation: After pre-wetting the substrate, build it into a heap 1.5 m wide and 0.6 m high, with no limit on length. Turn the heap once a day. Before turning, a small amount of water may be sprayed on the surface of the heap; the amount sprayed should be just enough to ensure there is no dry substrate. When turning, move the substrate from the center of the heap to the surface, and move the substrate from the surface and bottom layers to the center of the heap. The temperature of the heap can rise to 60°C to 80°C from the 2nd day. The fermentation period is generally 5 to 10 days. Successfully fermented substrate has a large amount of white actinomycetes, no sour smell and no ammonia smell, is dark brown, and has the sweet fermented aroma of fermented substrate.
Filling bags and inoculating: Fill each bag with 5 layers of spawn and 4 layers of substrate. First add 1 layer of substrate, then add 1 layer of spawn. Break the spawn into pieces the size of walnuts, and try not to break the spawn into small fragments. Fill with 1 layer of substrate and 1 layer of spawn alternately, then seal the opening with a large-head pin. When filling the bags, pay attention to maintaining appropriate tightness. After sealing both ends of the spawn bag, punch 1 hole at each end with a wooden stick 3 cm in diameter.
Spawn-running management: Before October, the temperature inside the mushroom shed is relatively high. At this time, place the spawn bags in 1 layer on the ground, leaving a 3 cm gap between bags, and spawn running can be carried out inside the mushroom shed. After October, arrange them in 3 layers on the ground; after December, arrange them in 4 to 5 layers to form a spawn wall, leaving a 10 cm wide gap between rows, and cover the top of the spawn wall with 10 to 20 cm thick wheat straw. Insert several thermometers into the spawn bags and record the temperature once each morning and evening. During the spawn-running period, control the temperature inside the bags at 20°C to 30°C. If the temperature is higher than 35°C, there is a risk of burning the spawn; when it reaches 40°C and persists for 2 hours, all the mycelium will be burned to death. The temperature of the spawn bags can be controlled by uncovering or covering the plastic film and adjusting the ventilation openings.
Covering the spawn bags with soil: About 20 days after bag filling, the mycelium will have grown throughout the bags. Because shaggy mane mushrooms do not fruit unless they touch soil, the bags can be removed and covered with soil 3 to 5 days after the mycelium has fully colonized the bags. Before covering with soil, first water the ground of the mushroom shed thoroughly, then dig down 15 cm and place the fully colonized spawn bags upright in the prepared bed after removing the plastic bags. If the spawn bags are too long, they can be cut in half from the middle. The bed is 1.5 m wide, with no limit on length. As you arrange them, fill soil into the gaps, and finally cover the top with 2 to 3 cm thick soil. The soil moisture should be such that it forms a ball when squeezed by hand and crumbles when touched. Add 2% lime when covering with soil. After covering with soil, cover with plastic film and maintain the temperature at 14°C to 25°C. After 15 days of cultivation, mushrooms will fruit and primordia will appear.
Fruiting management: When the mycelium develops into the reproductive growth stage, management should focus on temperature regulation, humidification, and ventilation, and provide an appropriate amount of light. The fruiting temperature should preferably be controlled at 12°C to 22°C. Sprinkle water and ventilate every day, maintain the relative air humidity in the mushroom shed between 85% and 95%, and ensure fresh air to promote mycelial knotting and the formation of mushroom primordia. Generally, the fruiting bodies need 7 to 12 days to mature.
Harvest at the appropriate time: When the ring on the edge of the cap of the fruiting body just begins to loosen and is still tightly wrapped around the stipe, it should be harvested promptly. When harvesting, hold the lower part of the stipe with your hand and gently twist to pull it up. After harvesting, tidy the surface of the substrate, remove the mushroom roots, spray 1 heavy watering, cover with film, and cultivate for 10 to 15 days to produce the 2nd flush of mushrooms. The management of subsequent flushes is the same as that of the previous flush.