Utilization of Wheat Straw and Cattle and Horse Manure in Button Mushroom Cultivation
The overwintering period of button mushrooms in greenhouses generally refers to the period from the Winter Solstice of that year to the Awakening of Insects in the following year. During this period, the time is long and the temperature is low, and the mycelium is in a stage of extremely slow or stopped growth. Although a small amount of fruiting bodies may sometimes be produced, it is of little significance in production. Depending on the degree of dryness or wetness of the mycelium layer, either dry overwintering or wet overwintering methods can be used for management...
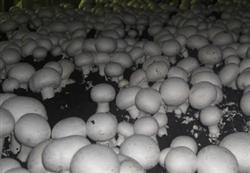 The button mushroom, also known as mushroom, white mushroom, or field mushroom, is nutritious and delicious and is quite popular internationally. If wheat straw and cattle and horse manure are used as raw materials to cultivate button mushrooms, the investment is low, the benefit is high, and it has promotional value.
I. Building the mushroom house
Choose a place with high and dry terrain, sufficient water source, and facing south to build the house. The house width is 2.4 m (two beds) or 4.5 m (three beds), and the length depends on the terrain. The specific construction method is the same as that of a general oyster mushroom plastic shed. In order to increase the cultivation area, the retaining walls on both sides can be appropriately heightened, and simple bed frames can be built with wooden poles and covered with corn stalks, reed mats, etc., allowing 2 to 3 layers to be cultivated, with a layer spacing of 60 cm.
II. Piling and fermentation of the compost
1. Material preparation For 100 sq m, prepare 1,500 kg of dry wheat straw, 1,000 kg of dry cattle manure, 15 to 20 kg of urea, 37.5 kg of superphosphate, 40 kg of raw gypsum powder, 45 kg of calcium carbonate, and 20 kg of quicklime.
2. Building the pile This is done in mid-to-late July. Two days before building the pile, the wheat straw and cattle manure should be pre-wetted. The moisture level is as follows: when cattle manure is squeezed in the hand, 4 to 5 drops of water appear between the fingers; when wheat straw is twisted by hand, water drips down. The pile runs north-south, with a width of 2.5 m, a length of 7.0 to 8.0 m, and a height of 1.5 m, for a total of 7 layers. For the first layer, first spread 30 cm of wheat straw on the ground, then scatter urea (1/7 of the total amount), and then scatter 150 kg of cattle manure. From the 2nd to the 7th layer, the wheat straw thickness is 20 cm. For the 2nd to 6th layers, the cattle manure amount is 100 kg per layer, and all the remainder is placed on the 7th layer. The urea amount for each layer is the same as for the first layer. After the pile is built, the temperature can rise to 75°C, and after 5 to 6 days the pile temperature drops.
3. Turning the pile Seven days after building the pile, add 15 kg of quicklime during the first turning (the remainder is scattered on the bed surface). During the second turning, add raw gypsum powder, reduce the pile width to 1.5 to 2.0 m, keep the length at 7.0 m, and keep the height unchanged. During the third turning, add superphosphate. If the material temperature exceeds 60°C, set one vent hole every 1.5 m. During the fourth turning, add calcium carbonate (2/3 of the total amount). During the fifth turning, adjust the pH to 7.2 to 8.0.
III. Spawning
One week before the mushroom compost is brought into the house, thoroughly disinfect the mushroom house with 1.2% copper sulfate or 500-fold carbendazim. Then move the compost into the house and spread it 15 to 20 cm thick. Wait until the compost temperature drops below 28°C and there is no ammonia smell in the compost before spawning. Use 1 to 1.5 bottles of spawn per sq m. First evenly scatter 2/3 of the amount on the compost surface, shake the compost surface by hand so that the spawn sinks 3 to 5 cm, then scatter the remaining spawn on the compost surface, and gently pat it level with a wooden stick.
IV. Management after spawning
1. Within 3 days after spawning, focus on moisture retention The optimum temperature for mycelial growth is 20 to 25°C, and the relative humidity is 70% to 75%.
2. Casing soil Perform casing about 13 to 15 days after spawning (when the mycelium has colonized 2/3 of the compost). Loam or clay loam is suitable for the soil, and 3 to 3.5 cubic m are needed per 100 sq m. Coarse soil particles are 1 to 1.5 cm in size and account for 2/3; fine soil particles are 0.3 to 0.5 cm in size and account for 1/3. Mix them for casing. Add the remaining calcium carbonate and 0.25 kg of dichlorvos to the soil, spray with water evenly, and mix well. The moisture of the soil particles is considered appropriate when they can be rolled into a ball and pressed flat. Then cover with plastic film for 24 hours. When casing, the soil thickness on the compost surface is 3 to 3.5 cm and should be uniform.
3. Management after casing For the first 3 days after casing, regulate the soil temperature so that the water content reaches 16% to 18%, that is, the coarse soil has no white core, can be rolled into a ball, and can be pressed flat, with no cracks; the fine soil cracks when pressed flat. About half a month after casing, when some mycelium thickens and forms fruiting bodies the size of peas, promptly spray fruiting-inducing water, generally 1 to 1.5 kg/sq m (depending on the compost), divided over 2 days, sprayed 3 to 4 times per day, then ventilate for 1 to 1.5 hours. After 6 days, when the fruiting bodies grow to the size of soybeans, spray once more with fruiting water, generally 0.25 to 0.5 kg/sq m. After 10 days, spray water according to the amount of fruiting: spray more when there are many mushrooms and less when there are few, and ventilate for 30 minutes after spraying. Half a month after casing, the optimum temperature for fruiting body growth is 13 to 18°C, and the relative humidity is about 90%.
4. Harvesting and management after harvesting Harvest when the mushroom caps grow to 2 to 4 cm and before the veil opens. After the current flush of mushrooms ends, promptly remove dead mushrooms and residual mushroom bases from the compost surface, fill the holes level with coarse and fine soil, spray water once again, and wait for the next flush.
5. Overwintering and spring management The mushroom shed should be reinforced for overwintering to prevent collapse under heavy snow. Loosen the soil on the mushroom bed once and add 1.0 cm of new fine soil. Before the Awakening of Insects, check the water content in the compost, scatter 50 g of plant ash per sq m, and spray water to moisten it. Within 3 days after the Awakening of Insects, spray 1000-fold dichlorvos, and hang strips of cloth with dichlorvos in ventilated areas to prevent insect damage. After the temperature rises, management is the same as for casing in autumn. Harvesting ends in June.