How to Cultivate Oyster Mushrooms for High Yields? Detailed Explanation of Key Planting Techniques
How to cultivate oyster mushrooms for high yields? A detailed introduction to the methods. Oyster mushroom cultivation has the advantages of low investment, quick results and small risk. Planting in autumn makes full use of the scraps and by-products of agricultural production and the idle labor of autumn and winter, and it takes only 1 month from input to output, making it a short, quick and efficient money-making project. Culture...
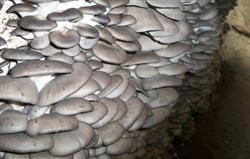
How to cultivate oyster mushrooms for high yields? A detailed introduction to the methods
Oyster mushroom cultivation has the advantages of low investment, quick results and small risk. Planting in autumn makes full use of the scraps and by-products of agricultural production and the idle labor of autumn and winter, and it takes only 1 month from input to output, making it a short, quick and efficient money-making project. Substrate formulas. Formula 1: cottonseed hull 40%, corn (2345, 12.00, 0.51%) cobs 45%, wheat bran 10%, quicklime 4%, compound fertilizer 1%. Formula 2: corn cobs 75%, wheat bran 20%, quicklime 4%, compound fertilizer 1%. Formula 3: corn cobs 40%, soybean stalks 35%, wheat bran 20%, quicklime 4%, compound fertilizer 1%. Formula 4: soybean stalks 74%, wheat bran 20%, quicklime 4%, compound fertilizer 1%, white sugar (5207, -9.00, -0.17%) 1%. Preparing the substrate. Crush the corn cobs into particles the size of peanut kernels, crush the soybean stalks into needle-like pieces, and mix all the raw materials thoroughly at a material-to-water ratio of 1:1.4. Pile the mixed substrate into a heap 0.8 m high and more than 1.5 m wide, with no limit on length, punch holes in it, then cover it with plastic film to keep it warm and moist. At night, cover the film with straw mats to keep it warm. When the material temperature rises to 60°C, begin turning the pile; afterwards, depending on how the temperature rises, turn the pile once every 1-2 days, for a total of 4-5 turnings. Microporous bag spawning. Choose polyethylene plastic bags 50 cm long and 25 cm in folded diameter, punch 10 holes 0.3 cm in diameter at 10 cm from both ends of the bag (where the spawn is placed), and inoculate in 3 layers in total, 1 layer in the middle and 1 layer at each end; after inoculation, tie both ends of the bag tightly with plastic rope. The amount of spawn used is about 15% of the dry material. After filling the bags, place them in a well-ventilated, dark and clean place at an air temperature of 15-25°C for mycelial running. The number of layers of bags in a stack depends on the air temperature, generally 2-4 layers. Turn the bags frequently to avoid overheating and killing the mycelium.
Unbagging and soil-covering cultivation. Remove the plastic bags from the colonized bags, bury them vertically in the beds with 2-4 cm between bags, fill the gaps tightly with soil, cover the bags with 2 cm of soil, then water thoroughly. After 2 days, fill in the holes washed out by watering with soil again, and sprinkle once with a little water. Depending on the air temperature, build a small arch shed over the bed; in winter, build a large arch shed outside the small one. Do not cover the large arch shed with straw mats during the day, and cover the small arch shed with straw mats for shade. Other management practices are the same as for conventional cultivation.
Click to get more oyster mushroom cultivation techniques
Click to get more edible mushroom cultivation techniques