Where can you find straw mushroom cultivation techniques? A full breakdown of the detailed tutorial
Want to grow straw mushrooms but don't have the skills, and wondering where you can learn straw mushroom cultivation techniques? The No-Skills Farming Website can help you. The following straw mushroom cultivation techniques are for your reference: 1. Spawn production techniques. Making spawn is an important part of straw mushroom cultivation. Using artificially cultivated pure spawn to grow straw mushrooms means fast fruiting, high yields, and good...
Want to grow straw mushrooms but don't have the skills, and wondering where you can learn straw mushroom cultivation techniques?
The No-Skills Farming Website can help you. The following straw mushroom cultivation techniques are for your reference:
1 Spawn production techniques
Making spawn is an important part of straw mushroom cultivation. Using artificially cultivated pure spawn to grow straw mushrooms means fast fruiting, high yields, and good quality. The spawn culture conditions are 28-30°C for 10-15 d. Straw mushroom stock spawn production mainly includes three types: wheat grain spawn, cottonseed hull spawn, and straw material spawn. The formula for wheat grain spawn is 87% wheat grain, 5% rice husk, 5% rice straw powder, 2% lime, and 1% gypsum or calcium carbonate; the formula for cottonseed hull spawn is 70% cottonseed hulls, 16% dried cattle manure bits, 5% rice husk, 5% rice bran or wheat bran, 3% lime, and 1% gypsum; the formula for straw material spawn is 77% short rice straw cut to 2-3 cm, 20% wheat bran or rice bran, 1% gypsum or calcium carbonate, and 2% lime. The medium moisture content is about 65%, the culture conditions are 28-30°C, and cultivation takes about 20 d in 750 ml spawn bottles or 12 cm x 25 cm plastic spawn bags.
Straw mushroom spawn should be stored at 15°C and transferred to fresh tubes about once every 3 months. Different strains must be strictly labeled and stored separately; mixing strains will cause antagonism and prevent fruiting bodies from forming.
2 Substrate preparation
Straw mushroom cultivation mainly uses waste cotton, cottonseed hulls, rice straw, wheat straw, and other materials with a high cellulose content. China has abundant rice and wheat straw, which provides a rich source of raw materials for straw mushroom production. Developing straw mushroom production also helps solve the resource waste and environmental pollution caused by burning crop straw in the fields. Rice straw was the earliest substrate used for cultivating straw mushrooms, but its bioconversion efficiency is relatively low, generally around 15%-20%, and can reach 40% under high-yield conditions. When cultivating with rice straw, it must be pre-stacked so the straw softens, the carbon-to-nitrogen ratio is adjusted, and heat retention and moisture retention are improved. The treatment method is to first cut the rice straw to a length of about 15 cm, soak it in 3% lime water, and after it is thoroughly soaked, add pig manure or cattle manure bits equal to 25% of the dry straw weight, then add 1% superphosphate and gypsum and mix well, and stack it for 2-3 days and nights so the temperature at the center of the pile reaches above 60°C. Generally, the amount of rice straw substrate used is 18 kg/sq m. Cultivating straw mushrooms with two or more substrates is called composite substrate cultivation; for example, using rice straw for the lower layer and waste cotton for the upper layer helps reduce production costs.
You can also use spent substrate from edible fungi such as wood ear, oyster mushroom, and shiitake to prepare straw mushroom cultivation substrate. Choose spent edible fungus substrate with no unwanted microbial growth and no mold or rot, crush it, dry it in the sun, and mix in about 30% of it with other cultivation materials to build a pile for fermentation, after which the straw mushrooms can be spawned.
3 Variety selection and spawning
Choose superior spawn. The best temperature for spawn cultivation is 28°C; although mycelium grows quickly at 30°C, it is sparse and weak with low vitality. The spawn age should be about 30 d, and the best time to spawn is when the mycelium has reached the bottom of the bottle and a small amount of light rust-red chlamydospores have appeared on the shoulder of the spawn bottle. Straw mushroom spawning generally uses the broadcast sowing method: scatter the straw mushroom spawn directly on the surface of the substrate, then pat the surface lightly so the spawn and substrate are tightly combined. After spawning, cover the surface layer of the substrate with rich, mature soil. Generally, the substrate is put in during the morning and spawning is done in the afternoon; spawning at high temperature favors mycelial growth, and spawning is best when the room temperature is 36-38°C and the substrate surface temperature is 39-40°C. The spawning rate is 3.5-4 bottles per sq m; if using plastic bag spawn of the 17 cm x 33 cm specification, then use 2 bags per sq m. Under field cultivation conditions, use 630-675 bottles per 1000 sq m, or 300-330 bags of plastic bag spawn.
4 Management after spawning
After spawning, cover the bed surface with plastic film and maintain a temperature of 35-40°C for 5 d. Pay attention to shading and prevent the temperature from exceeding 40°C or dropping below 22°C during mycelial growth. After the straw mushroom mycelium has covered the surface, remove the film and control the temperature at about 32°C. After 4-5 d from spawning, when there is no wind or only a light breeze, ventilate briefly on the leeward side, and pay attention to moisture retention. At 7-8 d after spawning, when the temperature at the center of the substrate is 30-33°C, the straw mushroom mycelium begins to knot and form small primordia. When the small primordia appear, they are extremely sensitive to environmental conditions; prevent sunlight exposure and drastic temperature changes, and also meet the oxygen needs of the straw mushroom mycelium during its vigorous growth stage.
Water management is very important during the fruiting period. The relative air humidity should be maintained at about 90%, the ground should be watered frequently, and the air should be misted frequently. If water is found to be insufficient before primordia form, spray water on the casing soil, and keep the water temperature consistent with the substrate temperature to avoid injuring the mycelium. When most primordia have grown to the size of peanut grains, begin spraying water on the bed surface; after spraying, ventilate the mushroom house so the water on the surface of the primordia evaporates.
5 Harvesting
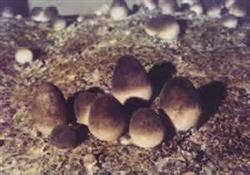
Under suitable growing conditions, straw mushrooms show small primordia 5-7 d after spawning and begin to be harvested at about 10 d (Figure 4). When harvesting straw mushrooms, note the following: 1. Straw mushrooms grow quickly and easily open their caps, so they should be picked as promptly as possible, once in the morning and once in the evening each day. Quality is best when harvested while the mushroom egg is oval, the veil is tightly wrapped, and the mushroom is firm. 2. For clustered mushrooms, harvest the whole cluster when most of the mushrooms are suitable for harvest. 3. When picking, try not to loosen the substrate, so as to avoid breaking the mycelium and causing the surrounding young mushrooms to die. After harvesting is complete, promptly tidy the bed surface, remove dead mushrooms left on the bed, level the bed surface, and then evenly spray lime water once to replenish the water in the substrate; the second flush of mushrooms appears after about 5 d. The first flush accounts for 70%-80% of total yield.
I. Cultivation materials. The raw materials used for straw mushroom production are mainly crop straw, called the carbon source. Generally, cottonseed hulls as the raw material give higher yields, followed by rice straw, while sugarcane bagasse is poorer; supplementary materials such as wheat bran, rice bran, and cornmeal serve as the nitrogen source.
II. Cultivation methods and cultivation sites. According to differences in cultivation sites, straw mushroom cultivation is divided into indoor cultivation and outdoor cultivation. Indoor straw mushroom cultivation can be carried out in specially built straw mushroom houses, or in mushroom houses converted from idle farmhouses, pig sheds, and the like. Converted mushroom houses can have bed frames installed, or cultivation can be done directly on the ground. Brick-style cultivation is mainly carried out in plastic greenhouses, under fruit trees, in open spaces in front of and behind houses, and in rice fields.
III. Cultivation season. Straw mushrooms are a straw-rotting mushroom type that likes high temperature and high humidity. The optimum mycelial growth temperature is 28-35°C, and the optimum fruiting temperature is 30-35°C. In Guangxi, summer cultivation can be carried out from April to October. If heating equipment is used, year-round production is possible. At present, most cultivation in our region is year-round.
IV. Cultivation management
(I) Outdoor cultivation (1) Site selection: Choose a sheltered, sunny, fertile sandy soil site with convenient water supply and easy drainage as the place to build mushroom beds. When temperatures are low, choose a south-facing site with ample sunlight and shade providers on the west and north sides; in midsummer, choose a cool, ventilated place for the mushroom bed. When making the mushroom bed, turn the soil, sun it for 1-2 days, rake it level, and mix in lime to drive away insects and earthworms. When spawning, spray the bed surface wet so the substrate does not lose too much water, and leave a 20 cm wide fruiting surface around the bed. Choose sandy fields or orchard land that is sheltered, sunny, and convenient for irrigation and drainage, and plow, harrow, and sun them in combination, adding lime powder to disinfect and build up the soil; make beds about 1.2 m wide, open drainage ditches well, and set up a shade shed. (2) Material treatment and spawning: Choose fresh, dry rice straw with no mold, soak the rice straw in 2-3% lime water for 24 hours, take it out, twist it into straw bundles, lay them into the bed surface, and press them firmly. At 5 cm from the edge of the straw layer, scatter a ring of mixed spawn (wheat bran and spawn mixed 1:1). For the second layer of straw bundles, set them inward 5 cm from the outer edge of the first straw layer, press firmly, and scatter a ring of mixed spawn around the edge within 5 cm. Repeat this operation for each subsequent layer, generally laying 4-5 layers of straw bundles. After the last layer of straw bundles is laid and pressed firmly, evenly scatter a 1 cm thick layer of sterilized burnt soil, and cover with plastic film. The usual spawn amount is 10 bags of spawn per 100 jin of dry straw. (3) Management and harvesting: After spawning, pay attention to shading and spraying water, cooling, and moisture retention. When the substrate surface temperature is above 45°C, promptly uncover the film for ventilation and spray water to cool it down. Generally, in the high-temperature season, uncover the film and spray water 2-3 times a day, with each interval lasting 1-2 hours. After about 3 days, the mycelium covers the bed surface, small white dots of young primordia can be seen on the 7th-10th day, and the first flush of mushrooms can be harvested every 10-15 days. After harvesting, stop watering for 3-5 days, then spray water and manage again; after about 5 days, the second flush can be harvested, and generally 3-4 flushes can be harvested. (4) Precautions: 1. After soaking rice straw in lime water, it is best to compost and ferment it for 5 days (turning the pile once during this time), and when the material temperature drops to 40°C, spread the material and spawn while it is still hot, which can reduce contamination by unwanted microorganisms (especially ink caps). 2. During cultivation, if contamination by unwanted microorganisms is found, promptly apply lime slurry to disinfect. 3. When uncovering the film for ventilation and cooling, prevent the temperature from dropping. 4. Straw mushrooms like to grow in a slightly alkaline environment, with a pH of about 8, generally adjusted with lime powder or lime water.
(II) Indoor cultivation. Indoor straw mushroom cultivation can artificially provide the temperature, humidity, nutrients, and ventilation conditions needed for straw mushroom growth and development, avoiding damage from typhoons, heavy rain, low temperatures, drought, and other adverse weather, thereby helping extend the cultivation season and improve the yield and quality of straw mushrooms. 1. Construction of the mushroom house: (1) Mushroom house. Most rural areas use the mushroom houses and bed frames left after cultivating mushrooms in winter and spring to cultivate straw mushrooms in summer. (2) Foam board mushroom house. The mushroom house is built with wood as the support, using polystyrene foam boards as the walls and roof of the mushroom house, and the inner layers of the walls and roof are lined with polyethylene film. At each end of the mushroom house, set three cross-ventilation windows measuring 0.3-0.4 m square, and two lower ventilation windows, with an aisle in the middle. The cultivation bed frames are placed against both sides but not tightly against the foam board walls. The bed frames are divided into 5-6 layers, and the bed surface is woven from nylon netting so that mushrooms can fruit on both the upper and lower surfaces, expanding the fruiting area. (3) Brick-and-tile house. First build a house with bricks, specifications: 6 m long, 4 m wide, 2.8 m high at the sides, 3.5 m high at the top, covered with asbestos tiles. Inside the mushroom house, set up 2 rows of bed frames, one door, and two rows of windows, upper and lower. After the bricks are laid, seal a 3 cm thick foam board on the roof, then seal a layer of film, and finally set up the bed frames. 2. Preparation and fermentation of the substrate: (1) Using rice straw as the main raw material. Cut the rice straw into 5-10 cm lengths or crush it with a grinder. Soak the chopped rice straw in lime water, using 5 kg of lime per 100 kg of rice straw; after soaking for 6 hours, take it out and drain it, then mix in gypsum, livestock and poultry manure, compound fertilizer, phosphate fertilizer, plant ash, and the like to build a pile for fermentation. After stacking for 5 days, turn the pile once in the middle; during turning, fine rice bran or wheat bran can be added (it can also be mixed in evenly before spreading the material), with the total added amount not exceeding 5%. When rice straw is composted and fermented, generally the pile is 1.2 m wide, 1 m high, and more than 1 m long, and appropriate ventilation holes should be made in the pile. After stacking, cover with film to retain moisture and also prevent pest invasion. The well-composted substrate should be soft in texture, with a moisture content of 70%, and the pH adjusted to about 9. After composting and fermentation, it is best to carry out secondary fermentation, especially for raw materials to which rice bran, wheat bran, or dried cattle manure have been added; secondary fermentation must be carried out. (2) Using waste cotton residue or cottonseed hulls as the main raw material. Soak the waste cotton in lime water, adding 5 kg of lime per 100 kg of waste cotton residue; after it is thoroughly soaked, take it out and make a pile, cover with film, and ferment for about 2 days. When the moisture content is about 70%, it can be moved into the mushroom house. Before entering the house, if the pH is lower than 8, usually add an appropriate amount of lime to adjust it to about 9. (3) Using sugarcane as the main raw material. Soak the sugarcane in lime water, loosen and mix evenly 100 kg of sugarcane, move it into the mushroom house, and spread it on the cultivation racks. Rice straw and sugarcane bagasse substrate should be spread 15-18 cm thick, waste cotton residue substrate should be spread 5-10 cm thick; the material on the upper layers of the bed frame can be spread thinner, and the layers below should be slightly thicker in order, so that the material temperature in each layer is uniform, which is favorable for mycelial growth. After the substrate is leveled and slightly compacted, close the doors and windows, introduce steam for secondary fermentation, make the material temperature reach 65°C, maintain it for 4-6 hours, and then let it cool naturally. When it drops to about 45°C, open the doors and windows, and spawn when the material drops to about 36°C. 3. Spawning: When the material temperature drops to about 36°C, spawn while hot (38-40°C in low-temperature off-season cultivation). Spawning methods include hole spawning, strip spawning, and broadcast spawning. In production, hole spawning and ridge-style strip spawning are mostly used. When using hole spawning, it is suitable to break the spawn into walnut-sized pieces, with holes 3-5 cm deep and 8-10 cm apart; ridge-style strip spawning is a new method for high straw mushroom yields (more than 60 kg of fresh straw mushrooms can be produced per 100 kg of dry material). Spawning uses three-layer ridge-style cultivation: first spread material on the ground or bed frame, 30-40 cm wide and 10 cm thick, with unlimited length, scatter a layer of spawn along the surroundings, and mix wheat bran with 3% lime water to moisten it and place it in the mushroom house for secondary fermentation. In the center of the spawning area, scatter a 10 cm wide band of wheat bran inward, then spread the second layer of material, spawn, and scatter wheat bran in the same way, spread a layer of material on top, scatter a layer of spawn on the material surface, and cover it with spawn mixed in advance, because mixing different varieties together will cause antagonism, resulting in few mushrooms and seriously affecting yield. 4. Management: After spawning, maintain the material temperature at about 36°C, not lower than 30°C and not higher than 40°C, and keep it for about 4 days, then uncover the film; in the high-temperature summer season, about 2 days is enough. After spawning, cover the bed surface with a thin layer (about 1 cm) of burnt soil or fertile sandy loam, and spray an appropriate amount of 1% lime water on the soil layer to keep the soil layer moist, then cover with plastic film to retain heat. After covering with soil, control the room temperature at about 30°C and maintain the material temperature at 35°C. If the daytime temperature is high, the plastic film can be opened and some water sprayed to keep the material surface moist and cool it down; when the temperature is low at night, cover the film again. Ensure proper ventilation while maintaining material temperature. On the 4th-5th day after spawning, spray fruiting water once; after spraying, ventilate properly and avoid closing doors and windows immediately after spraying, otherwise the mycelium will grow excessively. Increase light in winter, and then a large number of straw mushroom fruiting body primordia can be seen forming. Under normal conditions, young mushrooms begin to form 6-7 days after spawning. At this time, pay attention to heat and moisture retention, and ventilate properly. Maintain the material temperature at 33-35°C, relative air humidity at about 90%, and maintain a certain amount of scattered light. At this time, the temperature in the mushroom house should not fluctuate too much, and strong wind should not blow directly onto the bed surface; in particular, north wind must not blow directly into the mushroom house, otherwise it will cause large numbers of young mushrooms to die. Do not spray water directly on young mushrooms; when humidity is insufficient, mist with water at about 30°C. Usually, mushrooms can be harvested about 10 days after spawning.
(III) New brick-style straw mushroom cultivation technique. The straw bundle style of straw mushrooms has low and unstable yields; indoor cultivation is often affected by serious damage from ink caps and mites, which reduces yield. Brick-style straw mushroom cultivation has the advantages of high yield, easy management, and few pest and disease problems. The method is as follows: (1) Substrate formula: 100 kg dry rice straw, 5 kg rice bran, 5-8 kg dried cattle manure, 2 kg plant ash, 2-3 kg lime, 1 kg calcium carbonate. (2) Substrate composting. Choose golden-yellow, mold-free dry rice straw, chop it into small pieces about 3 cm long, soak it in 1% lime water for 1 day, take it out, drain it, and build a pile. The pile is 1.5 m wide and 1.5 m high, with length depending on circumstances, generally preferably not more than 10 m. First spread rice straw 20 cm thick, then scatter cattle manure (cattle manure powder should be pre-wetted 3 days in advance), rice bran, calcium carbonate, plant ash, and lime (the amount of lime added should be suitable for adjusting pH to 7-8). In this way, layer straw and then layer materials until the pile is built. Turn the pile after 3 days; when turning, mix the supplementary materials and rice straw evenly, and after another 2 days bricks can be made. (3) Method for making straw bricks: Make several square wooden frames 40 cm long and 15 cm high. Place a sheet of film on the wooden frame (about 150 cm long and wide, with a 10 cm hole punched every 15 cm in the middle to facilitate water and air movement). Load the fermented substrate into the frame, press it firmly, cover the surface with film, lift the wooden frame, and the straw brick is made. (4) Sterilization and inoculation: The made straw bricks must be sterilized at normal pressure (maintain 100°C for 8-10 hours). After sterilization, move them into the cultivation room (the cultivation room should be cleaned in advance and fumigated with 1500-fold dichlorvos), and inoculate when the material temperature drops below 37°C. When inoculating, first open the film on the surface, spawn by the broadcast method, immediately cover the film back, and move them onto the mushroom bed to grow mycelium. (5) Cultivation management: 5 days after inoculation, open the film on the surface and cover with 1-2 cm thick burnt soil. After another 3 days, water can be sprayed, keeping the space humidity at 85%-95% to promote the growth and development of primordia. Generally, mushrooms can be harvested 5 days after primordia appear. After the first flush is harvested, check the moisture content of the substrate, and if necessary use lime water at pH 8-9 to supplement it. Then raise the temperature of the mushroom house to promote mycelial recovery and growth (if conditions permit, spawn again). Then manage according to the above method until the end of the cultivation period. Generally, the whole cultivation cycle is 30 days, and 2-3 flushes of mushrooms can be harvested.
Environmental condition requirements of edible fungi
The environmental conditions required for the growth and development of edible fungi are mainly factors such as nutrients, temperature, water, air, light, and pH.
1. Nutrition: Generally there are three types: saprophytic, symbiotic, and facultatively parasitic.
1 Saprophytic type: obtains nutrients by decomposing dead grass and dead wood, such as straw mushrooms, oyster mushrooms, and shiitake.
2 Symbiotic type: must grow on living trees, such as matsutake and porcini.
3 Facultatively parasitic type: such as honey fungus, which can both grow on dead wood and invade and grow in Gastrodia elata.
The main nutrients are: carbon sources: fiber, lignin, starch, sugar, and the like, which are decomposed under the action of acids for absorption by edible fungi.
Nitrogen sources: derived from proteins, amino acids, urea, ammonia, nitrates, and the like.
Inorganic salts: among them phosphorus, potassium, and magnesium are the most important.
2. Temperature: Edible fungi have three stages of temperature requirements over their life cycle:
1 Mycelial growth stage. The mycelial growth range of the vast majority of edible fungi is 5-33°C, with an optimum temperature of 20-25°C. Generally mycelium is not tolerant of high temperature, but straw mushrooms grow well at 40 degrees.
2 Fruiting body differentiation stage: generally somewhat lower than for mycelium.
It is divided into low-temperature type: optimum temperature below 18 degrees, such as oyster mushrooms and shiitake; they fruit in autumn, winter, and early spring. Medium-temperature type: optimum temperature 20-24 degrees, such as shaggy ink cap and silver ear, mostly fruiting in spring and autumn. High-temperature type: optimum temperature above 24 degrees, such as straw mushrooms and high-temperature oyster mushrooms, mostly produced in summer.
3 Fruiting body development stage: somewhat higher than for mycelium, but somewhat lower than the differentiation stage.
3. Water: The moisture content of the substrate is very important, and during cultivation, air humidity is also crucial.
The moisture content of the substrate is generally about 60%, and air humidity is generally 85-95%.
4. Air: Edible fungi are aerobic fungi, and ventilation conditions must be met.
5. Light: Generally they are cultivated under shaded conditions; mycelial growth requires dark conditions, and fruiting body development requires scattered light, otherwise deformed mushrooms will appear.
6. pH: (pH value)
The vast majority of edible fungi prefer acidic environments, and the optimum pH for mycelial growth is 5-5.5; above 8 it is affected. Because of sterilization and the tendency of the substrate to acidify, when mixing materials, the medium should be slightly higher than the value required by the mycelium.
IV. Basic equipment for edible fungus production
Edible fungus production includes spawn production and cultivation. There is a lot of spawn production equipment, from simple to complex, from coarse to fine, up to serialized and modern production, and there is a process of development; cultivation requires sites and mushroom houses, and there are also scales and procedures, all requiring gradual investment and development.
1. Sterilization pot: There are two types, high-pressure sterilization pots and normal-pressure sterilization stoves. High-pressure sterilization at a pressure of 1.1 kg/cm2 for 30 minutes can kill unwanted microorganisms in slant test tubes; sterilization at a pressure of 1.5 kg/cm2 for 1 hour can kill unwanted microorganisms in substrates such as cottonseed hulls and sawdust in mushroom bottles. If conditions permit, a portable medical sterilizer can be purchased, which can sterilize 50-60 test tubes or 10 mushroom bottles at one time. Normal-pressure sterilization stove: made of bricks and cement, place the items to be sterilized on the steamer, just bring the water to a boil and keep it for 6-8 hours; after stopping the fire, let it stew for another 1-2 hours; generally used for sterilizing production spawn.
At present, simple sterilization uses steamer intermittent sterilization: bring the water to a boil and keep it for 1-1.5 hours, stop the fire and let it cool for 30 minutes, then use high heat to bring it to a boil again and keep it for 1-1.5 hours, and sterilization is complete. Microwave sterilization can use medium-high power, set for 10 minutes and sterilization is complete, and the intermittent sterilization method can also be used.
2. Inoculation box: All spawn transfer, isolation, and propagation need to be carried out in an inoculation box; it is required to be tightly sealed and convenient for operation. A general simple inoculation box is 50 cm high, 47 cm wide, and 82 cm long; on the upper part of the long side, install a piece of 30 x 32 cm glass for observation, and below leave two openings with a diameter of 14 cm, with 33 cm long cloth sleeves installed on the openings, and the cuffs fastened tightly with elastic bands. Install a lamp inside the box, and if conditions permit, also install an ultraviolet lamp. At present, open inoculation is often used in large-scale production, which requires purchasing an inoculator and inoculating in an sterile air area.
3. Constant-temperature incubator: There are specially made ones and homemade ones. A homemade wooden box can use double-layer boards with sawdust packed inside for insulation, and several specifications of light bulbs installed in the box for adjustment. Nowadays, ovens are also used for modification, and generally the insulation effect is also very good.
4. Culture room: It is required to be dry, clean, ventilated, and have scattered light. The room must be disinfected before spawn is brought in. The room should be equipped with multi-layer culture racks, and also a heating stove, with iron pipes leading outside to exhaust air. In summer there should be fans to help cool it down.
5. Spawn production tools
Balance: an ordinary 500 g balance Measuring cup: used to measure the volume of water, in two types, 500 and 1000 ml
Test tube: generally uses the 20 x 200 mm specification
Small funnel: spawn bottle: spawn bag: high-temperature-resistant polypropylene film, alcohol lamp: inoculation knife, shovel, needle, tweezers, cotton, gauze, and the like.
6. Disinfectant drugs: Formaldehyde: used for space fumigation and disinfection, 2 ml per cubic meter
Potassium permanganate: prepared as a 0.1% solution, used for surface disinfection of materials; 5 g potassium permanganate plus 10 ml formaldehyde can also be mixed for fumigation and disinfection.
Benzalkonium bromide, bleaching powder, carbendazim, and lime are all commonly kept disinfection items.
7. Construction of mushroom sheds:
The basic requirements for building a mushroom shed are the ability to shade the sun, keeping the shed at three parts sunlight and seven parts shade, with only scattered light and no direct sunlight; secondly, it must be able to ventilate and exchange air, with air vents, and at the same time be able to retain heat and moisture, and be convenient for operation, management, and harvesting. The main forms are:
1. Small plastic ground shed: An arched circular small plastic ground shed is generally 1.0-1.5 m wide, and should be determined according to the width of the mushroom bed. The shed frame uses thin bamboo poles or moso bamboo strips, with a spacing of 0.3-0.6 m between them, covered with film. The small ground shed has a very good effect of increasing temperature and retaining moisture, and is one type of simple outdoor mushroom shed.
2. Semi-sunken large shed: The semi-sunken large shed is a relatively practical large shed designed according to local conditions and with simple means. The main structure and features are: (1) It can run east-west or north-south, generally 50 m long and 6 m wide, with bamboo poles propping up the two middle ribs, and bamboo or bamboo strips arched on top. (2) Earth walls are built around it, the ground inside the shed is dug down about 30 cm, the surrounding walls are about 50 cm high, and the shed is about 2 m high at the central ridge. (3) The frame is reinforced with iron wire, covered with agricultural film, compacted with soil around the edges, and covered with rice straw for shade. This kind of shed has low cost, retains heat and moisture, provides uniform scattered light, has good ventilation performance, and is also convenient to operate.
3. Solar greenhouse: This is a greenhouse that uses sunlight as an energy source. It has good heat retention, generally more than 10°C higher than the outside, and the temperature difference range is not large. Its back wall is made of earth walls or double-layer bricks, the front is composed of supports, crossbeams, and the like, the shed surface is covered with film and straw curtains, and ventilation openings must be left in the back wall.
In addition, there are steel-frame large sheds, with large cultivation area and fast warming, but a layer of shade netting must be added, and in winter straw curtains must also be covered to retain heat.
V. Basic techniques for edible fungus production
(I) Cultivation of three levels of spawn
Spawn used for production generally goes through three steps. Culture and expansion of mother spawn (first-level test tube spawn) - production of stock spawn (second-level wide-mouth bottle spawn) - production of cultivation spawn (third-level spawn bag spawn).
1. Culture of mother spawn: Pure spawn obtained from spore isolation or tissue isolation is called mother spawn in production. When culturing mother spawn, an appropriate medium should be selected according to the necessary growth conditions of different edible fungus mycelia for expansion culture. (1) Potato, glucose, agar medium (PDA medium), (2) Potato, sucrose, agar medium (PSA medium).
Preparation method: Wash and peel potatoes, weigh 200 g, add 1000 ml of water, and boil for about 20 minutes; filter through gauze to remove residue, add 20 g agar and 25 g white sugar to the juice, heat to dissolve, then add water to make up to 1000 ml, and after boiling, fill test tubes while hot. Then after high-pressure sterilization, it becomes slant medium; inoculate and culture to become mother spawn.
2. Production of stock spawn and cultivation spawn: Cut the well-cultured mother spawn in the test tube into 4-6 pieces and transfer them into wide-mouth bottle medium such as cottonseed hulls, sawdust, or manure-straw, and the spawn obtained after constant-temperature culture is called stock spawn. Transfer the stock spawn to the same medium for expansion culture, and the spawn used in production is cultivation spawn. Generally one test tube of mother spawn is inoculated into 5 bottles of stock spawn, and one bottle of stock spawn is inoculated into 10 bags of production spawn. During the culture period of stock spawn and cultivation spawn, temperature and humidity must be controlled, and frequent inspection is also required; pay attention to air permeability, prevent direct sunlight, and prevent contamination by unwanted microorganisms.
Stock spawn wheat grain medium: 1000 g wheat grain
Gypsum 2 g Calcium carbonate 5 g Water 1500 ml
First soak the wheat grains for 3-5 hours, heat and boil for 15 minutes, until the wheat grains are shiny but not broken, then filter and dry, and mix with gypsum and calcium carbonate.
Cooked material cultivation spawn medium: cottonseed hulls 50%
Sawdust 30% Wheat bran 18% Gypsum 1% Sugar 1%
(II) Seasonal arrangement for mushroom cultivation in four seasons
According to the temperature requirements of different mushroom varieties, combined with local climate conditions, choose and arrange the spawn production period and spawning period, so as to obtain the best fruiting period and achieve higher yields.
According to the response of different edible fungi to temperature during the fruiting body differentiation stage, they can be divided into three major types.
1. Low-temperature type: the maximum temperature for fruiting body differentiation is below 24°C, and the optimum temperature is below 20°C, such as oyster mushrooms, button mushrooms, shiitake, enoki mushrooms, and lion's mane. Generally production spawn is made in September, spawning is in October, and production and fruiting occur in autumn, winter, and spring.
2. Medium-temperature type: the maximum temperature for fruiting body differentiation is below 28°C, and the optimum temperature is 22-24°C, such as wood ear, silver ear, and shaggy ink cap (on the lower side of medium temperature). Generally spawn is made in mid-August, spawning is in mid-to-late September, and production and fruiting occur in autumn, and can also be produced in spring.
3. High-temperature type: the maximum temperature for fruiting body differentiation is above 30°C, and the optimum temperature is above 24°C, represented by straw mushrooms, big fat mushroom (high-temperature button mushroom), and abalone mushroom (high-temperature oyster mushroom, Taiwan oyster mushroom).
Generally production spawn is made in May-June, and production and fruiting occur in July-September.
(III) Principles for preparing substrate
The substrate formula refers to the types and quantitative ratios of main raw materials and supplementary materials used when making the medium, and should be determined according to the requirements of different mushroom species and the full use of local resources. A relatively reasonable and scientific formula must have three conditions: nutritional quality, air permeability, and water-holding capacity. Only in this way can the spawn grow quickly, the mycelium be vigorous, the yield be high, and the quality be good.
1 Nutritional quality: Edible fungi need large amounts of carbon sources, nitrogen sources, inorganic salts, and growth factors for both vegetative growth and reproductive growth. Under general conditions, the absorption and utilization rate of carbon sources is 25%; if carbon sources are insufficient, the mycelium is prone to premature aging. If nitrogen sources are insufficient, mycelial growth is weak and slow; if nitrogen sources are excessive, the mycelium grows too vigorously, which is unfavorable for accumulating metabolites. Generally, for edible fungi, the carbon-to-nitrogen ratio is preferably about 20:1 during the vegetative growth stage and about 40:1 during the fruiting body development stage. The supplementary materials for adjusting and supplementing carbon sources are mainly sugars, and the supplementary materials for supplementing nitrogen sources are mainly wheat bran, soybean cake, rice bran, diammonium phosphate, and urea.
2 Air permeability: If too many raw materials with fine texture and poor air permeability are added to the formula, the mycelium will accumulate more carbon dioxide and harmful gases during the growth stage, which will inhibit growth and even cause death. A medium with good air permeability gives vigorous mycelium and sturdy fruiting bodies.
3 Water-holding capacity: Raw materials that retain water well can fully meet the mycelium and fruiting body's demand for water and the absorption of nutrients, reduce water spraying, and preserve the nutrients in the substrate. Otherwise, the mycelium or fruiting bodies will dry up because water is not replenished in time and stop growing and developing. Medium raw materials with better water-holding capacity include wheat straw, corn, and the like. Compared with cottonseed hulls, the nutrition of crop straw is not as good as cottonseed hulls, so composite media should be prepared as much as possible (prepared by mixing several kinds of straw), and a single straw should be avoided as much as possible, to prevent nutritional deficiency or monotony. A mixture of soybean straw and corn cobs is rich and has good air permeability, but poor water-holding capacity; soybean straw is rich in nutrients, and after proper treatment has poor air permeability and good water-holding capacity; wheat straw and rice straw have average nutrition, but good air permeability and poor water-holding capacity; sawdust is rich in carbon, with good water-holding capacity and poor air permeability. When preparing, it is necessary both to make full use of discarded crop straw and to consider several raw materials, adopting the principle of complementary advantages for combined proportioning. The mixed medium prepared in this way has rich nutrition, strong air permeability, and good water-holding capacity, and can fully satisfy the growth and development of mycelium and fruiting bodies.
(IV) Edible fungus cultivation methods
There are many cultivation methods, and different varieties differ somewhat. On the basis of the original bed cultivation and bag cultivation, in recent years there have been many new breakthroughs, such as garden-style cultivation, protected cultivation, three-dimensional cultivation, underground cultivation, casing soil cultivation, off-season cultivation, and so on. It should be pointed out that when using these techniques, there are both advantages and disadvantages, and they must be carried out in combination with local realities. Here are some relatively advanced cultivation methods.
1 Oyster mushroom bed cultivation with casing soil and straw covering: It has both the advantage of fruiting after casing soil and overcomes the disadvantage of mushroom roots sticking to mud. The method is to set up beds in a greenhouse, about 1 m wide and 30 cm deep, loosen the soil at the bottom of the pit, spread a layer of fertile mud, cut mature spawn bags open in the middle into two sections, remove the bag film, stand them upright and arrange them in the bed. The casing soil layer must not be thick; water thoroughly, then cover with film to grow mycelium. When mycelium is seen covering the soil surface, cover with a layer of rice or wheat straw 15-25 cm long (pre-soaked in lime water). The straw covering thickness should be such that the casing soil layer is clearly not visible, then cover with plastic film again to grow mycelium, and pay attention to ventilation and air exchange. After a few days, a large number of primordia will appear.
2 Single-row mud-surface mushroom wall casing method. Prepare casing soil and wall-smearing mud materials in advance, preferably river mud or pond mud, followed by vegetable garden soil. Add 4-5% vegetable cake soaking liquid, 0.5-1% phosphate fertilizer, 0.2% urea, 0.1%-0.2% potassium dihydrogen phosphate, and 1-3% lime powder to the soil, add an appropriate amount of water, and mix into nutrient thin mud for later use. In the greenhouse, build earth ridges or wall footings at a spacing of 80-100 cm (15-25 cm high), arrange de-bagged mushroom sticks flat on the earth ridges in sequence, pour a topdressing liquid once (4-5% vegetable cake soaking liquid plus 0.4%-0.6% urea), cover with a layer of nutrient thin mud, and stack 7-10 layers in this way to a height of 90-110 cm, then use a mud trowel to tighten the surface and smooth the wall surface. After the wall surface is slightly dry, apply nutrient thin mud again the next day. Make a water storage pool with mud on top of the mushroom wall, irrigate frequently, and let it seep naturally to keep it moist.
3 Bag-style casing cultivation: After the spawn bags have fully grown mycelium, remove the film and directly carry out casing cultivation in a shed or bed. Choose a plot with good drainage and fertile soil, dig a bed 10-20 cm deep and 100-150 cm wide, with unlimited length, oriented north-south, with drainage ditches dug around it, and the bed bottom required to be level. Scatter a small amount of lime to disinfect, then place the de-bagged mushroom sticks horizontally and arranged lengthwise on the bed, with 3-5 cm gaps between the sticks, fill with fertile soil or fermented material, and then cover the surface of the mushroom sticks with 3-5 cm thick mixed coarse and fine soil (or vegetable garden soil). The casing material should be disinfected with 1-2% lime water before use. After casing, cover with film and straw curtains to avoid direct sunlight, and then manage according to fruiting conditions.
4 Narrow ridge hole sowing cultivation. For example, in oyster mushroom production, make the bed 1 m wide and the material 10 cm thick, then use a wooden board to separate the upper layer of material and make narrow ridges, so that the entire bed surface appears wavy. The wave peaks are 30 cm apart, compacted with a wooden board, then spawn by the hole sowing method, with hole spacing of 10 cm x 10 cm, and scatter a layer of spawn on the surface, scatter a layer of material, pat it level with a wooden board, cover with a layer of chopped rice straw moistened with 2% lime water, cover with film to grow mycelium, and carry out routine management.
5 Indoor bed-style cultivation: Generally button mushrooms, oyster mushrooms, and the like can all be cultivated on racks indoors or in greenhouses. The bed frame must be sturdy, generally 1 m wide, with 4-5 layers, and 50 cm between the upper and lower layers, ensuring that scattered light reaches the bed surface. The bed surface is covered with plastic film. Before use, spray the four walls and floor with 5% lime water. When spawning button mushrooms, first spread the substrate, with uniform thickness and a level surface, generally 15 cm thick. In order to give play to the advantage of the spawn, hole sowing is generally used, with hole spacing of 8 x 10 cm and hole depth of 3-4 cm. Generally a 750 ml button mushroom bottle of spawn can spawn 0.27-0.33 sq m. The method is: use a finger to dig holes, place the spawn in the holes, cover with a layer of substrate, press lightly so the spawn and material are pressed tightly together, and after spawning cover with film to retain moisture and grow mycelium in dim light.
(V) Measures to reduce contamination by unwanted microorganisms in edible fungus production
Controlling contamination by unwanted microorganisms is a very important part of developing edible fungus production. So-called unwanted microorganisms refers to all microorganisms growing on the medium, other than the specifically cultured edible fungi, that inhibit or hinder the normal growth of edible fungi, collectively called unwanted microorganisms. The main general measures to reduce contamination by unwanted microorganisms are:
1. Clumped and caked substrate must be broken up; the substrate must first be fermented or treated with lime water.
2. The cotton plugs for culturing mother spawn and stock spawn must not absorb moisture and become contaminated; the tightness should be moderate, as too loose allows unwanted microorganisms to enter easily.
3. High-pressure sterilization must pay attention to the relationship among pressure, temperature, and time. Master the second exhaust well. Mother spawn test tube sterilization should be no less than half an hour, and stock spawn no less than 1 hour. Normal-pressure sterilization should be no less than 10 hours after reaching the timed temperature.
4. When inoculating, strict aseptic operation requirements must be followed, procedures must not be reduced, and contamination sources should be reduced as much as possible.
5. The culture room must be ventilated and dry, and disinfected in a timely manner.
6. Preventing contamination by unwanted microorganisms should implement the policy of prevention first, with drugs as a supplement, so as to reduce contamination, increase yield, lower costs, improve quality, and safeguard the safety and health of consumers.
7. Common unwanted microorganisms: In the high-temperature season, common ones include Neurospora (red bread mold), green Trichoderma, which is white at first and later turns green, Rhizopus, which is white at first and later turns gray-white to black; Penicillium mycelium is broom-shaped, and there are also Aspergillus, Mucor, and ink cap unwanted microorganisms. The fundamental way to prevent them lies in strict operation in every step, timely discovery after disease occurs, and taking measures to prevent spread and harm.
VI. Cultivation and management of oyster mushrooms
Oyster mushroom is a general term for a group of edible species or varieties in the genus Pleurotus. At present there are many varieties with basically similar habits. Once you learn oyster mushroom cultivation, growing other mushrooms becomes very easy.
1. Basic habits: 1. Wide temperature range. Although the mycelium requires 20-28°C, the fruiting bodies are divided into six types: high, medium, low, and wide temperature, and varieties can be selected according to production needs. 2. Relatively high humidity. The substrate moisture content is 60-70%; the air humidity for fruiting bodies is 85-95%. 3. It is an aerobic fungus. When ventilation is poor, the fruiting bodies have long stems and thin caps, appearing as deformed mushrooms. 4. It prefers a slightly acidic environment, with substrate pH of 5.8-6.2. 5. Its light requirement is that mycelium should be in darkness, but fruiting bodies should have scattered light; with strong light the color is dark, and with weak light the color is white. 6. It is a wood-rotting fungus, first using starch, then decomposing fiber and wood.
2. Cultivation methods
1 If conditions permit, use cooked material or fermented material; generally raw material cultivation is used for spawning. Use 85% cottonseed hulls and 15% cornmeal, generally disinfect with 0.3% carbendazim, and when mixing the material, 0.5% salt can also be added; it has no residual toxicity and can also promote growth and development. The material-to-water ratio is 1:1.3, and superphosphate is added.
2 Diammonium phosphate, urea, and the like all need to be made into solution to be mixed evenly. Raw material needs to be piled and left to sweat for one day, and bagged and spawned the next day. The spawn amount is 10% of the material, with three layers of spawn and two layers of material. After inoculation, immediately punch holes for ventilation and mycelial growth.
③ Management: a. Mycelial growth stage: aim for 20-25 days to complete mycelial growth, at a temperature of 22-24°C; sprouting in three days, deep penetration in 6 days, and more than one-third of the substrate colonized in 15 days. Pay attention to removing contamination from foreign fungi and to ventilation, and turn the bags for inspection.
b. Fruiting stage: wall-style cultivation is generally used. To produce mushrooms early and produce good mushrooms, pay attention to increasing the day-night temperature difference: close the curtains during the day and ventilate at night, with a temperature difference of 6-8°C; during the fruiting stage the temperature should not exceed 20°C, as this is a temperature-varying mushroom type. Pay attention to scattered light; if old skin is found, scratch and break it open so the mycelium knots again and produces mushrooms.
After pinhead formation, do not spray water directly onto the mushrooms; only spray water on the ground and walls, or spray mist into the air. Pay attention to harvesting mushrooms in good time; after harvesting, a nutrient solution can be injected and water replenished. Pay attention to disinfection and hygiene. After about half a month, a second flush of mushrooms will appear. Casing soil cultivation can also be carried out, which can increase yield by more than 30%.
More straw mushroom cultivation techniques
More edible mushroom cultivation techniques