How to grow Agaricus bisporus (button mushroom) for high yields?
How to grow Agaricus bisporus for high yields? A detailed introduction: Agaricus bisporus has tender, fresh flesh, a delicious taste and rich nutrition, and is the edible fungus with the largest cultivated area and output in the world. Its main cultivation techniques are introduced as follows: 1 Raw materials and formulas The main raw materials for Agaricus bisporus cultivation are various agricultural products (8...
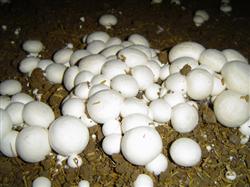
How to grow Agaricus bisporus for high yields? A detailed introduction
Agaricus bisporus has tender, fresh flesh, a delicious taste and rich nutrition, and is the edible fungus with the largest cultivated area and output in the world. Its main cultivation techniques are introduced as follows:
1 Raw materials and formulas
The main raw materials for Agaricus bisporus cultivation are the by-products of various agricultural products (8.48,-0.18,-2.08%) and high-quality livestock and poultry manure such as horse, cattle and chicken manure, which are fermented through a reasonable ratio. Common formulas are: ① 2000 kg dry wheat straw, 2000 kg dry horse manure, 150 kg rapeseed cake, 50 kg superphosphate, 50 kg gypsum, 15 kg lime; ② 2000 kg dry wheat straw, 1400 kg dry cattle manure, 100 kg rapeseed cake, 40 kg superphosphate, 40 kg gypsum, 15 kg lime.
2 Composting the substrate
Pre-wet the wheat straw: 2-3 days before stacking, water or soak the wheat straw so that it is thoroughly wet and can retain enough moisture. When stacking, build the pile 1.50-2.50 m wide and about 1.50 m high, with the length depending on the size of the site. When laying the materials, the straw layer is about 30 cm thick and the manure layer about 3 cm thick; layer the straw first and then the manure, one layer of straw and one layer of manure, about 10 layers in total, with the top of the pile shaped like a turtle shell. Add the rapeseed cake in layers in the middle of the pile while building it. Spray water while building the pile, and spray the water onto the straw; after the pile is built, it is best if water seeps out around the outside of the pile.
3 The fermentation process of the substrate
① First fermentation: turn the pile on the 5th day after building it, and evenly sprinkle in half of the gypsum powder and superphosphate that should be added during turning; turn the pile a second time on the 9th day, fully mixing the manure and straw and evenly sprinkling in the remaining gypsum powder and superphosphate; turn the pile a third time on the 12th day and add the lime powder. During turning, add water as appropriate depending on the dryness and moisture of the pile. ② Second fermentation: after the first fermentation ends, move the material into the mushroom house while it is hot; the substrate should be concentrated on the middle shelves of the mushroom house. After the pile heats up on its own for 5-6 hours, heat it with steam, passing overheated steam into the mushroom house so that the house temperature rises to about 62°C; maintain this for 6-8 hours, then ventilate to cool it so that the material temperature is about 50°C and keep it there for 4-6 days. After fermentation ends, ventilate and exchange the air, cooling slowly so that the material temperature drops below 28°C before spawning. After the second fermentation ends, the quality standards for the substrate are: the wheat straw is brown, soft and elastic, tough and not sticky to the hand, with a fragrant smell and no ammonia smell, and the moisture content of the substrate is about 65%.
4 Spawning and mycelial growth
After the second fermentation ends, tidy the material in the mushroom house and spread the substrate evenly on each layer of shelves, with a cultivation thickness of about 20 cm. When the material temperature drops below 28°C and no longer rises and there is no ammonia smell, carry out spawning using mixed spawning, that is, thoroughly mix 75% of the spawn with the substrate, evenly sprinkle the remaining spawn on the surface of the substrate, then cover with 1 thin layer of material, and gently pat the surface firm with a wooden board so that the substrate and spawn are fully in contact. Control the mushroom house temperature at 20-24°C and keep the relative air humidity at 70%-80%; ventilate more in hot and humid weather and less in dry and cold weather. In the later stage of mycelial growth, keep the surface of the substrate dry to reduce contamination by weed molds and promote rapid growth of the mycelium into the interior of the substrate.
5 Casing soil and management after casing
About 15 days after spawning, when most of the mycelium has grown to the bottom of the substrate, casing can be done. If the surface of the substrate is relatively dry, spray water to moisten the surface before casing. Choose garden soil or clay loam; before casing, crush the soil particles and sieve them, with a particle diameter of 0.50-2 cm. First sterilize the soil material with formaldehyde, and after the formaldehyde has completely evaporated, spray dichlorvos as an insecticidal treatment. Use one-time casing, with a casing thickness of 3.50-5 cm; the casing must be uniform and of consistent thickness. After casing, adjust the water with light and frequent spraying, 3-4 times a day, adjusting the soil moisture content to 18%-24%, that is, the soil particles can be flattened without breaking, are moist, and have no white core. Strengthen water management, keep the casing layer moist, with a room temperature of about 20°C and a relative air humidity of 80%-90%.
6 Fruiting management
When the mycelium climbs onto the surface of the casing layer, control the room temperature at 12-16°C and the relative air humidity at about 90%, ventilate and exchange the air, and carry out water management. Spray fruiting water, using about 3 kg of water per sq m, applied in 6-10 portions over 2-3 days, to promote the formation of mushroom primordia. When the primordia have generally grown to the size of soybeans, spray mushroom-preserving water, using about 2 kg of water per sq m, sprayed 3 times a day and finished within 2 days. After fruiting, the principle for watering the soil layer is light and frequent spraying: spray more when there are many mushrooms and less when there are few; spray less in the early stage and more in the later stage. When spraying, tilt the nozzle of the water gun upward so that the water falls as a mist, preventing the water stream from being sprayed directly onto the mushroom bodies.
7 Harvesting
Stop watering before harvesting. Harvest when the mushroom cap has grown to 2-5 cm and the partial veil of the fruiting body has not yet broken. When harvesting, gently hold the cap with the thumb, index finger and middle finger and twist it up; if large and small mushrooms grow in a cluster, use a sharp knife to cut off the mushrooms that need to be harvested, leaving the small ones. Handle them gently when harvesting and placing them. After harvesting, promptly remove mushroom roots, dead mushrooms and mushroom fragments, and add soil to keep the mushroom bed level and clean.
Click to get more mushroom cultivation techniques
Click to get more edible fungus cultivation techniques