What are the cultivation techniques for oyster mushrooms? A detailed guide to growing methods
What are the cultivation techniques for oyster mushrooms? Please introduce them. The oyster mushroom is the most widely cultivated, highest-yielding edible fungus in China, and the one most consumed and exported. Its scientific name is Pleurotus ostreatus (Jacq. ex Fr.), belonging to the subdivision Basidiomycotina, class Hymenomycetes, order Agaricales, family Pleurotaceae, genus Pleurotus. Its other names include...
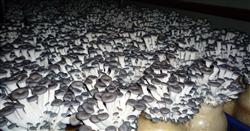
What are the cultivation techniques for oyster mushrooms? Please introduce them
The oyster mushroom is the most widely cultivated, highest-yielding edible fungus in China, and the one most consumed and exported. Its scientific name is Pleurotus ostreatus (Jacq. ex Fr.), belonging to the subdivision Basidiomycotina, class Hymenomycetes, order Agaricales, family Pleurotaceae, genus Pleurotus. Its other names include abalone mushroom, north wind mushroom, yuan mushroom, white shiitake, and edge-foot mushroom. In production and daily life, "oyster mushroom" is usually a commercial name, a general term for several cultivated species in the genus Pleurotus.
There are many varieties of oyster mushrooms, and every year a batch of new strains is introduced to the market. Common cultivated species of oyster mushroom include:
① Pleurotus ostreatus: what people usually call "oyster mushroom" mostly refers to this species, which is currently the widely cultivated type, mainly low-temperature and medium-temperature varieties. Common good varieties include Pingza 17, Xibao AX3, Xinping 1012, Shuangnai, Tianda, Jiangdu 792, Jiangdu 8813, Hei 89, Changzhou No. 2, and others.
② Phoenix mushroom (Pleurotus sajor-caju): native to India, it is a medium-to-high-temperature oyster mushroom that is fairly widely cultivated. Common varieties include Pinggu 831 and F327.
③ Elm yellow mushroom (Pleurotus citrinopileatus): also known as golden-top Pleurotus, it is a high-temperature variety. Common varieties include Northeast Elm Yellow Mushroom and Nongda Yuhuang 96.
④ Florida oyster mushroom (Pleurotus florida): introduced to China from the United States and Germany, it is a medium-to-low-temperature variety. Common varieties include Oyster Mushroom Zhongshu No. 10 (ACCC50165 preserved at the National Agricultural Culture Collection Center of the Chinese Academy of Agricultural Sciences) and Oyster Mushroom AS5.184 (preserved at the China General Microbiological Culture Collection Center, introduced from the Chinese University of Hong Kong).
⑤ Yellow-white oyster mushroom (Pleurotus pulmonarius): also known as delicious oyster mushroom, purple-spore oyster mushroom, and small oyster mushroom, it is a medium-to-low-temperature variety. Common varieties include Jigu 9008 and Jigu 9811.
⑥ Peach-red oyster mushroom (Pleurotus djamor): a high-temperature variety. Common varieties include Fujian Peach-red Oyster Mushroom and Jiangxi Peach-red Oyster Mushroom.
In production, the phenomenon of the same oyster mushroom variety having different names is fairly serious and should be noted.
Oyster mushrooms are tender and plump, delicious in taste, and rich in nutrients. According to analysis, fresh oyster mushrooms have a water content of 86%-93%, are rich in free amino acids with the highest content being glutamic acid, a total nitrogen content of 2.8%-6.05%, and a water-soluble sugar content of 14.5%-21.2%. Dried oyster mushrooms have a protein content of 21.17% and contain 18 amino acids, among which the 8 essential amino acids for the human body are also very abundant, especially lysine and methionine, which are usually lacking in grains and legumes. Other minerals such as phosphorus, potassium, iron, molybdenum, zinc, copper, cobalt, and vitamins B1 and C are also present to some degree. It has been reported that regular consumption of oyster mushrooms can regulate human metabolism and lower blood pressure, and is effective for hepatitis, gastric ulcers, duodenal ulcers, and osteomalacia. Japanese researchers have found that oyster mushrooms have a certain function in inhibiting the proliferation of cancer cells and can induce the synthesis of interferon. Medicinal tests show an inhibition rate of 70% against Ehrlich carcinoma and 80% against mouse sarcoma 180, so the oyster mushroom is a nutrient-rich health food.
Oyster mushrooms have strong adaptability and are extremely widely distributed in China. Through the domestication, cultivation, and breeding of wild oyster mushrooms, a series of matching varieties has been developed. From autumn to winter and spring, and even in summer, there are species and varieties suitable for growth, and a few heat-tolerant varieties can even fruit in the midsummer of the south.
Compared with other edible fungi, oyster mushrooms are the easiest type to cultivate. They can use various agricultural by-product residues for raw-material or cooked-material cultivation. The cultivation method is simple and easy, the growth cycle is short, the cultivation sites are diverse, the materials are widely available, the cost is low, and results come quickly. They are a major fresh mushroom variety grown by mushroom farmers in suburban areas.
II. Biological characteristics
1. Morphological characteristics
The oyster mushroom consists of two main parts: the mycelium and the fruiting body.
Mycelium: The mycelium of the oyster mushroom (Pleurotus ostreatus) in a test tube is white, dense, and strong. The aerial hyphae are well developed, with a strong ability to climb the walls; they do not secrete pigment, the mycelium grows quickly, and it has strong stress resistance, sometimes forming small fruiting bodies in the test tube.
Fruiting body: The fruiting bodies of the oyster mushroom (Pleurotus ostreatus) grow in imbricate clusters. The cap is initially flatly hemispherical, then becomes fan-shaped, kidney-shaped, shallow trumpet-shaped, or funnel-shaped, with a diameter of 5-21 cm. The initial color is blue-black, later fading, and at maturity it is grayish white to white or blue-gray; it is fleshy, with a smooth surface, and the depressed central part sometimes has white down or fine hairs. The flesh is white and thick. The gills are white, decurrent, and interweave into a network on the stipe. The stipe is lateral, short or absent, solid, white, 1-3 cm long and 1-2 cm thick, often with white down at the base. The spore print is white. Under the microscope, the spores are colorless, smooth, and nearly cylindrical, 3-10 (11) μm × 2.5-5.5 μm.
2. Growth and development process of the fruiting body
(1) Primordium stage: After the oyster mushroom mycelium has fully colonized the substrate, it enters the light-sensitive stage. At this time the mycelium is stimulated by light, and under suitable temperature and humidity conditions, the growth of the aerial hyphae on the surface of the substrate gradually weakens, the color changes from snow white to dark, and the hyphae knot into clumps; this is the early stage of oyster mushroom primordium differentiation. When yellow water droplets appear, the fruiting body primordium differentiates, appearing as nodular protrusions.
(2) Mulberry stage: The primordium further differentiates and develops into small millet-grain-like masses of mushroom embryos, resembling the surface of a mulberry; this is called the mulberry stage. Some scattered oyster mushrooms such as willow oyster mushroom and Phoenix mushroom do not form a mulberry stage, and after forming the primordium they enter the coral stage.
(3) Coral stage: After a certain time in the mulberry stage, coral-like clusters of mushroom buds form. The small buds gradually elongate into irregular short rod shapes, and the middle swells to become the original stipe. After continued growth, the whole cluster of buds becomes uneven and turns coral-like. Among them, only a few buds can develop into fruiting bodies, while most shrink.
(4) Elongation stage: The cap and stipe are already clearly distinguished.
(5) Forming stage: The stipe gradually thickens, and the cap further develops and enlarges.
(6) Maturity stage: From the forming stage to the maturity stage, it is further divided into several periods according to changes in cap morphology and degree of maturity. ① Early mature stage: The cap expands, the gills begin to appear, spores also begin to form, and the center is raised in a hemispherical shape; ② Mid-mature stage: The cap is fully expanded, the margin begins to curl upward, showing slight waviness. This period releases the most spores, mostly from the upward-curling part of the cap; ③ Late mature stage: The cap begins to shrink, cracks appear at the margin, and the massive discharge of spores is coming to an end.
3. Living conditions
(1) Nutrition: The oyster mushroom is a wood-rotting fungus with a very strong ability to decompose cellulose, lignin, and hemicellulose. It is not very strict in its nutrient requirements and can be cultivated using sawdust, cottonseed hulls, corncobs, straw, and many other substitute materials. In cultivation, wheat bran, rice bran, cornmeal, soybean powder, and the like are generally used to supplement nitrogen. Appropriate addition of minerals such as phosphorus, potassium, magnesium, and calcium and vitamins B1, B2, and C can increase yield and improve quality.
(2) Temperature: The oyster mushroom is a low-temperature, temperature-variable fruiting fungus.
The temperature range for oyster mushroom mycelial growth is 3-35°C, with 24-28°C being most suitable.
Oyster mushroom fruiting bodies generally can differentiate between 5-26°C, and some can at even higher temperatures, up to 30°C. The optimum temperature for fruiting body differentiation varies greatly among varieties.
According to the geographical distribution of oyster mushrooms, the fruiting season, and the optimum temperature for fruiting body differentiation, they can generally be divided into three ecological types: low-temperature, medium-temperature, and high-temperature. The optimum temperature for fruiting body differentiation of the low-temperature type is generally 10-15°C, such as Pleurotus ostreatus and Pleurotus pulmonarius; the optimum temperature for the medium-temperature type is 16-22°C, such as Phoenix mushroom and Florida oyster mushroom, and also includes some varieties of Pleurotus ostreatus; the optimum temperature for the high-temperature type is 24-28°C, with a maximum of up to 30°C, such as Pleurotus cystidiosus, peach-red oyster mushroom, and golden-top Pleurotus. In addition, there is another type of oyster mushroom variety (wide-temperature type), whose fruiting body differentiation temperature range is broader and which has strong adaptability, such as Guangping, Shuangnai, and Za 17. These varieties can form fruiting bodies at 12-30°C.
Oyster mushroom fruiting body differentiation requires stimulation by variable temperature conditions. Within a certain temperature range, a large day-night temperature difference can promote the formation of fruiting body primordia.
Within the temperature range for fruiting body development, when the temperature is low, growth is slower and the mushroom body is thicker; when the temperature is high, the mushroom body matures quickly, but it is thin, easily broken, and of poor quality. During cultivation, oyster mushroom varieties of different temperature types should be correctly selected according to climatic conditions.
(3) Water and humidity: The oyster mushroom is a moisture-loving fungus with fairly strong moisture tolerance.
During the mycelial growth stage, the water content of the substrate is required to be 65%-70%. If it is below 50%, mycelial growth is poor, while if the water content is too high, there is less air in the substrate, which also affects mycelial growth. When the substrate is too wet and encounters high temperatures, it will turn sour and smelly and is prone to contamination by competing microorganisms. Because different substrates differ in physical properties (water absorption, porosity, water-holding rate), the substrate should be adjusted appropriately according to its type when preparing it; for example, cottonseed hull substrate is 65%, sawdust substrate is 55%, and rice straw substrate is 70%.
During spawn running of oyster mushrooms, the relative air humidity is generally suitable at 60%-70%, and during fruiting body differentiation and growth it is 85%-90%. At 55% growth is slow, at 40%-45% the mushroom body shrivels, and above 95% the cap easily changes color and rots and is also prone to contamination by competing microorganisms.
(4) Air: The oyster mushroom is an aerobic fungus, and both the mycelium and fruiting body require oxygen for growth and development.
During the mycelial growth stage it can tolerate relatively high concentrations of carbon dioxide and can grow normally under semi-anaerobic conditions, but the fruiting body differentiation and growth stage requires a large amount of oxygen. Different varieties have different tolerances to carbon dioxide, so when cultivating oyster mushrooms, varieties with strong adaptability to carbon dioxide should be selected as much as possible. In large-scale production, ventilation and air exchange should be strengthened in the later stage of spawn running.
(5) Light
Oyster mushroom mycelium can grow normally in darkness, but fruiting body differentiation and development require a certain amount of scattered light. Direct light and strong light make it difficult to form fruiting bodies. If light is insufficient, the number of primordia decreases, the differentiated young fruiting bodies have slender stipes and small caps, and there are many deformed mushrooms. The cap color of oyster mushrooms is closely related to light intensity. If light is insufficient, the color is lighter; for example, golden-top Pleurotus only shows a golden-yellow cap under 300 lx of light. If the light intensity is below 100 lx, the cap is pale yellow, and at 10 lx the cap is white.
(6) pH
Oyster mushrooms have a fairly wide range of adaptability to pH and can grow at pH 3-9, but 5.5-6.5 is most suitable. Generally, when people mix ingredients according to the formula, the natural pH can meet the growth and development needs of oyster mushroom mycelium. During growth and development, oyster mushrooms produce organic acids such as acetic acid, succinic acid, and oxalic acid through metabolism, causing the substrate pH to gradually decrease. Under alkaline conditions when using rice straw as substrate, by the time fruiting bodies form, the pH has dropped to 4.8-5.5. In addition, the pH of the medium also decreases after sterilization, so when preparing the substrate, it is best to adjust the pH to 7-8, as this slightly alkaline environment also helps prevent the occurrence of competing microorganisms.
III. Cultivation techniques
Oyster mushrooms were formerly often cultivated on short logs, but at present substitute material cultivation is mainly used.
Substitute material cultivation refers to the method of using by-products from agriculture, forestry, and industry (such as sawdust, cottonseed hulls, rice straw, waste cotton, distiller's grains, etc.) as the main material, adding certain auxiliary raw materials to prepare a substrate, and using it to replace traditional log or timber cultivation of various edible fungi. (Definition)
Substitute material cultivation of edible fungi can broaden the sources of substrate and comprehensively utilize agricultural and forestry by-products and residues, turning fibrous materials that cannot be directly eaten and have low economic value into high-nutrition food through the growth and use of edible fungi. This not only saves raw materials, fully utilizes resources, and turns waste into treasure, but also resolves the contradiction between edible fungus cultivation and mountain forest tending, thereby effectively expanding the cultivation area and accelerating the development of edible fungus production. (Function)
Substitute material cultivation can be divided according to the treatment of the substrate into three types: cooked-material cultivation, fermented-material cultivation, and raw-material cultivation. According to the cultivation container, it can be divided into bottle cultivation, bag cultivation, block pressing cultivation, box cultivation, and large-bed cultivation. According to the cultivation site, it can be divided into outdoor cultivation and indoor cultivation. Outdoor cultivation can be divided into sunken-bed cultivation, trench cultivation, open-field cultivation, and tree-shade cultivation, etc. (Methods)
Although there are many ways to cultivate oyster mushrooms, they are related to one another. Once you master one method, you can understand the others by analogy. Here the focus is on bag cultivation of oyster mushrooms.
Bag cultivation: short for bag-style cultivation, also called space bag cultivation. It refers to the method of cultivating edible fungi in heat-resistant plastic bags and is also the main method of substitute material cultivation for wood-rotting edible fungi. According to whether the substrate has undergone heat sterilization, it is divided into cooked-material bag cultivation and raw-material bag cultivation.
Bag cultivation of oyster mushrooms can make full use of space, reduce the land area occupied, and make full use of different facilities for mycelial incubation and fruiting cultivation. It helps control contamination by competing microorganisms and damage from diseases and pests, and increases the success rate of cultivation. It is currently the most widely used cultivation method.
(I) Cooked-material bag cultivation
Cooked-material bag cultivation is the basic method for cultivating oyster mushrooms and one of the most important methods for cultivating other wood-rotting edible fungi. Its advantages are that the amount of spawn used is small, the nutrients in the substrate are easily absorbed, spawn running is not easily affected by the external environment (it can also run at higher temperatures), the yield is high, and diseases and pests are relatively easy to control. Its disadvantages are that inoculation and sterilization require a large amount of work, production costs are high, fuel consumption is high, and due to the limitation of sterilization capacity, large-scale production in a short time is difficult.
1. Spawn preparation
According to local climatic conditions and the type of substrate selected, choose excellent varieties suitable for local cultivation, and produce a large amount of cultivation spawn according to conventional spawn-making methods, sowing time, and production scale. Generally, cultivating 1 t of raw material requires preparing 8 bottles of stock spawn.
2. Determination of cultivation season
According to the biological characteristics of the variety, reasonably determine the sowing period of oyster mushrooms. Usually, according to the characteristics of oyster mushrooms, the inoculation period is calculated by counting back 30-40 d from the initial fruiting period, and then corresponding adjustments are made according to the specific market and production conditions.
3. Substrate selection
According to the sources of the main local edible fungus raw materials and the adaptability of the cultivated varieties to the substrate, select suitable raw materials as the main ingredient. Then use a scientific formula to prepare the substrate reasonably.
Oyster mushroom substrate formulas: see the textbook and related materials.
(1) Cottonseed hulls 98%, sucrose 1%, gypsum powder 1%.
(2) Cottonseed hulls 94%, rapeseed cake 5%, gypsum powder 1%.
(3) Cottonseed hulls 88%, rice straw fragments 10%, superphosphate 1%, gypsum powder 0.5%, lime 0.5%.
(4) Corncobs (or corn stalks, chopped rice straw) 74%, wheat bran or rice bran 24%, superphosphate 1%, gypsum powder 0.5%, lime 0.5%.
(5) Sorghum hulls 46%, sorghum hull powder 35%, wheat bran 15%, gypsum powder 1%, superphosphate 1%, lime powder 2%.
(6) Sawdust (broadleaf tree sawdust) 78%, wheat bran or rice bran 20%, sucrose 1%, gypsum powder 1%.
(7) Sawdust 83%, wheat bran or rice bran 15%, sucrose 1%, urea 0.4%, potassium dihydrogen phosphate 0.2%, lime 0.4%.
(8) Bagasse 70%, wheat bran or rice bran 28%, gypsum powder 2%.
(9) Bagasse 90%, wheat bran 6%, calcium-magnesium phosphate fertilizer 2%, gypsum powder 2%.
(10) Peanut shells, sunflower stalks, hemp stalks, etc., crushed into fragments by machine before use. Material fragments 75%-85%, wheat bran 10%-15%, sucrose 1%, urea 0.5%, superphosphate 2%, gypsum powder 1%.
4. Treatment of the substrate
The selected raw materials must be properly treated according to their properties before use. Rice straw stems have a waxy layer on the outside, which is not conducive to decomposition by mycelium, so manual cutting, mechanical crushing, and pile fermentation are generally used for treatment. Wheat straw stems are hard and have an even thicker waxy layer, so a feed grinder is generally used, but a specially made iron sieve with a mesh diameter of about 1 cm should be installed to crush it into short filamentous pieces. Corncobs should be mechanically or manually crushed to peanut-size pieces. Sawdust is generally processed into relatively large particles.
5. Preparation of the substrate
(1) Weighing materials: Weigh the prepared raw materials according to the proportions specified in the formula.
(2) Mixing materials: When preparing, mix the main materials such as cottonseed hulls, rice straw, and corncobs evenly with water-insoluble auxiliary materials such as wheat bran and rice bran, and add substances such as sugar in the form of an aqueous solution. Mix evenly, and turn the pile several times so that the substrate fully absorbs water.
(3) Adjusting water content: Adjust to a suitable water content according to the different material properties of the substrate. Generally follow the "three high and three low" principle, namely: ① If the substrate particles are relatively large or relatively dry, the water should be more; otherwise it should be less; ② On sunny days, water evaporation is high, so the water content should be slightly higher, while on cloudy days it should be lower; ③ If the mixing site has strong water absorption, the water content should be adjusted higher; otherwise it should be adjusted lower. When mixing cottonseed hull substrate, pick up a handful of the mixed raw material and squeeze it tightly; if water seeps out from between the fingers and drips without forming a line, the water content is about 65%; if only water marks appear, the water content is about 60%. In addition, after mixing, the material must be piled up to allow water to fully penetrate the raw materials.
(4) Measuring pH: After mixing, measure the pH with pH test paper. Generally pH 7-7.5 is suitable. If it is too alkaline, use citric acid to adjust it; if it is too acidic, use lime powder to adjust it.
6. Bagging and sterilization
Use plastic bags with a width of 22-24 cm and a length of 40-50 cm.
(1) Bagging
Generally, bag cultivation should allow mushrooms to emerge from both ends of the bag. Before filling, first tie one end of the bag with a collar ring, paper, and string to save time during filling; this work should be prepared in spare time from mushroom growing. The specific method is to put a collar ring on one end of the cut tube material, then fold the bag opening down over the collar ring, cover it with a layer of kraft paper, and tie it with thin string or a rubber band. When filling, the tightness should be appropriate. Generally, fill while pressing down with your hand. When filling to 5-6 cm from the bag opening, stop filling, gently press the surface flat with your hand, poke a hole in the middle of the bagged material with a pointed wooden stick about 2.5 cm in diameter, and then seal the bag opening. When filling, it should not be too tight; if too tight, the bag is easily burst by heat expansion after sterilization, and air permeability is too poor, so mycelial growth is too slow. It also should not be too loose; if too loose, many gaps are left between the material and the bag wall, which easily leads to fruiting all around the bag, causing a waste of nutrients. It is best if the bag is straight rather than bent after filling, and the material at both ends is slightly tighter than in the middle.
(2) Sterilization
Filled bags should not be left for long and should be sterilized within 4 h. This is especially important in hot seasons; otherwise, under high temperatures microorganisms multiply rapidly in the substrate, and it quickly spoils. In large-scale production, atmospheric steam sterilization is generally used. When the bags enter the atmospheric sterilization chamber, they should be stacked well, not too crowded, and steam channels should be left so that steam can circulate within the chamber and avoid dead corners in sterilization.
7. Inoculation
After sterilization, put the bags into the inoculation room while hot to cool, then fumigate and disinfect according to the inoculation room space using chemicals. When the temperature of the bags drops below 28°C, inoculation can begin. Sterilized bags should not be left too long, otherwise the probability of contamination by competing microorganisms increases.
When inoculating, discard the spawn at the bottle mouth and use tweezers to take out the spawn and inoculate it into the bags. During inoculation, it is best to work in groups of 2-3 people, continuously opening the bag, inoculating, and sealing. The whole process must be strictly aseptic, movements should be quick, and the exposure time of the bag opening should be minimized as much as possible to prevent contamination by competing microorganisms.
8. Spawn running
After inoculation, the bags (called spawn bags) should immediately be moved into the incubation room for spawn running. So-called spawn running refers to the process of creating suitable environmental conditions to promote the normal growth of mycelium in the spawn bags. During spawn running, the main tasks are temperature regulation, humidity control, ventilation, and prevention of contamination by competing microorganisms. Sowing at the right time and making full use of natural temperature for spawn running are very important in production. The stacking form of the spawn bags in the incubation room depends on weather conditions. When the temperature is high, they should be stacked sparsely, and the number of layers should not be too many, which helps dissipate heat; otherwise, mushroom burning may occur. When the temperature is low, they can be stacked thicker, effectively using the heat generated by the spawn bags themselves to raise the temperature and promote normal mycelial growth. Generally speaking, the temperature inside the spawn bags is 2-3°C higher than in the incubation room. In management, the temperature changes within the pile should be observed frequently, especially in hot seasons.
(1) Regulation of temperature and humidity in the incubation room: The incubation room temperature should preferably be controlled at 22°C. When the incubation room temperature exceeds 28°C, doors and windows should be opened for appropriate ventilation to lower the room temperature. When the outside temperature is also very high, the stacked spawn bags should be spread out to lower the temperature of the bags as much as possible. The humidity of the incubation room is generally controlled at about 70%, and it is best to keep it a bit dry.
(2) Ventilation and air exchange: During mycelial growth, a large amount of oxygen is consumed and carbon dioxide is released, so ventilation and air exchange should be carried out in conjunction with regulating indoor temperature and humidity. When the temperature is high, ventilate in the morning and evening; when the temperature is low, exchange air briefly at noon.
(3) Checking spawn running: After inoculation, after culturing for 4-6 d under suitable temperature conditions, check bag by bag the inoculation quality and whether the spawn has survived. If the spawn has not germinated, re-inoculate. Also check whether the spawn bags are contaminated by competing microorganisms. If serious contamination is found, analyze the cause and deal with it promptly. The following situations usually occur in production:
① Infection from cultivation spawn: Its characteristic is that 3-5 d after inoculation, a large number of bags are infected, and the contaminating microorganisms are distributed around the spawn blocks and on the surface of the medium. The solution is to re-sterilize and re-inoculate the contaminated bags as soon as possible and strictly check spawn quality.
② Infection caused by incomplete sterilization: Its characteristic is that after 7 d from inoculation, the bags gradually become infected in large numbers, and mold colonies are distributed on the upper, middle, and lower surfaces of the bags. When the bags are opened, contaminating microorganisms are also present in the middle of the substrate. The solution is to re-sterilize and re-inoculate the contaminated bags.
③ Infection caused by improper inoculation operation: Its characteristic is that a small number of bags become infected, with mold colonies scattered in speckles on the surface of the substrate. This is infection caused by careless operation. First, the inoculation tools and hands were not strictly disinfected; second, the inoculation box (room) was not thoroughly disinfected, resulting in a high density of contaminating spores; third, the sealing paper was not tightly sealed, and during handling and culturing external contaminants invaded the substrate through gaps at the bag opening seal. The solution is to strictly follow aseptic operating procedures.
④ Infection during incubation: In the middle of incubation, when the oyster mushroom mycelium has already grown 5-8 cm, batches of bags appear with contamination in the middle. The usual cause is contamination caused by excessively high substrate temperature or water content, or by tearing the plastic bags during sterilization, inoculation, and incubation. In the incubation room, attention should be paid to eliminating mice and cockroaches, and care should be taken during handling to prevent puncturing the bags.
9. Fruiting management
Under suitable temperatures, the mycelium usually fully colonizes the bags in 25-35 d. A few days later, the mycelium on the surface of the bags begins to secrete yellow water, and shortly afterward small primordia begin to appear on the surface of the bags. At this time, the bags should be moved into the mushroom house or outdoor fruiting site for fruiting management.
(1) Mushroom house: Mushroom houses for cultivating oyster mushrooms are diverse; they are buildings that can provide for the production of edible fungus fruiting bodies, such as above-ground mushroom houses (empty rooms, above-ground greenhouses, etc.), underground mushroom houses (cellars, air-raid shelters, etc.), and semi-underground mushroom houses (semi-underground mushroom sheds, trenches, etc.). Above-ground mushroom houses are good for ventilation and light transmission, but they should not be too large, otherwise management is inconvenient (uneven ventilation and air exchange, unfavorable for moisture retention, and temperature and humidity are hard to control). They also should not be too small, otherwise the utilization rate is too low and the cost is too high. Underground mushroom houses are warm in winter and cool in summer, convenient for moisture and heat retention, and convenient for year-round production, but ventilation conditions are poor and diseases and pests are likely to occur. Semi-underground mushroom houses are the most ideal, as they can both retain heat and moisture and overcome the poor ventilation of underground mushroom houses.
The best mushroom house for cultivating oyster mushrooms is a semi-underground plastic greenhouse. The main advantages of a semi-underground mushroom shed are low cost, good heat and moisture retention, and convenient cultivation management. It is more suitable for the growth and development of oyster mushrooms, so the yield is high, the return on investment is high, and the economic benefit is very significant. Its construction method is: dig 0.8-1 m deep, then build a 1 m high earth wall around it, with the thickness of the earth wall mostly 0.6-0.8 cm. The width of the shed is mostly 3-3.5 m, and the length is mostly about 20 m. Then use bamboo poles as thick as a thumb to build arches every 1 m. To increase strength, fix the arches together with bamboo poles, and support them below with two thicker bamboo poles, with a distance of 0.8 m between the two support poles, and cover the top with plastic greenhouse film and straw curtains. If the greenhouse film is an anti-drip film, the effect is even better and the investment is more reasonable; this film can be used for 2 years. When digging the soil, it should not be too shallow or too deep. Too shallow is unfavorable for heat and moisture retention in winter; too deep results in poor ventilation and air exchange and easily leads to deformed mushrooms and the occurrence of diseases and pests. A mushroom shed built in this way costs less than 1000 yuan each, yet can hold 2 t of raw material.
(2) Management during the fruiting period is mainly carried out from the following aspects: ① Temperature control: Generally, after the mycelium is fully colonized, a temperature below 20°C and as large a temperature difference as possible should be provided to help stimulate the formation of primordia. The temperature during oyster mushroom fruiting body development affects the growth speed of the mushroom buds and the color of the cap. For example, Florida and Za 17 are white medium-temperature varieties; when fruiting above 20°C, the cap is white, and at low temperatures below 15°C, the cap color turns yellowish brown. Generally, the lower the temperature, the slower the fruiting body grows, but the cap is thicker, the cap color is darker, and the quality is better. When the temperature is high, the fruiting body grows quickly, the color is light, the flesh is thin, loose, the stipe is long, it breaks easily, and the quality is poor.
② Humidity management: During the fruiting stage, pay attention to water management every day, maintain a relative air humidity of 90%-95%, and use a sprayer to spray water on the bags, the space, and the ground. When the temperature is high or the air is dry, water can be splashed on the ground to increase the humidity in the air and keep the ground moist.
③ Ventilation and air exchange: During the growth and development of oyster mushroom fruiting bodies, oxygen consumption is high and they are sensitive to carbon dioxide concentration. When indoor ventilation is poor, it easily causes deformed mushrooms with small caps and long stipes. When ventilating the mushroom house, do not ventilate too vigorously, so as not to dry out the mushroom buds.
④ Light control: During the fruiting body growth period, attention should also be paid to light. If the cultivation site (room) is too dark, the formed mushroom buds easily develop into branch-like deformed mushrooms, and it also affects the color of the cap, so the cultivation site should have appropriate scattered light.
10. Later-stage management
Oyster mushroom fruiting flushes are distinct. After each flush is harvested, the dead mushrooms and stipes remaining at the bag opening should be cleaned away to prevent rotting and attracting diseases and pests, then tidy the mushroom site, stop spraying water, and lower the humidity of the mushroom site to help the oyster mushroom mycelium recover growth and accumulate nutrients. After 7-10 d, begin spraying water again, still following the management method for the first fruiting flush.
After oyster mushrooms have produced 2-3 flushes, the bags become soft due to lack of water, most nutrients have been consumed, and the pH also decreases somewhat due to the production of metabolic products, so fruiting becomes sparse. If primordia are again induced, they can still fruit, but the mushrooms are small and uneven, and although the number of flushes is greater, the economic benefit is low. Therefore, to further increase yield, it is necessary to supplement nutrients, water, etc., and even change the fruiting method. Commonly used methods include soaking the bags to replenish water, using a water injector to replenish water, casing soil to replenish water and nutrients, and mud-wall cultivation, among which the mud-wall method has a better effect.
The specific operation of the mud-wall fruiting method is as follows: First, after the bags have produced several flushes, scratch the surface of the substrate and remove the bags, then mix clean water containing 1% gypsum powder and 1% superphosphate with soil to make mud. The soil used is best garden soil or clean soil with the surface layer scraped off. When mixing the mud, sometimes fungicides such as carbendazim, kemeiling, or quicklime are also added to inhibit the growth of contaminating microorganisms in the soil. Use this mud to build the bag-removed spawn bags up like a wall, one layer of mud and one layer of bags, building 4-8 layers, then coat both sides of the mushroom wall with mud to form a mud wall, and make a water trough on top of the wall or directly poke a hole at a certain interval for use when adding water. This treatment allows the bags to be fully supplied with water, nutrients, and a large amount of mineral nutrients from the soil, thereby producing oyster mushrooms with larger fruit bodies, thicker caps, and higher yield. Generally, after making the mud wall, the bags can continue to produce 3-4 more flushes. One point must be paid great attention to in mud-wall fruiting: do not spray water too heavily and get mud onto the mushrooms, thereby affecting their sale. Finally, the mud wall after fruiting is finished, when dumped in the field, is also a very good mushroom fertilizer.
(II) Raw-material cultivation
Raw-material cultivation is the method of cultivating edible fungi using substrate that has not undergone any heat sterilization, with disinfection by mixing in chemicals. It is the main method for large-scale oyster mushroom cultivation in northern China and in low-temperature seasons in the south.
The main advantages of raw-material bag cultivation of oyster mushrooms are: the substrate does not need high-temperature sterilization; inoculation is open and does not require special facilities; the method is simple and easy to promote; it saves labor, time, and energy and can carry out large-scale production in a short time without being limited by sterilization capacity; management is extensive, environmental requirements are not strict, investment is low, and results come quickly; spawn running can be carried out indoors or outdoors, etc. Its disadvantages are: it is not suitable for cultivation in high-temperature areas and hot seasons; the mycelium is easily gnawed and damaged by larvae hatched from eggs in the substrate; it has stricter requirements for the freshness and type of substrate; the water content of the material must be appropriate when mixing; a large inoculation amount is required; and disinfectants such as carbendazim or kemeiling must be mixed into the material.
There are many ways of raw-material cultivation. Currently commonly used ones include bag cultivation, indoor bed cultivation, outdoor sunken-bed cultivation, trench cultivation, semi-underground mushroom shed cultivation, and intercropping with crops.
The most widely used is bag cultivation. The main steps of bag cultivation are basically the same as for cooked-material cultivation, except that the substrate does not undergo the sterilization process. The specific method is as follows:
1. Spawn preparation
For raw-material cultivation, low-temperature varieties with strong stress resistance should be selected. The spawn used is required to have vigorous mycelial growth and a very strong ability to decompose cellulose and lignin. The amount of spawn prepared should be higher than for cooked-material and fermented-material cultivation. The sowing amount is generally 10%-15%. For 1 t of raw material, about 20 bottles of stock spawn are needed to make cultivation spawn before use.
2. Determination of cultivation season
Raw-material cultivation of oyster mushrooms should be carried out when the temperature is relatively low and the humidity is relatively low, because at this time there are fewer pathogenic microorganisms and pests in the environment and the cultivation success rate is higher. In the south, it is generally chosen from the end of November to early March of the following year; in the north, generally from early October to April of the following year.
3. Raw material selection and treatment
Raw-material cultivation has stricter requirements for raw materials. Mostly fresh cottonseed hulls, corncobs, etc., free of mold and insect eggs, are used. The amount of nitrogen-containing substances added to the formula should be appropriately reduced to reduce contamination by competing microorganisms. The treatment of the material is the same as above.
4. Mixing materials
When mixing materials for raw material cultivation, the water added must be strictly controlled, generally better to use less rather than more compared with cooked material cultivation. After mixing the culture material well, spray in omethoate to kill insects, then add 0.1% carbendazim or kremei. The usual method of addition is 0.1%-0.2% of the dry weight of the culture medium, dissolved in an appropriate amount of water and added by spraying, stirring while spraying.
5. Bagging and inoculation
For raw material inoculation, layer spawning is mostly used. First tie one end of the bag with string, open the other end, place a layer of spawn at the bottom of the bag about 1 cm thick, then fill with culture material; when filled to 1/3 of the bag length, sow a layer of spawn about 1 cm thick, then fill with culture material to 2/3 of the bag length, inoculate another layer of spawn as above, fill with culture material to the bag opening, leaving enough to tie the bag tightly, and finally sow a layer of spawn on the surface of the material, evenly scattered, in the same amount as the bottom layer; then make a hole in the center of the bag and tie the bag opening tightly. In this way, a culture bag with 4 layers of spawn and 3 layers of material is made. To shorten the colonization time, or when the plastic bag is relatively long, sow with 5 layers of spawn and 4 layers of material. The amount of spawn used is about 15% of the dry material weight.
For raw material bag cultivation, inoculation should be carried out where the surrounding environment is as hygienic and dust-free as possible, and flies and other pests should be kept away as much as possible to reduce the contamination rate. Raw material cultivation is more likely to succeed in a new site.
6. Colonization
The most critical step in raw material cultivation is colonization, and the main factor affecting colonization is temperature, followed by ventilation and air exchange.
After bagging and sowing, move the bags to a disinfected culture room or site; sometimes they can also be colonized directly outdoors under shade, placing the bags flat on the ground or on shelves. To make full use of space, the bags are often stacked in several layers on the ground to form a mushroom wall; the number of layers should be determined by the air temperature of the culture environment. At 0-5°C, 4-6 layers can be stacked; at 5-10°C, 3-4 layers; at 10-15°C, 2 layers; above 15°C, generally no stacking.
In addition, during the early stage of colonization, the stacks should be turned promptly to prevent the material temperature from rising too fast or too high, which could kill the spawn or cause contamination by weed molds.
In raw material cultivation, colonization must be carried out at low temperature, not above 20°C, which helps prevent contamination by weed molds. Generally, only when the material temperature is relatively stable can higher mushroom walls be stacked. The number of times to turn the stacks depends on the number of layers of bags stacked and the environmental temperature. Generally, during the early stage of colonization, stacks are turned more frequently, once every 2 d; after ten-odd days, once every 5-6 d. Generally, the bags are fully colonized in 22-30 d.
If the temperature is too low, the colonization time is slightly prolonged.
During raw material colonization, one issue requires great attention: ventilation and air exchange. As the mycelium grows rapidly, ventilation and air exchange should be continuously strengthened, and culture should be carried out under light-shaded conditions.
When colonizing in the same environment, bags of raw material cultivation are generally faster than those of cooked material cultivation, especially much faster at low temperatures. This is because in raw material cultivation the sowing amount is large and the culture material can ferment and heat up.
Therefore, in large-scale production, we use raw material cultivation only in seasons with low temperatures, and use cooked material cultivation in seasons with high temperatures.
7. Other
The fruiting management, harvesting and later management of raw material cultivation are basically the same as those of cooked material cultivation described earlier.
(3) Fermented material bag cultivation
Fermented material bag cultivation, also called semi-cooked material cultivation, refers to a method in which the culture material is not sterilized at high temperature but relies on pile fermentation, using pasteurization to kill most of the heat-intolerant weed molds and pests before cultivation.
Cultivating oyster mushrooms with fermented material has the characteristics of a simple cultivation process, low investment and a low contamination rate by weed molds.
1. Spawn preparation: same as raw material cultivation.
2. Determination of cultivation season
The raw materials for fermented material cultivation are not sterilized; only part of the harmful microorganisms are inhibited and killed during fermentation. Therefore, the cultivation period should avoid high-temperature seasons to control the growth and reproduction rate of weed molds. Cultivation is suitable from late autumn to early spring, with late autumn being the best. Generally, in autumn, cultivation begins in November in the south and after mid-September in the north; in spring, it begins in early February.
3. Selection of culture material
The culture material should be fresh, mold-free cottonseed hulls, corncobs, straw powder, etc. When preparing the culture material, 3% lime powder should be added to the formula to regulate the organic acids produced during fermentation and inhibit the growth of weed molds, with the pH controlled at 7.5-8.5.
4. Pile fermentation
Pile fermentation, also called composting, has long been used in button mushroom cultivation. In recent years it has also been applied to the treatment of oyster mushroom raw materials.
In edible mushroom production, the most harmful weed molds are Trichoderma, Penicillium and Aspergillus. The conidia of these weed molds germinate and grow best at 30°C; when the temperature rises to 40-50°C, the spores do not germinate. Weed mold spores are highly resistant to heat because when the spores are dormant, the physiological activity of enzymes almost stops and metabolism is at its lowest level. The water in the cells exists in a bound state, with very little free water, and proteins are not easily denatured by heat. They can survive for a long time at higher temperatures, and weed mold spores must be killed under high-pressure steam or high temperature. If the weed molds are in the vegetative growth stage, the physiological activity in the cells is vigorous and the free water content is high, so after heating, the cell proteins are very easily denatured and coagulated, causing death. Using this principle, during the pile fermentation of the culture material, the temperature is controlled to rise from low to high, inducing the weed mold spores to germinate in large numbers and form mycelium, and then the gradually rising fermentation temperature is used to kill the weed mold vegetative bodies, thereby achieving the purpose of controlling the weed mold population.
Carrying out pile fermentation of the culture material well is an effective measure to prevent weed mold contamination. However, during pile fermentation of the culture material, because the depth of the pile differs, the temperature of each layer is also inconsistent. In addition, if turning is uneven during operation, weed molds in the low-temperature layer are not killed and will multiply greatly after inoculation, harming mushroom growth. If the fermented culture material is then sterilized at high temperature for another 2-3 h, the effect will be better. Environmental temperature is also an important factor affecting fermentation and is directly related to the rise in pile temperature. When fermenting culture material in a low-temperature season, the air temperature is low and the pile temperature is not easy to raise, so the pasteurization effect cannot be achieved; other disinfection methods should be adopted to inhibit the growth of weed molds. Therefore, during fermentation of the culture material, two issues should be noted: first, the temperature should rise quickly and be high; second, when turning the pile, the inner material should be turned outward and the outer material inward, to avoid uneven fermentation or inclusion of raw material, and the quality of fermentation must be ensured.
The specific steps of pile fermentation of the culture material include pre-wetting, building the pile, turning the pile and quality inspection.
(1) Building the pile
According to the culture material formula, mix the various raw materials evenly, add water to pre-wet, adjust the moisture, then build the pile. The pile is 1 m high, 1.5-2 m wide, and the length is unlimited. The four sides should be steep; after building, pat the surroundings lightly, then insert some vertical air holes into the pile with a thicker wooden stick, reaching straight to the bottom of the pile, to improve ventilation inside the pile. To prevent sun and rain, cover the top of the pile with straw curtains; if covered with plastic film, it should be opened at regular times to facilitate ventilation and air exchange.
(2) Turning the pile
After building the pile, generally within 2-3 d the temperature inside the pile rises rapidly above 55°C, and can even reach above 65°C. In principle, the pile can be turned only after the temperature inside has been kept above 60°C for 6-8 h. When turning the pile, a large amount of snowflake-like white actinomycetes can be seen on the cross-section of the pile; these actinomycetes play a role in raising the temperature and degrading the culture substrate. Turn the pile 1-2 times in total. In order to make the whole pile ferment evenly under aerobic conditions, turning must be done carefully and thoroughly, mixing the outer and inner layers evenly and swapping their positions with the middle layer. After each turning, because oxygen is replenished, the material temperature rises again, killing weed molds and pests in the pile; a few pests will crawl out and stay on the surface of the pile, and the surface can be sprayed with 800-fold dichlorvos solution, then immediately covered with plastic film and fumigated for 12 h before dismantling the pile. The fermented culture material reduces the incidence of pests and diseases and creates good conditions for oyster mushroom growth.
(3) Quality inspection of the piled material
Well-fermented culture material has a normal smell, is not sour, not stinky, not sticky, has no mold, and has moderate moisture. When the material is on the dry side, large amounts of white actinomycetes often appear. Clean water should be used to adjust it, or 1% lime water can be used to adjust it to suitable moisture, and then it can be bagged.
5. Bagging and sowing
The bagging and sowing of fermented material cultivation are basically the same as raw material cultivation; sometimes, to promote rapid mycelial growth, 2-3 holes can be made during punching to facilitate ventilation.
6. Colonization and fruiting
Generally, colonization is carried out at low temperature, with the environmental temperature not exceeding 24°C, which can effectively control the growth of weed molds. During colonization, turn the pile about once every 7 d to make the bag temperature uniform and the mycelial growth neat. At the first turning, generally prick holes with a needle at the inoculation site to facilitate air permeation. During colonization, inspections should also be carried out frequently.
Generally, about 30 d after inoculation, the mycelium can fully colonize the bag; when primordia appear on the surface of the material, it indicates that the mycelium has reached physiological maturity, and the bags can be moved to the cultivation site for fruiting management.
7. Harvesting and later management
The harvesting and later management of oyster mushrooms in fermented material bag cultivation are basically the same as those in cooked material bag cultivation and raw material bag cultivation.
IV. Harvesting and grading
(1) Harvesting
The harvesting time of oyster mushrooms is mainly based on the degree of maturity of the fruiting body, combined with factors such as fruiting temperature, sales situation and consumption purpose.
Generally, oyster mushrooms mainly for fresh sale should be harvested in the early and middle stages of fruiting body maturity, when the edge of the cap has not yet fully expanded and spores have not been discharged. At this time, the cap edge has good toughness, a low breakage rate, thick and tender flesh, a firm and soft stipe, low fiber, a good product appearance, is suitable for storage, and has high commercial value.
Oyster mushrooms used for processing into canned products are harvested in the early mature stage of the fruiting body.
Harvesting too early gives low yield; harvesting too late causes the cap to curl back and crack, the stipe to harden, the flesh to age, the fresh flavor to diminish, and large amounts of spores to be discharged, reducing yield and thus affecting the commercial value of oyster mushrooms. Therefore, reasonable and timely harvesting is very important.
Generally, water should be sprayed once 3-4 h before harvesting so that the cap remains fresh and clean and is not easy to crack, but the amount of water sprayed should not be too large. When harvesting, usually one hand holds down the culture material at the base of the stipe, and the other hand pinches the stipe and gently twists it off, but it must not be pulled hard, so as not to lift the culture material and affect the next flush of fruiting. If conditions permit, it is best to hold the stipe with one hand and gently cut the mushroom off at the base with a knife with the other hand.
(2) Grading
In the domestic market, oyster mushrooms are mainly sold fresh; there is no strict grading standard for fresh oyster mushrooms on the market, consumers purchase by quality at negotiated prices, and there is no unified price standard either.
China's oyster mushroom exports are mostly salted; the foreign trade departments have certain grading standards, dividing them into three grades according to the diameter of the cap of salted mushrooms, the length of the stipe, the color of the cap, the thickness of the flesh and the breakage rate:
Grade 1: oyster mushroom cap diameter 1-5 cm, natural mushroom color, thick cap flesh, mushroom breakage rate less than 5%, no impurities or mold.
Grade 2: cap diameter 5-10 cm, other requirements the same as Grade 1 standards.
Grade 3: cap diameter greater than 10 cm, breakage rate less than 5%, no impurities or mold.
Click to get more oyster mushroom cultivation techniques
Click to get more edible mushroom cultivation techniques