Detailed Explanation of the Cultivation Methods and Technical Key Points for White Golden Needle Mushroom
How is the white golden needle mushroom cultivated? Experienced netizens are asked to help introduce the detailed steps. Golden needle mushroom is divided by color into three major categories: yellow types, light-colored types, and white types. The white golden needle mushroom is a type of golden needle mushroom. Its fruiting body is pure white and it has extremely strong cold resistance. It can fruit at below 15°C, and the fruiting quality is best when fruiting below 10°C. The white...
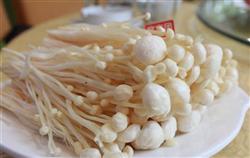 How is the white golden needle mushroom cultivated? Experienced netizens are asked to help introduce the detailed steps
Golden needle mushroom is divided by color into three major categories: yellow types, light-colored types, and white types. The white golden needle mushroom is a type of golden needle mushroom. Its fruiting body is pure white and it has extremely strong cold resistance. It can fruit at below 15°C, and the fruiting quality is best when fruiting below 10°C. The white golden needle mushroom is suitable for production in solar greenhouses in the winter and spring seasons in northern regions, and generally mainly supplies the winter and spring market. Therefore, Zhongdiwang has compiled the cultivation steps for the white golden needle mushroom, listed in detail below for netizens' reference.
Step 1. Suitable cultivation time for the white golden needle mushroom:
Most white golden needle mushrooms belong to low-temperature varieties. The optimum temperature for mycelial growth is 18-20°C, and the optimum temperature for mushroom formation is 6-8°C. Accordingly, white golden needle mushrooms are generally suitable for cultivation and fruiting from October to early March of the following year.
Step 2. Preparation of the culture material for the white golden needle mushroom:
The culture material for the white golden needle mushroom is best made with sawdust and rice bran, and finely crushed willow and fir sawdust are most suitable. Before use, it is best to subject it to a stacking treatment of more than 1 year. During stacking, water should be added frequently to keep the sawdust moist, so as to remove substances in the sawdust that are harmful to mycelial growth.
The proportion of coarse to fine sawdust should be reasonable: generally 2-3 mm in diameter accounts for 20%, 1-2 mm accounts for 40%, and below 1 mm accounts for 40%. If there is too much coarse sawdust, the medium dries easily; if there is too much fine sawdust, permeability is poor, affecting the speed of mycelial growth.
Rice bran contains all the nutrients needed for the growth and development of the white golden needle mushroom, but rice bran with high starch content and defatted rice bran have already deteriorated, so it is best not to use them. The volume ratio of sawdust to rice bran is 3:1. For each cubic meter of mixed material, add about 350 kg of water, and the water content of the culture material is 63%. The culture material should be stirred evenly so that it is fully moistened.
Step 3. Bottling and sterilization of the culture material:
Use 800 ml plastic bottles for filling the material, with about 480 g of material per bottle. The surface of the culture material should be compacted, and it should be ensured that the culture material loaded into each bottle is equal, with consistent looseness and tightness and consistent height. This is the prerequisite for uniform colonization in the future, simultaneous fruiting, and consistent stipe length.
After the bottle caps are sealed, sterilization treatment should be carried out immediately. If left for too long (2-3 hours in summer), it will ferment. Sterilization can use either atmospheric pressure sterilization or high pressure sterilization. For atmospheric pressure sterilization, maintain it for 4 hours after the temperature inside the material reaches above 98°C; for high pressure sterilization, keep it at 120°C inside the material for 70 minutes. After sterilization is completed, place the bottles while hot in a disinfected cooling room, cool to 25-20°C, and inoculate promptly.
Step 4. Inoculation method for the white golden needle mushroom:
This is generally carried out in a sterile room. The ratio of spawn to culture material is 1:50. The spawn is required to cover the surface of the culture material, so that the mycelium can grow evenly and contamination by competing microorganisms can be effectively prevented.
Step 5. Cultivation of the white golden needle mushroom mycelium:
Transfer the inoculated bottles promptly to the cultivation room. The temperature should be controlled at 18-20°C, and the air humidity at 60%-70%. Generally, after about 2 days, the mycelium begins to germinate. Ventilate and exchange air 2 times per day, 30 minutes each time. After 20-25 days, the golden needle mushroom mycelium can fully colonize the material.
Step 6. Scratching of the white golden needle mushroom:
So-called scratching means using a scratching machine (or manual work) to remove the old spawn blocks and mycelial skin. Scratching enables the fruiting bodies to emerge neatly from the surface of the medium. Under general conditions, bottles with normal mycelial growth should be scratched first, and then those with poorer mycelial growth.
If there is obvious contamination, it is best not to scratch. Scratching methods include flat scratching, scraping, and air scratching. Flat scratching does not damage the material surface and only removes the old spawn; this method fruits early and produces many caps. Scraping removes the old spawn together with 5 mm of the surface layer of material (suitable for sawdust) in blocks; because it damages the mycelium, fruiting is late and the number of caps decreases, so it is generally not used. Air scratching uses a high pressure air stream to blow away the old spawn, and this method is the simplest.
Step 7. Method for promoting budding of the white golden needle mushroom
After scratching the white golden needle mushroom, budding should be promoted in a timely manner. At this stage, the temperature should be controlled at 12-13°C, giving sufficient low-temperature stimulation to promote primordium formation. However, during the first 3 days, the relative air humidity should still be maintained at 90%-95% so that the mycelium can recover growth. After that, because respiration becomes more active and the carbon dioxide content rises, ventilation should be gradually increased after the mycelium resumes growth. At the same time, the material surface should be prevented from drying out, and a humidifier should be used to increase humidity.
During budding promotion, stack 240 bottles per square meter. After about 7 days, mushroom buds like fish roe can be seen, and after about 12 days, the rudimentary form of fruiting bodies can be seen, and budding promotion is finished.
Step 8. Uniform cultivation and inhibition of the white golden needle mushroom:
Uniform cultivation is the transitional stage of inhibition treatment. The room temperature should be controlled at about 8°C, the air humidity at 85%-90%, and the air environment should be kept as close to the natural state as possible, so as to promote the buds to differentiate and branch under low-temperature conditions.
When the mushroom buds grow to 1 cm, transfer to the inhibition stage. Adjust the temperature to 4-6°C, the air humidity to 85%-90%, and the carbon dioxide concentration to below 0.10%. At the same time, provide blowing air and light (2-3 hours per day), to promote consistent stipe length, compact tissue, and milky white color in the golden needle mushroom.
Inhibition mainly uses a gentle breeze directed at the fruiting bodies. Place 150 bottles per square meter. Under low temperature and cold air blowing, although the fruiting bodies grow slowly, they are very neat, strong, and firm. When the fruiting bodies grow 3 cm out of the bottle mouth, they can be sleeved with a tube and transferred to the growth room.
Yield-increasing techniques for golden needle mushroom cultivation
Methods for breeding golden needle mushroom spawn