Detailed Guide to Yellow Peach Planting and Cultivation Techniques: Grow This Health-Boosting Fruit Like This
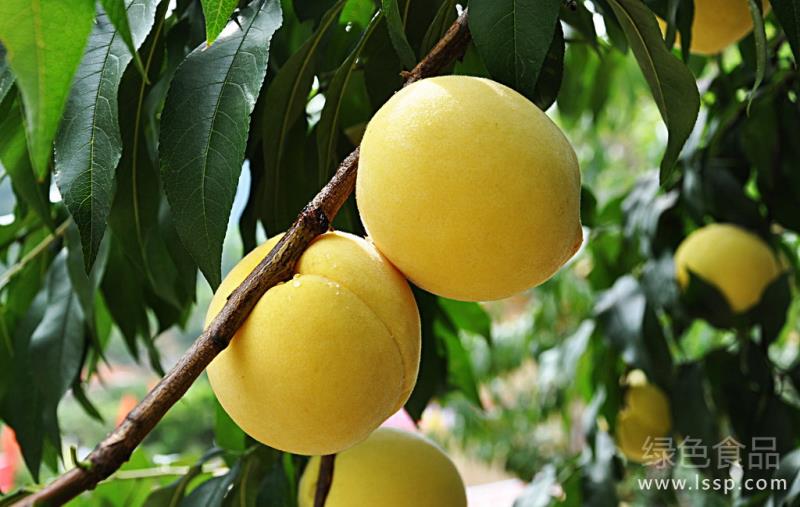
Yellow Peach
Yellow peaches are nutritious, golden all over, with fairly firm flesh and a sweet-and-sour taste, and are mainly used to produce peach slices, preserved peaches, canned peaches, and so on. Eating yellow peaches regularly can help with bowel movements, lower blood sugar and blood lipids, fight free radicals, remove dark spots, delay aging, and boost immunity, and it can also stimulate the appetite. Compared with other peaches grown for fresh eating, yellow peaches have a long fruiting period, high yields, a long storage period, relatively extensive management, and broad market demand, so growing yellow peaches is a good choice.
I. Peach Seedling Cultivation
1. Choose a good seedling-raising site
Choose land on high ground with ample sunlight and loose, fertile soil. Before sowing, plow deeply first, apply plenty of organic fertilizer, and dig drainage ditches well.
2. Cultivate rootstock seedlings (wild peach seedlings)
The seedlings used for producing 'Jinxiu' yellow peaches are generally grafted seedlings, and the rootstock is usually wild maotao (wild peach).
3. Grafting and seedling cultivation
There are two methods: the T-shaped insert grafting method and the bud-patch grafting method (this article focuses on the latter)
Advantages: easy to perform and suitable for large-scale grafting
II. Operating Procedure:
① Rootstock treatment: carried out from mid-August to the end of September
Cutting the rootstock
Cutting the rootstock: on the smooth side of the rootstock, use a grafting knife to cut away a strip of bark 2.5-3 cm long and about 3-3.5 cm wide, reaching down to the xylem
② Scion treatment:
Selecting buds: on the mother yellow peach tree, select vigorous vegetative shoot buds as scions, remove the leaves but keep the petioles
Cutting the bud: make a horizontal cut 0.5 cm above the bud down to the xylem, then at 2 cm below the bud cut upward through the xylem to the horizontal cut.
Attaching the scion: press the cut scion onto the cut on the rootstock, aligning the cambium layers.
③ Tying and unbinding
Use plastic film strips to tie the scion and rootstock together. After two weeks, check survival and unbind promptly.
III. Field Planting
1. Dig planting holes: planting holes 40-50 cm deep, about 40 holes per mu; apply 50 kg of organic fertilizer per hole, plus 1 kg of superphosphate, making sure there is one layer of fertilizer and one layer of soil; when the soil-and-fertilizer-filled planting hole is level with the ground, take soil from around the hole to make a planting mound 40-50 cm high, and wait to plant.
2. Dig drainage ditches
Set the bed width (row spacing) at 4.5-5 m, plant spacing at 4.5 m, ditch width at 40 cm, depth at 50 cm, and make the surrounding ditches and outlet ditches deep
3. Planting: ① Budded seedlings (seedlings grafted in September): the bud patch is plump, the stem is 0.5-0.7 cm thick, the main root is weak, the lateral roots are strong, there are many fibrous roots, and there are no root nodules. ② Finished seedlings (seedlings grafted in June): the seedlings are sturdy, the stem is 0.6 cm thick, and the training strip has 6-8 nodes of plump bud patches.
Disinfection: to prevent root nodules, before planting each hole can be disinfected with 2-3 jin of ammonium water.
Planting: carry out in late winter and early spring before budbreak, preferably finishing planting before the end of February. Planting depth should be 3-5 cm below the grafted part, with the bud patch facing the sun. After planting, water thoroughly to help the plant establish.
Setting up support poles: to prevent the seedling from swaying in the wind, insert a 50 cm bamboo pole beside the seedling and tie it securely.
Cutting the rootstock and pinching the tip: when the grafted bud grows to more than 40 cm, promptly cut off the rootstock, making a slanted cut 1 cm above the grafted bud. When the grafted bud grows to more than 60 cm, pinch the tip promptly to promote secondary shoot growth and prepare for developing the three main branches.
Yellow Peach
IV. Fertilization Management
① Newly planted seedlings must receive careful fertilizer management within 1-2 years to promote seedling growth, but fertilizer must be applied lightly and frequently. For young trees, vegetables can be interplanted during the spring and summer seedling-growing season to help increase soil vitality and improve the soil, but tall-stemmed crops must never be planted. In September-October, decomposed organic fertilizer can be applied deeply, at about 30 dan per mu, plus 50 jin of phosphate fertilizer, but by the early fruiting stage in the third year, fertilizer can be applied sparingly or not at all to control vegetative growth.
② Growing fruiting trees (trees in normal production) are fertilized twice a year: the first time in autumn after fruit picking and before leaf fall, called "post-harvest fertilizer"; the amount should be determined according to the growth of the yellow peach tree, with 40 dan of pig manure per mu plus 50 jin of phosphate fertilizer. The second fertilization is around the fruit pit-hardening stage, also called "fruit swelling fertilizer"; generally apply 40 dan of night soil per mu or 100 jin of yellow peach special fertilizer or imported compound fertilizer, usually within 3-4 days around July 10. Winter fertilizer is generally applied from mid-to-late September to early October.
V. Water Management
Yellow peach trees have very strict water requirements. During the plum rain season and summer typhoon rainstorms, drainage ditches must be dug well so that the ditches dry once the rain stops and no water accumulates. During the fruit swelling stage, water demand is high; if high temperatures and drought occur, drought relief irrigation must be carried out promptly. If continuous drought occurs in September, irrigation for drought relief is also needed to promote flower bud differentiation, so that flowering is normal the next year, the fruit set rate is high, and the yield is stable. In summer, the best time to irrigate is in the evening or early morning.
VI. Fruit Management
Yellow peaches drop flowers and fruit fairly seriously, with three physiological fruit drops in the whole year. The first physiological fruit drop occurs about 15 days after flowering; the second drop is from late May to early-to-mid June and is the pit-hardening drop, especially when young trees bearing fruit for the first time begin pit hardening.
Prevention methods: use bud thinning to suppress vigorous shoots; do not fertilize before flowering to prevent excessive shoot growth; in summer, carry out supplementary pruning and apply fertilizer appropriately; during the plum rain season, pay attention to drainage to prevent pests and diseases.
If the fruit set rate is too high, too many nutrients are consumed, which causes fruit drop, so fruit thinning must be carried out promptly. Fruit thinning can be done twice: the first time from late May to early June, removing obviously small fruit and overly dense fruit; the second time from mid-June to late June. The thinning standard is generally 4 fruit on long fruiting branches, 2-3 on medium fruiting branches, and 1 on short fruiting branches.
The suitable time for bagging 'Jinxiu' yellow peaches: generally mid-to-late June.
VII. Training and Pruning
1. Main branch training
The trunk height is about 40 cm, and three main branches are evenly arranged on the trunk, with an angle of 120 degrees between the main branches.
2. Lateral branch training
Each yellow peach main branch is generally equipped with 2 lateral branches, forming a "three main branches and six lateral branches" framework structure, with the first lateral branch arranged 60 cm from the base of the main branch.
3. Arrangement of fruiting branch groups
After completing the framework structure of three main branches and six lateral branches, the other branches mainly used for bearing fruit are collectively called fruiting branches.