Small chili peppers have a strong spicy taste and good market prospects. How do you grow pollution-free small chili peppers?
Small chili peppers are deeply loved for their strong spiciness, excellent quality and good storability, and market prices are promising. First, the editor will introduce the open-field pollution-free cultivation techniques for small chili peppers.
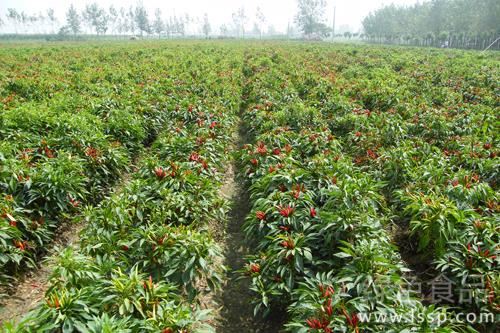
Small chili peppers
Variety selection.Choose Japanese facing-heaven chili varieties with strong disease resistance, heat tolerance, strong spiciness, medium fruit size, relatively thick flesh and good yield potential.
Suitable sowing time.Choose sandy loam soil with deep soil layers, fertile and loose soil and good drainage for open-field planting of small chili peppers. They can be cultivated in both spring and summer. For spring cultivation, sow seeds in a small arched shed in early January to raise chili seedlings, transplant in late April, and harvest for market from late June to before the first frost. For summer cultivation, sow seeds in a small arched shed in February to raise chili seedlings, transplant in early May, and harvest for market from early July to before the autumn frost.
Sowing and raising seedlings.Twenty days before sowing, prepare nutrient soil in a ratio of 60% garden soil that has not previously grown solanaceous vegetables, 30% decomposed and sieved barnyard manure and 10% plant ash. Each mu of chili seedling bed requires 100 kg of nutrient soil. Spray the nutrient soil with 25 ml of formalin mixed with 3 kg of water, then cover tightly with plastic film for 2-3 days for disinfection. Water the seedling bed thoroughly, spread a layer of nutrient soil, sow seeds, then cover with another 1 cm thick layer of nutrient soil. The seeding rate for chili peppers is 50-75 grams per mu of field. After sowing, cover the seedling bed with plastic mulch and build a small arched shed covered with plastic film and straw mats. Before the chili peppers emerge, keep the seedling bed temperature at 30°C during the day and 18-20°C at night. On the basis of ensuring the chili seedlings are not frozen, let them receive as much light as possible. Thin the seedlings on a sunny day after full emergence. For each mu of field seedling bed, mix 10 ml of Kang Ku Ling with 9 kg of water and 20% Virus A 600-fold solution, and spray 2-3 times to control seedling-stage diseases. Properly harden the seedlings 5-7 days before transplanting, keeping the bed temperature at 15-25°C during the day and 8-15°C at night.
Land preparation and transplanting.Choose sandy loam soil with deep soil layers, fertile and loose soil and good drainage for transplanting chili seedlings. After harvesting the previous crop, deep plow the land 20-30 cm and sun the soil clods. Half a month before transplanting, apply per mu 5000-6000 kg of decomposed mixed manure, 2500-3000 kg of human and livestock manure, 30-50 kg of compound fertilizer or 40-50 kg of superphosphate, and 10-15 kg of potassium chloride, plow them into the soil, level the land and make ridges. For high-ridge cultivation, the ridge bottom width is 40-50 cm and the ridge height is 20 cm, with 1 drainage ditch for every 4 ridges, and 1 cross ditch every 20-30 m along long ridges. For open-field cultivation of small chili peppers in spring, transplant after the frost period ends and when the 10 cm soil temperature is stably above 10°C. Dig holes for transplanting, with a hole depth of 8-10 cm, plant 1 row per ridge, with a plant spacing of 30-35 cm, and plant 3500-4000 plants per mu. For spring transplanting, choose a sunny afternoon and water while planting; for summer transplanting, choose a cloudy day.
Field management.After transplanting, water frequently and keep the soilalternately dry and wet. Combine watering with topdressing 5-7 times. When the heart leaves begin to grow and new chili roots form, apply a survival fertilizer, with diluted manure water being best. When the chili peppers begin to set fruit, apply a seedling-promoting fertilizer, with 7-10 kg of urea per mu. After that, apply a plant-stabilizing fertilizer once after each harvest or at intervals of 7-10 days, with 10-13 kg of urea per mu, to promote steady plant growth and extend the fruiting period. After the chili peppers are transplanted and established, frequently cultivate, weed and earth up, with a cultivation depth of 5-7 cm. Cultivate shallowly near the chili roots and deeply between rows. After the chili plants close the rows, only pull out weeds without cultivating, so as not to damage the root system and chili plants.
Harvesting.Harvest small chili peppers promptly when they turn red.