Kiwifruit bagging technology and management, preventing fruit sunscald and pest damage
I. Preparation before bagging
Thin out deformed fruit, flat fruit, small fruit, and fruit damaged by pests and diseases, keeping young fruit with thick, sturdy stalks and good development. In mature orchards, leave about 40 kiwifruits per sq m of trellis surface. After selecting the young fruit, carefully remove any debris attached to them. Irrigate with light water in furrow irrigation; generally, before bagging, irrigate appropriately to keep the soil moisture content at about 70% of field maximum water capacity. Before bagging, spray a fungicide once, with no more than 3 days between spraying and bagging; ideally, spray and bag on the same day. Low-toxicity, low-residue agents may be used, such as 80% Daconil M-45 wettable powder at 800 times dilution. Do not use emulsifiable concentrates, as they easily leave spots on the fruit surface. Once the spray solution has dried, bagging can begin.
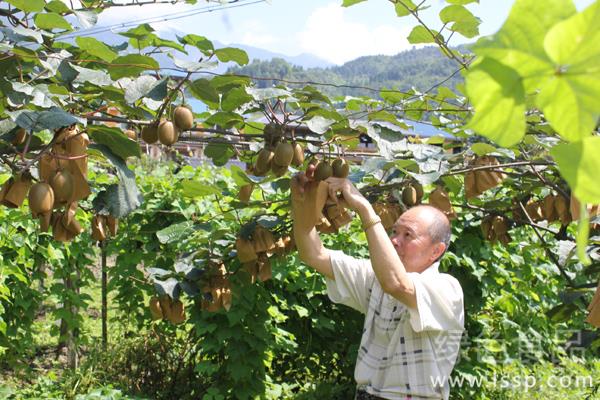
Kiwifruit bagging
II. Bagging technology
1. Selection of bag type: The yellow single-layer wood pulp fruit bags used for kiwifruit bagging require strong light blocking, good air permeability, low water absorption, strong tensile strength, and soft paper quality. The bottom of the fruit bag must have two ventilation holes, or the bottom may be left unsealed. The general specification is 165 mm × 115 mm.
2. Bagging period: Bagging should preferably be carried out about 30 days after kiwifruit petal fall, and completed within 10-15 days. Bag after the morning dew has dried, or after the spray solution has dried. On sunny days, the preferred times are generally 9:00-11:30 AM and 4:00-6:30 PM. Do not bag immediately after rain. Bagging too early easily damages the fruit stalk and fruit skin and is not conducive to young fruit development; bagging too late results in rough fruit surface, affects the bagging effect, and the lignified fruit stalk makes operation inconvenient.
3. Bagging method: The night before bagging, place the paper bags in a damp place to soften them, which helps to tie the bag opening tightly. The bagging operation steps are as follows: support the paper bag with the left hand, open the bag opening with the right hand to make the bag body puff out, and open the ventilation and drainage holes at the two bottom corners of the bag; with the bag opening facing up, hold the bag opening with both hands 2-3 cm from the opening, insert the kiwifruit into the bag, and let the fruit stalk rest at the base of the middle opening of the bag mouth; fold the bag opening horizontally from left and right toward the center, and after overlapping them, bend the wire into a "V" shape and clamp the bag opening to complete bagging. After bagging, if high-temperature weather occurs (air temperature above 38°C), open the bag ventilation openings to ventilate and lower the temperature inside the bag.
III. Management after bagging
1. Check bags frequently: Regularly inspect the growth of bagged kiwifruit, investigate and record kiwifruit growth and pest and disease conditions, and apply targeted treatments. If broken bags are found, replace them promptly.
2. Irrigate promptly: Long-term drought and high temperatures inside the bags easily cause kiwifruit sunburn, so irrigate evenly and promptly. During the rainy season, pay attention to drainage to prevent root rot.
3. Remove bags at the proper time: 7 days before harvest, remove the fruit bags to improve the coloring of the fruit surface. If cloudy and rainy weather occurs, bag removal may be postponed and harvest delayed to avoid rainwater contaminating the kiwifruit surface.