Rapeseed Seedling Raising and Transplanting Management Techniques Help Increase Yield
Rapeseed is one of the main small spring crops in Tengchong County. Rapeseed seedling raising and transplanting can not only resolve crop rotation conflicts and the problem of overwintering with strong seedlings, but also increase rapeseed yield. It has become the main method of rapeseed cultivation in our county. However, improper management after transplanting can also cause yield decline, affecting farmers' enthusiasm for planting rapeseed.
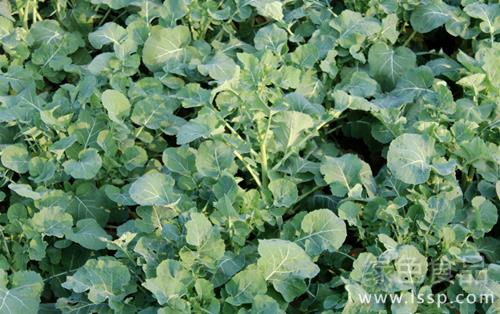
Rapeseed
1. Post-transplanting seedling stage management:
(1) Apply fertilizer early to help plants establish. 5-7 days after rapeseed transplanting, apply 1500-2000 kg of human and livestock manure or 3-5 kg of urea diluted in water per mu. This allows roots, soil and fertilizer to merge, promoting early greening and strong growth.
(2) Loosen soil early and frequently cultivate and weed. After rapeseed plants have established, cultivate and loosen the soil to aerate, remove weeds, promote stable root growth, and encourage early development and frost resistance.
(3) Drought resistance and waterlogging prevention. In severe autumn drought, take drought-resistant measures to preserve soil moisture, but avoid flooding irrigation. When autumn rain is excessive, pay attention to preventing waterlogging, promptly open the "three ditches" for drainage, ensure smooth water flow, and keep the field free of standing water.
(4) Pest and disease control. Rapeseed seedling stage pests and diseases include aphids, rapeseed downy mildew, rapeseed white rust, etc. These can be controlled with 10% pymetrozine, 75% chlorothalonil, 50% thiophanate-methyl and other chemicals, with significant results.
(5) Strengthen frost protection measures. Before winter, cover rapeseed seedlings with soil manure, plant ash, crop straw, etc., to provide wind and frost protection, preventing or reducing frost damage.
2. Bud and bolting stage management
(1) Apply heavy bolting fertilizer. When the bolt reaches 10-15 cm in height, apply 8-10 kg of urea per mu or 1000-1500 kg of human and livestock manure plus 3-5 kg of urea. The specific amount of fertilizer should be adjusted according to weather and seedling conditions; appropriately apply micronutrient fertilizer by spraying 50-75 kg of 0.2% borax aqueous solution per mu, which benefits growth.
(2) Manage irrigation and drainage well. During the rapeseed bolting stage, if drought occurs, fill the ditch with half water to maintain field humidity; when rain is excessive, clear ditches and drain water to prevent waterlogging damage.
(3) Prevent spring cold frost damage. Apply fertilizer scientifically, pay attention to the nitrogen-phosphorus-potassium ratio, apply more organic fertilizer, and enhance resistance.
Rapeseed transplanting
3. Flowering and pod stage management
(1) Appropriately apply flower fertilizer. Flower fertilizer should be applied properly and early, with about 5 kg of urea per mu; spray 50-75 kg of 1-2% potassium dihydrogen phosphate aqueous solution as a foliar application.
(2) Supplement boron fertilizer spray. To prevent boron deficiency in rapeseed causing "flowers without seeds" disorder, in boron-deficient fields, spray 50-75 kg of 0.2% borax solution per mu on a sunny evening at the early flowering stage.
(3) Pest and disease control. In the middle and late stages of rapeseed, the main pests and diseases include aphids, downy mildew, sclerotinia, white rust, etc. Focus on controlling sclerotinia by spraying 40% dimethachlon diluted in water per mu from the initial flowering stage to the full flowering stage, applying 1-2 times.
(4) Timely harvest. "When rapeseed is 80% yellow, it is 100% ready for harvest." Harvest 25-30 days after the final flowering when 2/3 of the pods show loquat yellow and the upper 1/3 of branches show yellow-green.