How to grow cherry tomatoes in pots on a balcony, natural and eco-friendly
Cherry tomatoes, also called small tomatoes or baby tomatoes, are highly nutritious, have a unique flavor, and are both edible and ornamental, making them very popular. Sometimes when you want a few to eat, you have to go to the fruit stand to buy them, the trip is far, and you do not know whether they are green and safe, with no guarantee. Now here is a trick for you: grow cherry tomatoes on your balcony, absolutely pure and natural.
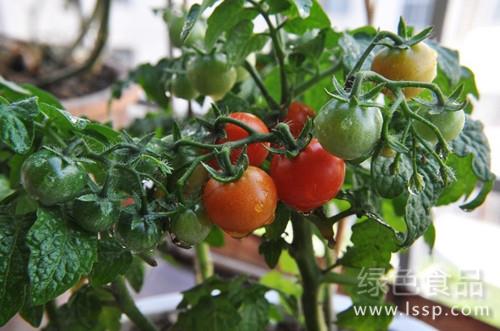
Cherry tomatoes
1. Preparation before planting
Soil preparation: Dig soil back from a flower bed or field, first sift it, and crush the large clumps. If conditions allow, you can disinfect the soil. Any organic fertilizer mixed in must be fermented and fully decomposed; use as little chemical fertilizer as possible.
Seedling stage: First disinfect the seeds by soaking the cherry tomato seeds in 55°C warm water for 15—20 minutes, stirring constantly, with the water amount about 5 times the volume of the seeds. After it cools to 28°C, keep it at this temperature and soak for 12—24 hours, changing the water once or twice during this period. Next is germination: drain the seeds, wrap them in a wet towel, and place them in an environment of 28—30°C, rinsing them with clean water once a day; in 1 to 2 days, the seeds will sprout.
2. Planting:
Dig a small hole 1 cm deep in the soil, put in the sprouted seeds, cover with 0.5—1 cm of loose soil, and keep the temperature at about 25°C. It is best to water this soil thoroughly the day before. Before the seedlings push through the soil, water more to keep the soil moist. After three to four days, the two cotyledons emerge from the soil. Then keep the daytime temperature unchanged and lower the nighttime temperature to about 20°C. After the leaves increase to four or five, water again, and you need to follow “dry and wet alternating”; that is, water after the soil dries, and water thoroughly each time. After each watering, you can use a small hook to loosen the soil about 5 cm deep.
3. Transplanting:
When the seedlings grow 4—5 leaves, they can be transplanted. Dig out the seedlings with soil, make a hole in a large pot, put the whole small root ball in, and water thoroughly. Transplanting allows the seedlings to have their roots broken and then regrow, so the cherry tomatoes grow better. In principle, do not water or apply additional fertilizer after transplanting, but also act according to the actual situation; if it is too dry, supplement appropriately.
4. Flowering and fruiting:
About 15 days after transplanting, the cherry tomato seedlings have begun to grow in the large pot. After they begin to flower and set fruit, water thoroughly and apply additional fertilizer. After that, every 7—10 days, water and apply additional fertilizer, and loosen the soil. Keep the daytime temperature at 25—30°C and the nighttime temperature at 15—20°C. When they grow to about 40 cm, you need to make a support to let the cherry tomatoes climb along it and continue growing, to prevent lodging. Note that the support must follow the original growth direction and must not twist them.
Cherry tomatoes are bisexual flowers and generally pollinate automatically, but you can also gently tap them with a bamboo pole to promote pollination. In addition, when the branches grow to about 10 cm, promptly remove the side shoots to prevent side branches from growing wildly and affecting the growth of the cherry tomatoes.
From sowing to harvest takes about 3 months. After 90 days, you can taste the cherry tomatoes you grew yourself.