Keep these precautions in mind for red chili cultivation
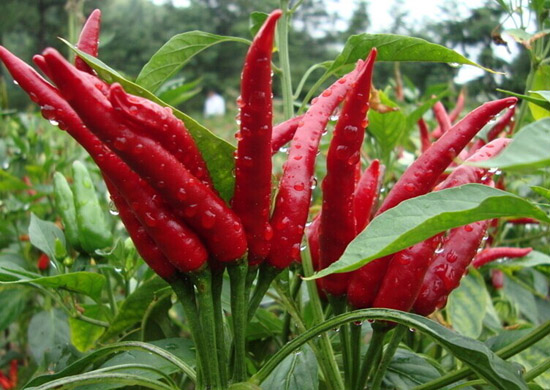
I. Botanical characteristics
It has a distinct taproot and many lateral roots and root hairs. After the taproot is injured, lateral roots develop quickly, so the transplant survival rate is relatively high. Adventitious roots are not easily produced on the stem. Branching begins from the 12th—14th node; the first branching is mostly 2 branches, and the second branching is mostly 4—6 branches. The leaves are ovate or long-ovate, simple, alternate, with obvious veins and a relatively smooth surface. The corolla is white, and the fruit is horn-shaped, 8—15cm long. The fresh pepper is green, and after maturity it turns red or dark red.
II. Requirements for environmental conditions
1. Temperature.The suitable germination temperature is 25°C; germination is difficult below 15°C. During the plant growth period, the suitable daytime temperature is 22—28°C, and the nighttime temperature is 15—20°C. Below 15°C or above 35°C, flowering and pollination are abnormal, often causing flower and fruit drop.
2. Light.It is a short-day crop. Under 10—12 hours of light per day, flowering and fruiting occur early and normally, but it can also adapt to longer daylight. It requires moderate light intensity; insufficient light reduces the fruit-setting rate; direct strong light slows plant growth, and the fruit is prone to sunscald.
3. Water.The root system is relatively weak and tolerates neither drought nor waterlogging, so water must be supplied regularly for good growth. However, water must not accumulate in the field. If water accumulates in the field for several hours, the plants will wilt, and in severe cases whole patches will die.
4. Soil.Yidu red chili has no strict requirements for soil conditions; sandy soil, loam and shajiang black soil can all be used for planting. Under soil conditions that are not very fertile but relatively rich in potassium, the cultivated chili plants are small and compact, with fewer but more concentrated fruits; the peppers have a deep color, high capsaicin content and good quality.
III. Key points of cultivation techniques
1. Raising seedlings and transplanting.For spring planting, the seedling-raising time is from the Spring Equinox to Qingming; for summer planting, the seedling-raising time is from Qingming to Guyu. Use plastic film mulching to raise seedlings, with a seedling age of 45—60 days. Thin the seedlings once each before and after the 2 true-leaf and 4 true-leaf stages. The standard for retaining seedlings is about 1 plant per 3—4cm, with about 600 plants per sq m. After the seedlings are 6—7cm tall, gradually ventilate and harden them to reduce seedling height, improve stress resistance and ensure the transplant survival rate. When the seedlings are 10—13cm tall, have 6—7 true leaves and flower buds appear, begin transplanting. For spring planting, transplant from Guyu to Lixia; for summer planting, transplanting should be as early as possible rather than late. Early transplanting gives higher yield, and in Shanxi Province it is best to finish transplanting before June 20. Before transplanting, deeply plow the chili field 30cm, level and harrow it finely, and apply 4000kg of high-quality barnyard manure, 30—40kg of superphosphate and 50kg of ternary compound fertilizer per 667 sq m. Apply the barnyard manure evenly in the field, and apply the phosphate fertilizer and compound fertilizer concentrated in the transplanting furrows. Open furrows according to wide and narrow rows, with a wide row spacing of 80cm, a narrow row spacing of 60cm and a plant spacing of 20cm, planting 4500—5000 plants per 667 sq m. Chili seedlings are easily damaged at the roots, so before lifting the seedlings, water the seedling bed thoroughly; when lifting the seedlings, keep as much soil as possible, water heavily immediately after planting, and then cover with plastic film or agricultural film.
2. Field management.In plots not covered with plastic film or agricultural film, after the chili seedlings recover, hoe the soil 3—4 times in succession to raise soil temperature and promote downward root growth. Around the flowering of the first pepper, remove all old leaves and branches below the first pepper to facilitate field ventilation and light penetration and prevent branching below the first pepper. Before the rainy season arrives, earth up and ridge to facilitate drainage. Water promptly according to soil moisture, and drain promptly after rain. After rain, immediately irrigate once with well water to lower soil and air temperature; this is called “irrigating the garden after waterlogging”. For Yidu red dried chili production, fertilization is mainly based on basal fertilizer. If basal fertilizer is insufficient and topdressing is needed, it should be done before earthing up. Per 667 sq m, mix 250kg of crushed soil manure with 25—30kg of ternary compound fertilizer, dig small holes and apply it on one side of the chili plants, then cover and press firmly, but care should be taken to avoid damaging the root system as much as possible.
3. Pest and disease control.During the chili growth period, the main diseases are anthracnose and viral disease. Anthracnose can be prevented after the early flowering stage with 1:1:160 Bordeaux mixture, sprayed once every 7—10 days. After diseased spots are found, spray 80% mancozeb 800-fold solution or 70% thiophanate-methyl 600—800-fold solution for control. Viral disease should be mainly prevented. While promptly controlling aphids, small brown planthoppers and other virus-transmitting vectors, spray 20% Virus A wettable powder 500-fold solution or 20% Virus Nemesis 400—600-fold solution at the seedling stage and after planting for control, once every 5—7 days.
4. Harvest.The normal maturity time of Yidu red chili is before Frost's Descent. In drought years, the harvest time can be advanced to around the Autumn Equinox. The harvest standard should be when 80% of the peppers have turned red. The harvest method is to dig them out with roots, lay them in the field to dry for 2—3 days, then transport them to the threshing floor at the village entrance and stand them upright in a layer. Turn and dry them repeatedly until the leaves have all fallen, then stack the chili plants. When stacking, first prepare the base of the stack. Generally, the base of the stack is 1.2m wide, 30—40cm above the ground, and the length depends on the quantity of peppers. Place the chili plants two by two opposite each other, roots facing inward and tips facing outward, laid flat, with a stack height of about 2m, and cover the top for rain protection. Under well-ventilated conditions, let them dry naturally. After the peppers are dry, pick them from the plants, grade, package and sell.