-

How are fermentation additives used when composting mushroom substrates?
How do you use fermentation additives to compost mushroom substrates?
-
What types of mushroom compost are there for straw mushrooms? How to prepare them
The raw materials needed for cultivating straw mushrooms come from a wide range of sources. Currently, the most commonly used are rice straw, wheat straw, waste cotton, and cottonseed hulls. Some spent substrate left over from cultivating other edible fungi can also be used to grow straw mushrooms. 1. Rice straw Choose golden-yellow, mold-free dry rice straw, and sun-dry it for 1-2 days before use to prevent the appearance of coprinus or other contaminating fungi during cultivation. There are generally two ways to treat rice straw. One is to cut the rice straw into pieces about 5 cm long, then soak them in 3% limewater for 1-2 days, then add dry pig manure or dry cow manure equal to 20%-25% of the straw weight and compost the mixture
-
Detailed Explanation of Key Points of the Aerated Composting Technique for Straw Mushroom Culture Material
Under suitable temperature conditions, the production cycle of straw mushroom is about 20 days. From sowing to harvesting the first flush of mushrooms takes about 10 days, and the yield is mainly concentrated in the first flush. In our province, it can be cultivated from May to September every year. Based on this production characteristic of straw mushroom, the author, in the work of promoting straw mushroom cultivation in rural areas, summarized a new composting method - the aerated composting method, and achieved very good results. Straw mushroom can be cultivated using rice straw plus some supplementary materials or solely cottonseed hulls. Before building the pile, sun-dry the rice straw or cottonseed hulls for 1 day, then soak them thoroughly in lime water at pH 11-12, and scoop
-
Key Points of Compost Fermentation Technology in the Cultivation of Agaricus bisporus (Button Mushroom)
Compost fermentation is divided into the one-phase fermentation method and the two-phase fermentation method. (1) One-phase fermentation method: 1 day before building the heap, cut the rice (wheat) straw into sections and drench it thoroughly with clean water so that it fully absorbs water, then leave it piled for 1 day. 7-10 days before building the heap, wet the dry manure with clean water or urine water, then build it into a heap for fermentation. When building the heap, arrange 1 layer of manure and 1 layer of straw, piling them layer by layer; start watering at the fourth layer, and from the fourth layer to the eighth layer add all of the cake fertilizer, superphosphate, gypsum and half the amount of urea layer by layer. After building 10 layers, the heap height reaches about 1.5 m, the four sides are basically vertical, the top of the heap is shaped like a turtle shell, and the very top is covered with 1 layer of manure. To maintain aeration, 2-3 ventilation holes can be inserted from top to bottom with bamboo tubes at the top of the compost heap. To keep warm and retain moisture, the top of the heap should be covered with straw mats, and plastic film should be used on rainy days. When piling the material, the water content of the compost is required to reach saturation. On the second day after building the heap, measure the material temperature within 50 cm; under normal conditions the material temperature will rise to 70°C. If it does not reach this temperature, find out the cause and take remedial measures as soon as possible. During fermentation, turn the heap once at intervals, supplement auxiliary raw materials, and adjust the water content and pH of the compost. On the second day after building the heap, the material temperature begins to rise, and on the third day the temperature at the center of the heap reaches its highest point (74-80°C). When this temperature is reached, the first turning can be carried out 6-7 days after building the heap. On the day before turning, water the upper part of the heap first, then water layer by layer during turning; after the heap is rebuilt, a small amount of water should flow out around it, indicating that the amount of water added is appropriate. When building the heap, still add the remaining urea from the fourth layer to the eighth layer. 2 days after the first turning, the material temperature can reach as high as 75-80°C. 5-6 days after the first turning, carry out the second turning. The focus of the second turning is to adjust moisture; the appropriate water content is when the compost is squeezed tightly by hand and 3-4 drops of water can be squeezed out. On rainy days, when covering with plastic sheeting, prop it up with wooden sticks so that the inside of the material is ventilated, prevent anaerobic fermentation, and keep the material temperature at 60-65°C. Generally, the third turning can be carried out 4-5 days after the second turning, using the same method as above. If there are lumps of manure, crush them before mixing them in. 4 days after the third turning, carry out the fourth turning. First check the water content of the heap; the method is that when the compost is squeezed tightly by hand, 1-2 drops of water between the fingers is just right. If the moisture is insufficient, adjust it with 1% lime water. If the moisture is too high, spread it out to air for a while first, and rebuild the heap when the moisture is appropriate. At the same time, prepare 0.5% dichlorvos and spray it to kill insects. 3-4 days after the fourth turning, the temperature inside the material is still around 50°C and tends to stabilize; carry out the final turning. During the turning, adjust the water content of the compost to 60%-63% and the pH to 7.5-8.0, and at the same time check whether residual ammonia gas and pests remain in the compost. If there is an ammonia smell, formaldehyde can be used again to neutralize it; if there are insects, 0.5% dichlorvos can be used to kill them. From heap building to entering the house, the compost generally needs to be turned 4-5 times, and the intervals between turnings are usually 7, 6, 5, 4 and 3 days. During the heap-building process, the moisture of the compost should first be wet and then dry, the heap should first be large and then small, and the turning intervals should first be long and then short. Following this principle, the heap temperature can be maintained above 50°C for a long time.
-
Key Management Points for Spring Button Mushrooms and Post-Harvest Handling Methods
The button mushroom (Agaricus bisporus) is currently China's largest export earner among edible fungi, with main production areas in Fujian, Shanghai, Hunan, Guangxi and other provinces. At present, it is the spring mushroom management stage, and some key management techniques for this stage are briefly introduced below: Spring mushroom management accounts for about 30% of total yield. After mid-March, as temperatures gradually rise and stabilize above 10°C, the water content of the casing soil can be gradually adjusted to sufficient levels to meet fruiting needs. When adjusting water, first spray the clear supernatant of lime water at pH 8-9; when the temperature is below 15°C, top-dressing fertilizer can be applied together with spraying. Around April
-
A Detailed Guide to Post-Harvest Handling and Processing Methods for Wine Cap Mushroom
Wine cap mushroom, also known as King Stropharia, is a domesticated wild mushroom species, and in recent years there has been a trend of gradual expansion. Its mushrooms have a delicate fragrance, crisp and tender flesh, good palatability, high yield, high selling price, and very considerable economic benefits. However, its fresh products have a short storage time and are not easy to preserve. If not sold fresh in time, huge losses will be caused. In order to ensure that economic benefits are not lost, the salting processing and dried product processing techniques for wine cap mushroom are now introduced. 1. Salting processing of wine cap mushroom. 1. Harvesting. The mushroom bodies of wine cap mushroom used for salted export should be at 6-7
-
Detailed Explanation of Five Post-Harvest Management Methods for Field-Grown Wood Ear Mushrooms
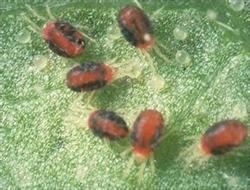
Remove contamination sources: culture material that is contaminated or severely affected by pests should be promptly disposed of and removed, and the contaminated environment should be cleaned and disinfected at the same time.
-
Why can't the fermentation of button mushroom compost be overlooked?
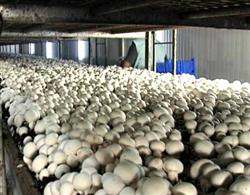
In recent years, the sales of button mushrooms have been improving year by year. Combined with the abundance of crop straw in the north, developing button mushroom production in rural areas is a very good path to increasing income. However, the instability of button mushroom yields has constrained the development of this industry. Therefore, to do this industry well and make it big, it is necessary to solve the techniques for high quality and high yields of button mushrooms...
-
What are the post-harvest management methods for Agaricus blazei?
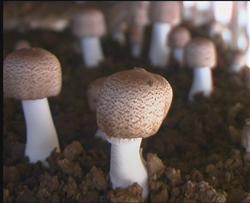
How do you manage Agaricus blazei after harvesting? Please note that it is more suitable to harvest Agaricus blazei when the fruiting body is 5-15 cm tall and the cap has not yet opened. In one cultivation cycle, Agaricus blazei can produce 3-5 flushes of mushrooms. After each flush is harvested, the mushroom stumps, fragments and other debris on the bed must be cleaned up thoroughly, new soil should be added to any depressions, watering should be stopped, and ventilation should be provided appropriately. Let the mycelium rest for 2-3 days, then resume watering to adjust moisture, cover with plastic film, and begin the fruiting management for the next flush.
条件筛选