How to care for a Christmas cactus after it finishes blooming
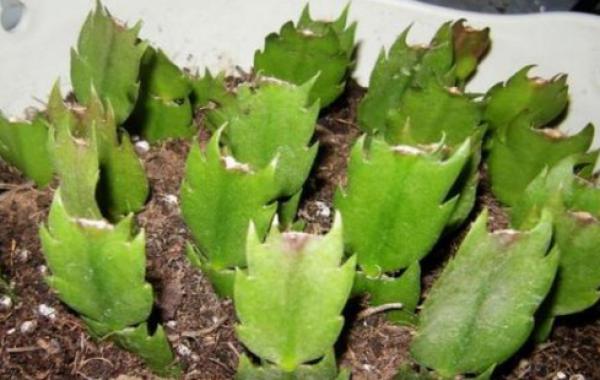
The Christmas cactus is deeply loved by gardening friends abroad and is often called the Christmas cactus because this flowering plant usually blooms around Christmas, and its flowers are very beautiful when they open. However, many people know how to care for it before and during blooming, but do not know what to do after blooming. So, what then.
In fact, after a potted Christmas cactus finishes blooming, we can give it proper pruning. On one hand, this saves the plant a large amount of nutrients and avoids unnecessary consumption of salts by the flowering branches and spent flowers; on the other hand, we can also use the cut stems and leaves for cuttings to propagate young plants. Why not do both.
1. Cutting the cuttings
After the Christmas cactus finishes blooming, combine this with pruning and use the cut stems and leaves as cuttings for propagation; note that if the cut stems and leaves are used for cuttings, you can select some healthy leaves, and keep 2 stem nodes on each leaf, which will make the cuttings more successful.
2. Drying the cut ends
After cutting the cuttings, place them on a paper towel and put them together in a warm, ventilated place without light to dry for a while, usually for several hours, until the cut ends on the stem nodes have dried before proceeding with the cuttings. Otherwise, if you take cuttings while the wounds are still not dry, it is easy to cause wound infection and lead to rot.
3. Preparing the soil
Before taking cuttings, we need to prepare the growing medium in advance. You can take peat soil and fine sand in a 1:1 ratio, mix them together and stir well before use. Of course, we can also use a mix of peat soil and perlite to make the cutting bed. And the growing medium needs to maintain a suitable moisture level for cuttings; avoid taking cuttings when the potting soil is too dry, otherwise it is easy to cause new damage to the cuttings.
4. Inserting the cuttings
When taking cuttings, first poke holes of suitable size and depth in the growing medium, with a depth of about 3 cm, then insert the dried-wound end of the Christmas cactus cutting into it, and then gently press the soil firm, so that later watering will not make the cuttings float up or tip over.
5. Watering properly
After completing the cuttings, we should water them in time, but the watering process must not be too forceful. You can slowly pour in clean water until water flows out from the bottom of the pot. Note that although the watering process is meant to water thoroughly, the instantaneous water volume should not be too large, otherwise it is easy to knock over the cuttings already planted in the pot.
6. Covering with film
After watering is completed, in order to create a warm and humid growing environment for the cuttings, it is usually recommended to put a plastic bag over them, or use transparent plastic film, which also makes it easier to observe the sprouting of the cuttings. This is because Christmas cactus cuttings usually only sprout in an environment where both temperature and humidity are relatively suitable.
7. Care and management
Before the cuttings sprout, we should do the corresponding care and management work. During this period, especially keep the growing medium moist, and also open the film at noon to let in some air for ventilation, which is more conducive to leaf sprouting. If all goes well, usually after 6 weeks you can see the cuttings rooting and sprouting. At that time, we can also remove the plastic film or plastic bag covering them.