Wild Orchid Potting Methods and Steps Explained in Detail
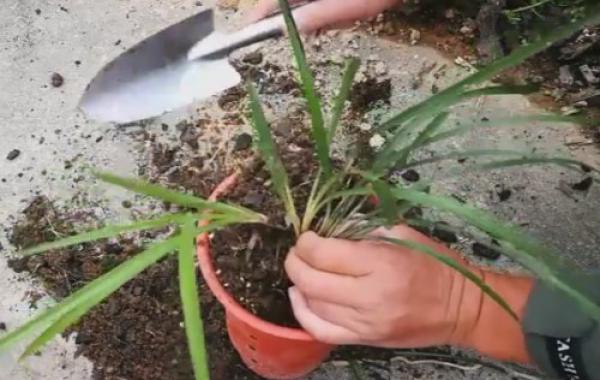
All theories need to be tested and proven through practice, and potting and growing orchids is no exception. Home-grown orchids are generally artificially propagated. If we are lucky enough to find orchids in the wild and need to grow them at home, then what? What should we pay attention to when potting them? Today, the editor will discuss with everyone several aspects to note when potting wild orchids as household potted plants.
For potting wild orchids, the editor has summarized it in 7 words: trim roots, cut leaves, bask in the sun. Let's take a look below.
1. Trimming Roots
When trimming roots, cut off all empty roots, rotten roots, residual roots, broken roots, and dead roots. Everyone should not worry about trimming too much, but it is still necessary to trim them, and even if a bit more is trimmed off, it does not matter much. This is because if these roots are not trimmed, they will rot over time after potting, and the pathogens produced will damage the healthy normal roots.
The root system of wild orchids grows horizontally, so it is relatively easy to damage some roots when digging them up, and damaged roots also need to be trimmed off. For orchids grown in flower pots, their root system generally grows downward. Therefore, it is also necessary for us to properly trim the roots of wild orchids, also to make potting easier.
2. Cutting Leaves
After trimming the roots, we also need to carry out necessary leaf-cutting treatment on the orchid plant. Leaf cutting mainly involves removing leaves such as withered and yellow stems and leaves, dead leaves, and diseased leaves, because orchids growing in the wild inevitably harbor some pests and diseases, which may parasitize the plant when potting in spring or winter, and once the temperature warms up, they will cause harm to the orchid. Therefore, it is very necessary to cut off unhealthy pest- and disease-affected orchid leaves.
3. Basking in the Sun
Light is very important when potting wild orchids, mainly playing a sterilizing role. This is because we previously trimmed roots and cut leaves, which will leave quite a few wounds, and properly basking in the sun can sterilize and disinfect the wounds. Moreover, after basking in the sun, these wounds will also quickly coagulate and heal, so after potting they are not easily invaded by pathogens. Before potting, it is also recommended to apply a little carbendazim or thiophanate-methyl to the root wounds. For wild orchids, the method of soaking in medicinal solution is not recommended.
Basking in the sun has another benefit: it can soften the horizontally growing root system of wild orchids, making it easier for us to pot them without easily breaking them. This is because if the root system is broken, it is very easy for rot to occur in the pot, which then infects other healthy roots, expands the area of root damage, and ultimately affects the wild orchid plant's establishment and survival after potting.
Next, what we need to do is pot the wild orchid. After trimming and tidying, the orchid's stems and leaves, root system, and the pseudobulb growing between the two can be clearly seen. The position of the pseudobulb should remain level with the rim of the pot, and then fill in the planting medium, following the normal potting method. After that, what needs to be done is acclimatization management.