How to change the sphagnum moss for a Phalaenopsis? You'll master it with these detailed steps
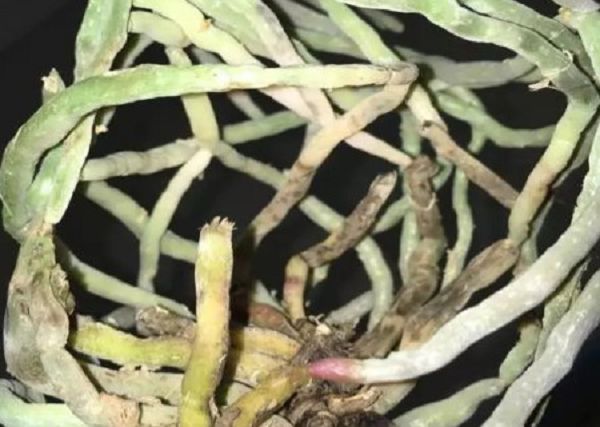
Most Phalaenopsis are grown in sphagnum moss, so changing the sphagnum moss is a common situation for flower lovers. Whether it is a Phalaenopsis bought from the market or one you grow yourself, it needs to be repotted regularly. Especially for a Phalaenopsis just bought from outside, it is recommended to change the growing medium first thing after getting it home. Although repotting while in bloom is a big taboo in flower growing, for Phalaenopsis it is a must.
In the north, many people buy Phalaenopsis to bring home around the Spring Festival. It is the cold winter then, and with indoor heating the air tends to be fairly dry. The Phalaenopsis sold on the market is packed with growing medium that is too tight and holds water too strongly, and buyers who do not know how to grow them often like to buy them as arranged groups, so dying after flowering is the reality for many people growing Phalaenopsis. In the north, growing Phalaenopsis in sphagnum moss, repotting in time, and filling the sphagnum moss reasonably are the keys to growing Phalaenopsis well.
The basic steps for changing the sphagnum moss of a Phalaenopsis are as follows:
Step 1: Take the Phalaenopsis out of its original pot, remove the old sphagnum moss, cut off the dry roots and rotten roots, and soak it in disinfectant for half an hour. For the disinfectant you can use: carbendazim diluted with water, or 1:5 hydrogen peroxide diluted with water (100ml hydrogen peroxide mixed with 500ml water). Because carbendazim is toxic, I usually use hydrogen peroxide for disinfection, which is safe and does not affect human health.
Step 2: After disinfection, take it out and let it dry for one to two hours, until the orchid roots turn whitish and moist.
Step 3: Disinfect the new sphagnum moss with boiling water at high temperature, then forcefully squeeze out the excess water until no more water can be squeezed out, just like a wrung-out towel, moist but not wet.
Step 4: Hold the Phalaenopsis upside down, and stuff the squeezed-dry sphagnum moss into the very center of the roots, stuffing it to a tightness of about seventy to eighty percent.
Step 5: After the very center of the roots is stuffed with sphagnum moss, use sphagnum moss to wrap all the outer roots, then put the Phalaenopsis into the pot. Place some small pieces of plastic foam board in the bottom of the pot beforehand (to increase air permeability at the bottom of the pot and at the same time create a drainage layer, so the roots do not rot easily).
Step 6: After potting, press the sphagnum moss around the edges of the pot with your fingers, then continue to fill in sphagnum moss and continue pressing, until the sphagnum moss is about seventy to eighty percent tight (the sphagnum moss is slightly springy). Be careful not to press the middle of the pot, otherwise the orchid roots are easily crushed and broken.
Step 7: After potting, put it in a place with weaker light and keep it in shade for half a month (shade growing will promote faster root growth and get it through the pot-adjusting period quickly), then gradually increase the light. An orchid just repotted must not be given a large soaking watering directly; it must be kept dry for a period of time until it gets through the pot-adjusting period (the orchid stem basically has new roots starting to sprout, which takes about a month). Before it gets through the pot-adjusting period, if the pot surface is dry, spray it slightly wet with a spray bottle, but do not spray too much water, otherwise the roots rot easily. By the same principle, no fertilizing during the pot-adjusting period either.
Step 8: After patiently caring for it and getting it through the pot-adjusting period, you can return to normal fertilizer and water management.
After potting, do not water; keep it in a place with scattered light for a week. For normal care, wait until the surface sphagnum moss is completely dry, then water by spraying until water flows out from the bottom. It is not necessary for all the sphagnum moss to be soaked through, and even more so do not soak the pot. Grown this way, you can repot in all four seasons, and the flowering period is no exception, and you can also save many Phalaenopsis that are near death, making them recover and become robust, blooming every year.
Phalaenopsis is often grown in sphagnum moss. Poor-quality sphagnum moss generally decays after about a year. If new sphagnum moss is not changed in time, it easily leads to root rot, thereby affecting the healthy growth and even the flowering of the Phalaenopsis. As for the quality of sphagnum moss, generally speaking: domestic sphagnum moss is poorer, Chilean sphagnum moss is better (especially Chilean Seven Star sphagnum moss), and New Zealand sphagnum moss is the best (and also the most expensive, but it can be used for two to three years).