How to trim the roots of a cactus and pot it up? I'll teach you the correct steps
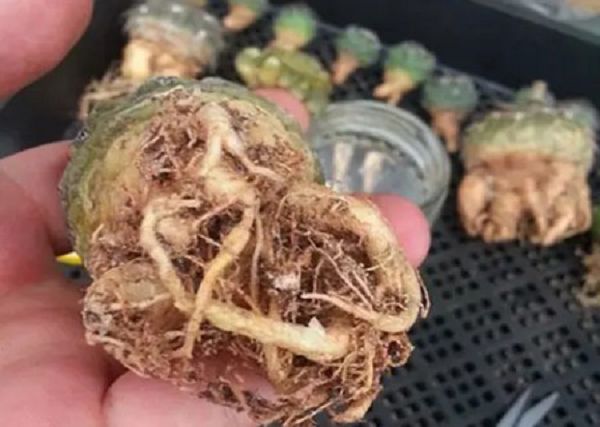
When it comes to cacti, everyone is more than familiar with them. But whether it is a cactus bought from the market or one that has been potted for several years, its roots should be trimmed at the right time. Why is that? Because trimming a cactus's roots at the right time not only reduces the risk of pest and disease damage and root rot, but also lets it grow faster and healthier. A cactus whose roots have been correctly and timely trimmed will quickly grow stout, tender white roots, and at a fast rate, which I believe will completely dispel everyone's worry that trimming a cactus's roots will affect its growth or survival.
How do you do it correctly? Below, I'll illustrate the root-trimming and potting process so everyone can see it clearly and understand it plainly.
1. Remove the soil and air-dry the roots
Whether it is a cactus just bought from the market or one planted previously, at this point it should be taken out and its soil removed. First wash the soil off the roots at the base of the stem, then place it in a cool, ventilated spot to air-dry for hours.
2. Disinfect the tools
Please prepare a pair of disinfected scissors; of course, the blades should have been sharpened fairly sharp beforehand. To disinfect the scissors, you can dip a cotton swab in alcohol and wipe it back and forth along the blade side to disinfect it.
3. Trim the roots
After the scissors have been disinfected, we can then use them to trim the cactus's roots. There is a certain art to trimming a cactus: we need to cut off the fine hair roots, fibrous roots and small lateral roots, keeping only the stout main roots. Of course, note that you should avoid trimming its roots in winter when the cactus enters dormancy, otherwise there will be great risk.
4. Disinfect and air-dry the roots
Earlier we disinfected the trimming tools; in this step, we also need to disinfect the wounds left after trimming the cactus's roots. Because a cactus that has been lifted from the soil may have diseased or damaged root hairs that easily carry various pathogens, so after trimming the roots, to be safe, we still need to disinfect the wounds. You can apply carbendazim to the cut surfaces of the wounds, then place it in a cool, ventilated spot to air-dry for about a week before potting it up.
5. Choose a pot and mix the soil
Before potting up the prepared cactus, we need to choose a pot and mix soil for it. As for choosing a pot, we have covered this in a previous article, so we won't repeat it here. As for mixing the growing medium, we suggest using 3 parts akadama soil + 3 parts coal cinders + 1 part vermiculite + 1 part coconut coir + 1 part coarse sand mixed together.
6. Pot up and plant
After trimming the cactus's roots, mixing the soil and completing these preparatory steps, we can pot up and plant the cactus. First put a layer of soil in the pot, then plant the cactus in it, then cover with another layer of growing medium until the soil covers the roots completely. After finishing, do not water immediately; to help it recover from transplanting, we need to water it a week later, which will keep the plant safer.
The above are the methods and steps for trimming a cactus's roots and potting it up that I have illustrated for everyone. Have you all learned them? Are you also eager to give it a try? Then at the right time, take the right method and do the right thing.