If your clivia and succulents grow slowly and have yellowing, dropping leaves, it's because the roots aren't well grown.
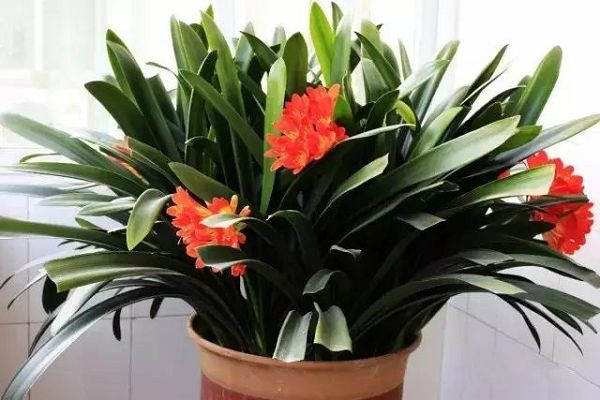
As the saying goes, grow flowers by growing roots first. Many flowers often show slow growth, yellow leaves and dry tips, but the real root cause is that the roots aren't well grown. Today, Huahua will introduce the root-growing secrets for these 3 kinds of flowers: clivia, succulents and orchids. Once you learn them, you'll be able to grow snow-white root systems.
Clivia root-growing secrets
How to grow roots?
To grow clivia well, you must first grow the roots well. To grow the roots well, you need to work hard on three aspects: soil mix, watering and fertilizing.
1. Soil mix
Clivia has fleshy roots, so the soil mix must be loose and breathable, and also have some water retention. Never use pure garden soil to grow clivia, as it easily causes root rot and stunted growth. Gardeners who don't know how to mix soil can refer to the following methods:
① 20% pine needles + 10% coarse sand + 50% leaf mold + 10% charcoal + 10% other
② 20% river sand + 20% humus soil + 40% pine bark
③ 5% charcoal granules + 20% pine needles + 60% leaf mold + 15% sand
2. Watering
Water clivia generally by the principle of not watering until dry, and never allow waterlogging.
When watering, poke your finger or a chopstick into the soil about 1/3 of the way. If it feels moist, don't water; if it feels dry, you can water, and water thoroughly.
3. Fertilizing
Clivia likes fertilizer, especially during the peak growing seasons of spring and autumn. When repotting, you can scatter fried sunflower seeds, castor beans or bone meal at the bottom of the pot as base fertilizer, with the base fertilizer making up about 1/10 of the whole pot soil.
Besides base fertilizer, in spring and autumn clivia can also be given a dilute application of decomposed soybean cake water about once every 10 days, and before flowering in late autumn, apply some fishy water or phosphorus-potassium fertilizer.
How to induce roots?
Clivia easily suffers root rot, so after root rot, can't it be saved? Not necessarily. Sometimes even if all the roots rot, Huahua can teach you to save it.
1. Cut off the rotted roots of the clivia, leaving none behind, soak in carbendazim for 15-30 minutes to disinfect, and leave in a cool, ventilated place to dry for 1 hour.
2. Prepare a glass bottle or plastic bottle, put sand inside, and spray the sand with water to moisten it.
3. Bury the base of the rootless clivia into the sand, just enough for it to stand upright; don't bury it too deep.
4. Spray water on the sand every day to keep it moist. After about 10-15 days, the clivia will grow plump white roots.
Succulent root-growing secrets
How to grow roots?
For succulents, growing roots is the top priority, because if you're not careful, they'll rot their roots on you. So if you want to grow succulents plump and cute with good shape and varied colors, you must first learn to grow the roots.
1. Soil mix
Soil mix for succulents is really important. It must be loose and breathable, and the proportion of granules must be half or even more, otherwise water accumulating at the roots easily causes root rot. You can refer to the following schemes for the soil mix.
In places like windowsills and balconies with low humidity and good ventilation, you can mix according to the ratio perlite : peat soil : coarse sand : rice husk charcoal = 2:4:1:1.
In places like greenhouses and sheds with high humidity and muggy conditions, you can mix according to the ratio leaf mold : perlite : akadama : coarse sand = 3:3:1:1.
2. Watering
Succulents must never be watered too much. Don't water until dry; water only when the pot soil surface turns white or the pot feels especially light when lifted.
For spring-autumn types and winter types, water 1-2 times a month in summer, 3-4 times a month in spring and autumn, and 1-2 times a month in winter.
For summer-type succulents, water 3-4 times a month in summer, 1-2 times a month in winter, and 2 times a month in spring.
3. Flower pots
Succulent pots must be somewhat breathable. Use more ceramic pots and fewer plastic or glass pots, and the bottom of the pot must have drainage holes.
How to induce roots?
For beheaded succulents or leaf-propagated succulents, they don't grow roots for a long time after being planted in soil. Isn't it frustrating, making you want to pull them out and check? Don't worry, today Huahua will introduce 1 method to make succulents grow roots quickly.
1. Don't rush to plant a freshly cut succulent. It must first be left in a cool, ventilated place to dry for 1-2 days, waiting for the wound to scab and heal.
2. Find a plastic bottle or glass bottle, pour in clean water, and insert the succulent stem into the bottle opening. Pay attention to the water level: the bottom of the stem should be very close to the water surface, but not touching the water.
3. Put the whole root-inducing setup in a place with bright, indirect light and ventilation. After about 3-5 days, you'll see fine roots. When the roots grow to about 2 cm, you can transplant it into a flower pot.
4. If you want succulent leaves to root quickly, you can find a plastic bottle, fill it halfway with water, poke a few holes above the water surface, and insert the leaves in, and they'll root quickly.
Orchid root-growing secrets
A good orchid with excellent appearance that blooms every year must have roots that are white and strong. Otherwise, the roots are thin and weak. Growing roots is the most important thing for an orchid.
How to grow roots?
1. Growing medium
To grow orchids well, the growing medium is crucial. It must be both breathable and water-retentive, and granules must make up at least half. Here Huahua recommends 2 formulas for everyone.
Simple formula: perlite : leaf mold = 1:1.
A relatively complex formula: perlite : leaf mold : pond stone : tree fern fiber : mountain soil : coconut coir = 1:1:1:1:1:0.5
2. Watering
Not dry, not wet, but moist. Never allow waterlogging, and never let it be short of water for a long time.
When the pot soil color is relatively dark, feels moist to the touch, and the moss is somewhat moldy, it means the pot soil is too wet, and you must not water.
Conversely, when you see the pot soil color turn lighter and white, the pot soil feels relatively hard, and the moss on the surface wilts, you should water immediately, until water flows out from the bottom of the pot.
In spring and autumn, water in the morning with a moderate amount; in summer, water around sunrise or sunset with an increased amount; in winter, water at noon with a reduced amount. In spring, summer and autumn, frequently spray water on the soil surface to keep it moist.
3. Fertilizing
During the spring and autumn growing seasons, apply a compound fertilizer rich in nitrogen, phosphorus and potassium once every 7-10 days. The fertilizer should be dissolved in water, and diluted with plenty of water to drench the roots of the orchid. You can also make some organic fertilizer yourself. In spring, you can apply decomposed soybean cake fertilizer, and in autumn, you can apply some decomposed fishy water, rice-washing water, etc.
How to induce roots?
When orchids rot roots due to overwatering, or develop hollow roots after many years, these roots all need to be cut off. After cutting them off, how do you make the orchid grow new roots?
1. Take the orchid out of the pot and wash the soil off the roots with clean water.
2. Cut off all the rotted and hollow roots among the orchid's roots, and apply plant ash or carbendazim to the wounds to disinfect, then dry in a bright, ventilated place for 15-30 minutes.
3. Prepare sphagnum moss, soak it in water in advance, and after it is thoroughly soaked, take it out and squeeze it a few times with your hand until no water comes out, but you can still feel moisture with your hand.
4. Wrap the orchid roots with the sphagnum moss and put them into a flower pot.
5. Spray water once every 4-7 days to keep the sphagnum moss slightly moist but not waterlogged. After about 15-20 days, the orchid will grow white, tender and thick roots, which is especially delightful.