There is a knack to repotting and changing the soil of clivias, so do not do it rashly
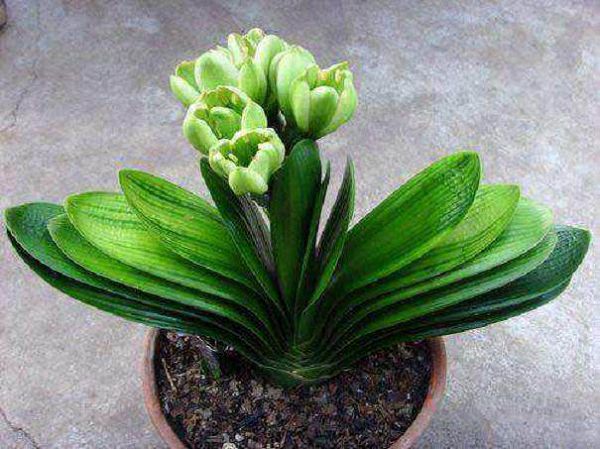
The best seasons to change the soil for clivias are spring and autumn. In spring, especially after the flowering period of the clivia, since the clivia has consumed a large amount of nutrients, changing the soil in time not only helps replenish nutrients promptly but also makes the necessary preparations for the coming hot summer.
After the long summer, the clivia's potting soil has consumed a large amount of nutrients and its permeability has decreased. If the soil is not changed in time to replenish nutrients, it will affect the clivia's bolting and flowering in winter. Therefore, after entering autumn, in Northeast China generally in mid-to-late September, and in North China generally from late September to early October, the soil and pot can be changed (other regions can decide according to local temperature conditions).
Repotting clivias
Winter is the peak flowering period of clivias, and it also coincides with New Year's Day and the Spring Festival. If a temperature above 10°C can be maintained, potting up a newly purchased clivia with soil will not have too great an impact on the plant's normal growth, so there is no need to change the soil as soon as you bring it home.
In summer, the temperature is relatively high and bacteria multiply quickly, and clivias are mostly in a dormant period. If the soil is changed or the pot is changed in this season, it is easy to cause root damage and rot. Therefore, do not change the soil or repot rashly.
The time for repotting is mostly in spring (in spring generally before Grain Rain) and autumn, and it is most suitable when the temperature is around 20°C (note: it must not be done during the flowering period). The new pot used for repotting should be larger than the original pot, so as to leave room for further extension of the plant's root system afterward. Add some superphosphate (or bone meal) to the potting soil and mix it evenly with the soil as a base fertilizer.
Before preparing to repot a clivia, stop watering and wait until the potting soil is slightly dry. At this time, the root system is softer than usual when there is sufficient water, and it is less likely to be damaged.
When repotting, first tap the edge of the pot lightly with your hand to separate the soil from the pot slightly. Use the index and middle fingers of your right hand to hold the base of the clivia (the crown), then turn the pot over, hold the bottom with your left hand, and tip the potting soil out together with the clivia plant. When changing to a larger pot, hold the clivia's pseudobulb with your right hand, support the bottom of the pot with your left hand, slowly turn it upside down, and tap the edge of the flower pot lightly on a wooden stool or wooden rack to tip the plant out. After tipping it out, remove the old spent nutrient soil and check the fleshy roots. If there are rotten roots and aged roots, remove them. Buds on the rhizome that need to be divided can also be taken off at this time. For strong-growing small and medium seedlings, the nutrient soil at the base, commonly known as heart-protecting soil, can be retained.
When changing a clivia into a new pot, except for many-year-old mature plants, generally the new pot should be 1-2 cun larger than the original one. Cover the drainage hole at the bottom of the pot with broken pot pieces, and for small and medium seedlings sprinkle a layer of granular sand. For mature flowering plants, add a layer of bone meal, cinder, or charcoal chunks, then add a layer of nutrient soil according to the size of the pot, and place the plant in the center of the pot. If the roots are too long, they can be coiled inside the pot, but the roots must not be cut off. Then add potting soil from around into the pot. When it is filled to half, check whether the clivia plant is positioned straight in the pot, and gently shake the clivia so that the potting soil fills in firmly around the root zone, avoiding gaps around the roots, which can easily cause root rot.
Then fill the pot with nutrient soil. Press lightly around the edges, and gently tap it on the ground so that the potting soil settles firmly. After seedlings are potted, they can be watered in time. After clivias are potted, it is enough to place them in a cool, shaded place.
Precautions for clivia flower pots:
1. It is best to choose spring and autumn for changing the soil, because at this time clivias grow vigorously and changing the soil will not affect the plant's growth.
2. The time and frequency of tipping out and changing the soil for clivias depend on the size of the seedling and the season. Mature clivias like these need their soil changed once a year.
3. Small clivia seedlings need repotting once or twice a year, and mature clivias once a year or once every two to three years. Do it in spring and autumn. Because the temperature is suitable, after repotting, as soon as the root system comes into contact with the loose and fertile new soil, it can absorb water and nutrients and grow vigorously very quickly, without affecting its growth due to repotting.