How to Grow Orchids Hydroponically? Methods and Precautions Explained
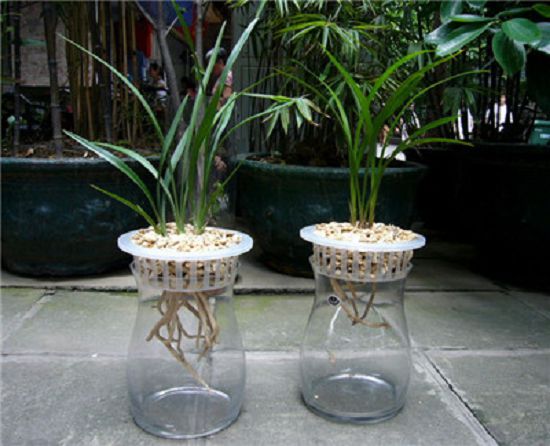
Orchids are very delicate flowers, and keeping soil-grown orchids healthy is no simple task, let alone growing them hydroponically. If you have enough patience and have been growing orchids for a long time, why not give hydroponics a try? Just follow these six steps!
Choosing a Pot for Hydroponic Orchids
For hydroponic orchid growing, use a dedicated hydroponic pot with no holes at the bottom and a double-layer mesh basket design. Put the nutrient solution in the outer layer, place a square mesh inside, and then use some clay pebbles or sponge to secure the plant.
Removing the Orchid from Its Pot
Lift the orchid plant out of the soil, remove rotten roots and old roots. If there are too many roots to fit into the inner mesh, use scissors to cut off some roots close to the pseudobulb, then rinse the roots clean with water to remove mud and dirt.
Disinfecting the Orchid Roots
Soak the cleaned roots in a disinfectant solution for 10-15 minutes, then rinse them clean with water.
Moving the Orchid into the Hydroponic Container
Place the orchid into the basket of the hydroponic container, divide the roots into 2-3 groups, and insert them into 2-3 mesh holes. Gently pull the roots that have passed through the holes with your hand so that the pseudobulb sits snugly against the cross-shaped ribs in the center between the holes.
Securing the Orchid
Hold the orchid with one hand and, with the other hand, add clean clay pebbles or small stones, filling around the plant. Secure the orchid in the center position.
Adding the Nutrient Solution
After securing the plant, rinse the roots and stones with water, then add clean water to the outer pot and add the nutrient solution. The transplanting work is now complete.
Note that hydroponic orchids need more nutrients, so you should change the water frequently and replenish the nutrient solution.