How to cut leaves for leaf cuttings of clivia? Detailed explanation of the correct method
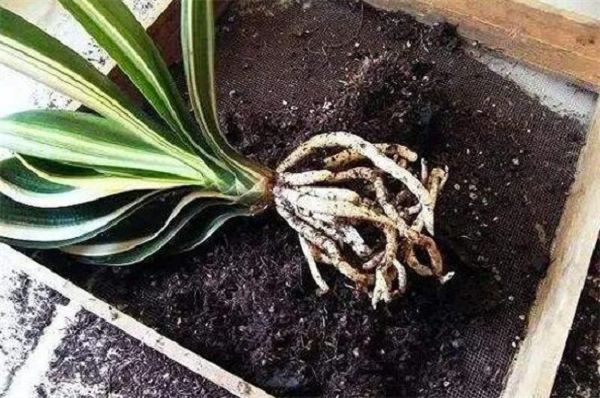
When propagating clivia by leaf cuttings, never cut the leaves at will. You need to choose a plant that has grown for more than two years and has not suffered from any pests or diseases, then cut the leaf from the base together with roots, so that the leaf can grow better in the soil. After cutting off the leaf, apply plant ash to the wound. Once the wound heals naturally, it can be inserted into the soil for propagation.
Cut the leaf from the base for clivia leaf cuttings
There are many propagation methods for clivia, and the most common one is leaf cutting propagation. But many people do not know that clivia leaf cutting propagation is different from the operation methods for most plants. It is best to cut the leaf together with roots from its base to increase the survival rate of the leaf cutting.
For clivia leaf cuttings, you need to choose a robust plant that has grown for more than two years. If you usually cut the leaf directly, then the leaf will find it very difficult to take root and sprout in the soil, and clivia leaves rot very easily, causing the leaf cutting propagation to fail. Cutting the leaf together with roots from the base can allow the leaf to obtain sufficient water and nutrients in the soil, letting it grow better.
Each time after cutting a leaf from the base of the clivia, do not insert it into the soil immediately, otherwise during the leaf cutting cultivation process, the wound of the leaf will rot, and it may even suffer from diseases. After cutting off the leaf, apply plant ash to the wound, then place it in a cool and ventilated place for 1 to 2 days.
When propagating clivia by leaf cuttings, in addition to paying attention to cutting the leaves, you also need to prepare soil suitable for clivia growth, insert its leaves into soil suitable for growth, loosen the soil appropriately and sprinkle an appropriate amount of water, and place it in a place with scattered light for careful care.