Grafting fruit trees and flowering plants: three methods you can easily master
A few days ago I had the good fortune to meet an old gardener, and we sat down together to discuss the challenges of grafting fruit trees. He used a mulberry tree as a demonstration and showed me the grafting technique. Friends, come and learn from this experience too.
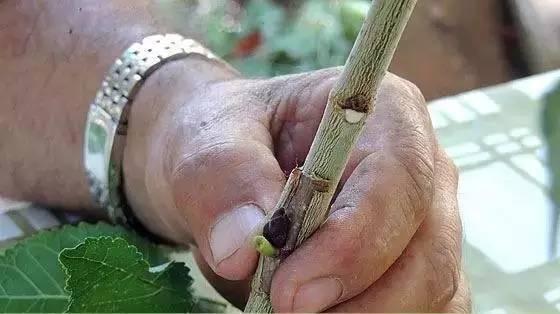
Grafting is a truly wonderful thing. You can graft plants of the same genus, such as oranges and mandarins, or lemons and pomelos. They all belong to the Rutaceae family, so they can be grafted together. But if you want to graft an apple and a mandarin together, that won't work.
Why graft fruit trees?
For example, if you have a delicious red apple tree at home and your neighbor has a sweet green apple tree, and you want to have the green apple tree, you can propagate it by cuttings and plant it in the yard. But if the yard doesn't have enough space for two apple trees, then you need to use grafting.
Graft the green apple tree onto the red apple tree, so that one tree bears two different kinds of fruit.
Methods for grafting fruit trees:
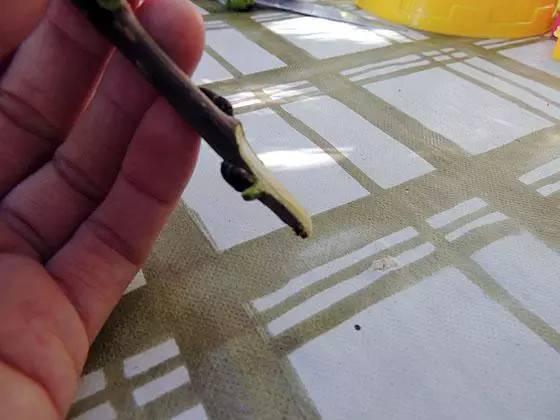
Here a mulberry tree is used for demonstration. First cut a section of scion. You can see that this cut is made at a slant. This is to increase the contact area with the tree being grafted. But note that the position of the slant cut must be right, otherwise it will have an effect.
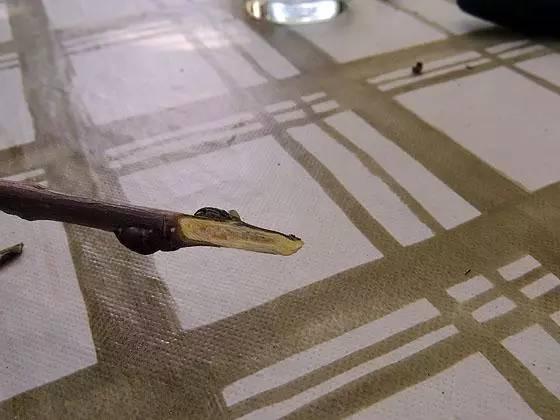
You can see that the cut above is 2 to 3 cm away from the growing point. The cut should be made with sharp garden shears or a knife. You can first wipe the scissors with alcohol.
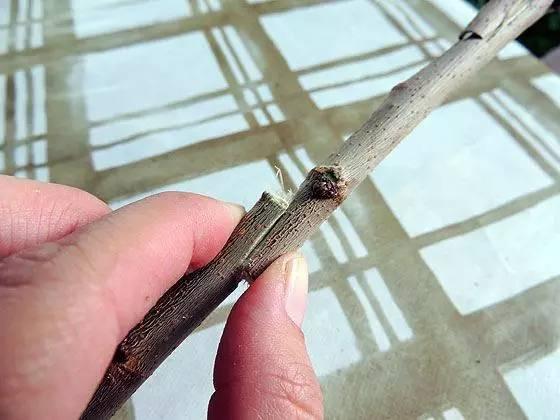
Next comes the specific grafting process. After we have cut the scion, we usually need to make a cut of the same size on the tree we want to graft onto. This tree is called the "rootstock," and we should choose a robust plant.
Grafting tips:
When grafting, we will notice that the outer edge of the cut is green bark, while the inside is white or white-green stem. What we need to do is align the bark on one side of the scion with the bark of the rootstock. Note that as long as the outer edge on one side is aligned well, you are halfway to success.
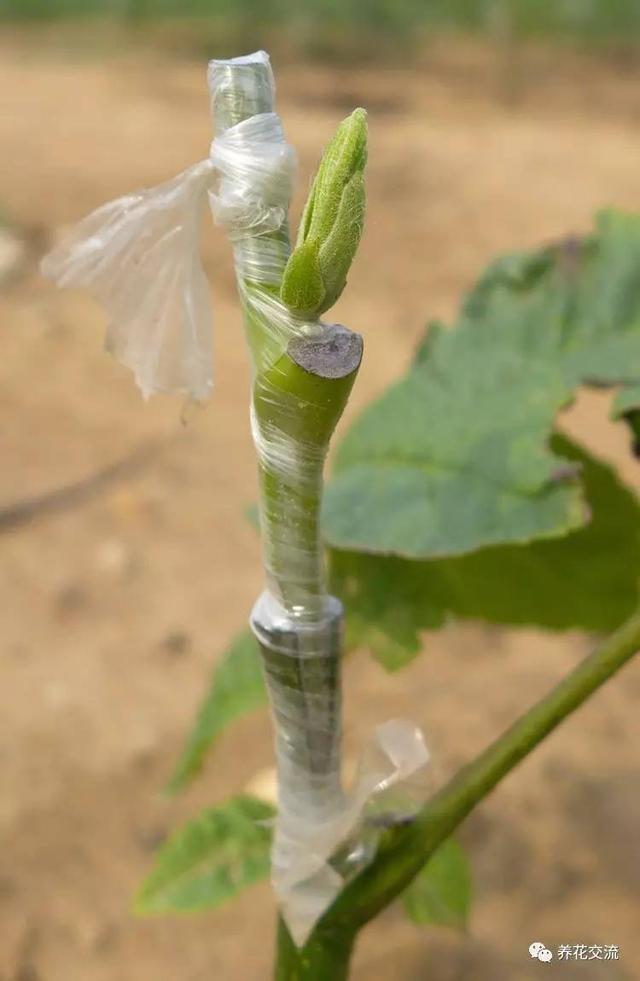
The benefit of doing this is that it lets the scion and rootstock fit together better, and the wound naturally heals more easily. This is the same principle as rejoining broken bones in humans.
After grafting, use grafting tape (sold in garden stores) or gauze to wrap around the grafted area. This is to retain moisture and avoid external interference. At the same time, make sure the environment is shaded, and do not expose it to strong sun or wind.
Note on grafting time:
Of course, you cannot graft in winter. It is only after spring arrives, when the temperature begins to rise and the trees start to resume rapid growth, that grafting is most likely to succeed and the wound heals quickly.
After a few weeks, once you see that the wound has completely healed, you can remove the grafting tape or gauze.
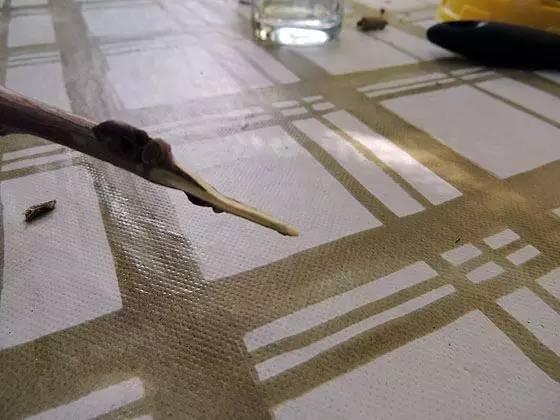
Next we continue with the second grafting method. You can see that the scion in the picture above is cut into a deep V-shaped notch, with both sides of the scion cut at a slant to become a thin slice.
The picture above shows a demonstration of the cut on the tree being grafted onto (the rootstock). Use a sharp knife to cut to a certain distance, avoiding cutting too deep.
Attach the scion. At this time you also need to pay attention to how the wound fits together. Do not leave too large a wound; fit them as tightly as possible, and the success rate will also increase. At the very least, make sure the outer edge of the bark on one side can fit together.
Likewise, we will change the position of the cut according to the size of the rootstock. If the rootstock is relatively large, then you only need to make one cut at the edge.
Demonstration picture
After joining them, likewise wrap with grafting tape or gauze to prevent the wound from being exposed.
The third grafting method: bud grafting
The bud grafting introduced below is not simply grafting a small bud directly onto the rootstock. There is one extra step. Let's take a look.
The picture above shows the prepared scion. Cut off a small piece of bark from the scion together with the small bud, making sure the small bud remains intact. Here it is cut into a rectangle.
Carefully remove the small bud. Next, it is time to prepare for grafting the scion.
If you do not want to ruin the small bud, you can peel off the whole piece of bark, and then cut out a small bud scion.
This is a very good demonstration; it was peeled quite well.
Below is the rootstock used for grafting (again, a mulberry tree is chosen)
You can first use a pen to mark the size. A fit that is just right is the easiest way to succeed. Carefully cut off a whole piece of bark equal in size to the scion.
When cutting the bark, be careful and try not to damage the stem inside, and do not cut too shallowly, otherwise the bark will not peel off.
Make two cuts around it horizontally, then make one more cut vertically, and you can easily peel off the bark, revealing the white-green stem inside.
Wrap the small bud of the scion in the bark of the grafting rootstock. Yes, that's right, wrap it with bark. Finally, wrap it with grafting tape or gauze.
You can use medical gauze, but be careful not to cover the small bud, and even more importantly, do not damage the small bud. It is very fragile. Later, this small bud will grow into a branch.
If the tree has no bark, the upper branches will easily dry out.
Grafting callus tissue
The tree above is an old mulberry tree that the old gardener grafted many years ago. It is really very large, but we can still see the traces of grafting. These were left by the passage of time. In this way, one mulberry tree bears two kinds of mulberries.
Old mulberry tree and mulberries
Do you see the difference? It really is amazing! The grafted fruit is so sweet.
What do you think? Have you ever tried grafting flowers and trees? If you have any questions, we can discuss them together too.
Search on WeChat for the public account: Yanghua Jiaoliu, WeChat ID: yanghuajiaoliu; join flower lovers across the country to discuss plant care together.