Detailed Explanation of Cutting Propagation Methods and Techniques for Osmanthus Trees
For cuttings, choose a suitable time. Osmanthus spring shoots stop developing at the end of April and by the end of June have become semi-mature sturdy branches. This kind of sturdy branch has the strongest vitality and is relatively easy to root when used for cuttings. The optimum temperature for osmanthus growth is 25°C-28°C; above 30°C growth slows. Therefore, in the lower reaches of the Yangtze River, the second half of June...
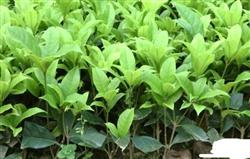
For cuttings, choose a suitable time. Osmanthus spring shoots stop developing at the end of April and by the end of June have become semi-mature sturdy branches. This kind of sturdy branch has the strongest vitality and is relatively easy to root when used for cuttings. The optimum temperature for osmanthus growth is 25°C-28°C; above 30°C growth slows. Therefore, in the lower reaches of the Yangtze River, the second half of June is better for cuttings. It can also be done in autumn, but the survival rate is lower, and special attention must be paid to cold protection for the growth of new seedlings.
Cuttings are best taken in the open field. Choose sandy loam for the seedbed; clay soil is not suitable. Plow and turn the soil in winter in advance, and carefully prepare the land in spring. Make beds 20 cm high, shaped like a turtle shell, and cover with grass for protection to prevent rain from compacting the surface. It is best to place a large water vat in the bed and store water one day before watering, so as to avoid too great a difference between water temperature and soil temperature. Generally, the "heel cutting method" is used. In heel cutting, the cutting is a new shoot cut with a little of the old branch bark and flesh at the lower end, shaped like a heel. The tissue at the heel is dense and rich in nutrients, making new roots easy to form. The cutting is about 10 cm long, with one pair of upper leaves kept at the top and the lower leaves all cut off. The retained pair of leaves must not be damaged, nor cut smaller. Insert the cutting 6-8 cm into the soil, and press the surrounding soil firm with your fingers. Spacing between plants and rows is 12 x 3 cm.
After inserting the cuttings, they must be carefully managed. Water thoroughly. Before watering, it is best to spread a layer of chopped grass on the soil surface to prevent mud from dirtying the leaves and to prevent the soil from compacting. Immediately afterward, shade with reed curtains, otherwise rooting will be unfavorable. A high-low double-layer shade frame is commonly used, which avoids direct sunlight while still allowing ventilation. Do not water too much, to prevent root rot. In dry, high-temperature weather, spray water on the leaves two or three times a day. Generally, root nodules form 1 month after insertion, and after 2 months, you can begin giving 1 hour of morning sun, then cover with curtains. After that, gradually lengthen the sunlight exposure time. By October, the low shade frame can be removed, so the seedlings receive half-scattered light all day from the high shade frame. At the end of November, change the high frame to a warm frame to protect against cold, and also cover the seedlings with a thin layer of rice straw. In winter, when the soil looks white, sprinkle water once, doing so at noon. After the weather warms in the second year, shading is still needed on sunny days, and appropriately add one part decomposed liquid fertilizer to the watering. By the end of the second year, the seedlings can reach 1 chi in height. Transplant in the spring of the third year.