Detailed Explanation of Summer Poplar Seedling Cultivation Methods and Technical Key Points
Pre-planting preparation: select fast-growing, high-quality, high-yielding, and highly adaptable varieties, such as 80351, Populus × euramericana '72', Populus × euramericana '69', etc. From late July to late September each year, propagation begins when the cuttings are semi-lignified. For mass propagation, use mainly the branch shoots and thin, weak, inferior seedlings of the current-year seedlings in the nursery. Make beds 1 m wide, with length based on the number of cuttings, and 20 cm high. ...
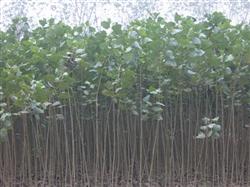
Pre-planting preparation: select fast-growing, high-quality, high-yielding, and highly adaptable varieties, such as 80351, Populus × euramericana '72', Populus × euramericana '69', etc. From late July to late September each year, propagation begins when the cuttings are semi-lignified. For mass propagation, use mainly the branch shoots and thin, weak, inferior seedlings of the current-year seedlings in the nursery. Make beds 1 m wide, with length based on the number of cuttings, and 20 cm high. The substrate consists of river sand, fine coal cinders, etc.; choose either one at 70%, with soil at 300%, and mix evenly with a soil fungicide for later use.
Cutting of stems: generally start pruning branches at 16:00 in the afternoon; rainy or overcast days are better. Adopt the method of collecting stems, cutting cuttings, and inserting cuttings at the same time. Use 3 leaves as one segment cutting, cut 3 to 4 segments per branch, discard thin tender branches, make the upper and lower cuts 2 cm from the base of the petiole, with the upper cut flat and the lower cut slightly slanted, cut off a small half of the upper leaf, and remove the lower two leaves together with their petioles. After cutting, insert the cuttings into the bed at a row spacing of 20 cm × 10 cm, deep enough to reach the base of the upper leaf.
Post-insertion management: after inserting the cuttings, water thoroughly immediately, shade for 10 to 12 days, spray water frequently during the day, and leave naturally exposed on rainy days. Spray 250 times diluted 25% carbendazim solution 3 to 5 days after insertion. Roots, sprouts, and shoots appear 8 to 10 days after insertion; afterward reduce the frequency of water spraying, gradually increase light in the morning and evening, until the covering is removed. The reduction of water and light should be based on the young shoots not wilting.
Seedling management: when new shoots grow to about 5 cm, apply artificial fertilizer, mainly decomposed liquid fertilizer, with a water-to-fertilizer ratio of 1:12, then apply once every 7 to 10 days, gradually increasing the water-fertilizer concentration to a ratio of 1:8. During this period, combine with 2 to 3 foliar fertilizer sprays, spraying 0.2% urea solution or 0.1% to 0.2% potassium dihydrogen phosphate solution. Also pay attention to drought prevention and waterlogging reduction, shade at noon to prevent sunscald, and spray 250 times diluted 25% carbendazim solution once every 10 days. As long as water and fertilizer are well managed, early seedlings can grow to about 1.5 cm tall.