A Detailed Guide to Camellia Propagation Methods and Planting Techniques
How do you propagate and plant camellias? Here is an introduction to the methods. Camellia propagation and planting can be done by referring to the following methods: Propagation techniques 1. Cuttings. In the rainy season from May to June, select a young mother plant, cut a one-year-old softwood shoot about 10cm long from the tip, remove the lower leaves, trim flat below the node with a blade, and keep at the tip...
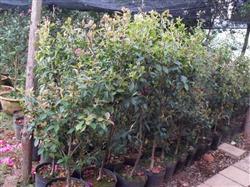
How do you propagate and plant camellias? Here is an introduction to the methods
Camellia propagation and planting can be done by referring to the following methods:
Propagation techniques
1. Cuttings. In the rainy season from May to June, select a young mother plant, cut a one-year-old softwood shoot about 10cm long from the tip, remove the lower leaves, trim flat below the node with a blade, and keep one terminal bud and one lateral bud and 2 to 3 leaves at the tip. Insert into a medium of river sand or gravel, with the insertion depth at 1/3 to 2/3. After insertion, cover with straw curtains for shade, increase foliar misting, and maintain air humidity in the cutting bed to encourage rooting. To improve the survival rate of cuttings, soak the cuttings in a 50 to 100ppm ABT rooting powder solution for 8 to 12 hours.
2. Grafting. Choose a vigorously growing seedling or a camellia variety that roots easily from cuttings as the rootstock, cut it off 4 to 5cm above ground level, split it through the pith to a depth of about 1.5cm, and use a 1- to 2-year-old branch as the scion. Keep 1 to 2 leaves on the upper part of the scion, cut the lower part into a wedge shape, insert it into the split opening in the rootstock, make sure the cambium layers of both sides fit closely together, then bind tightly with plastic tape.
Post-grafting care. After grafting, cover the scion with a plastic bag and tie it below with a string, but not too tightly, so that water droplets form inside the bag and keep dripping onto the rootstock. Then put a paper bag over the outside of the plastic bag to shield it from direct sunlight.
3. Bud cuttings. Take each bud node as a section, keep one leaf, about 1.5cm long, cut the lower part at a slant, then insert it into the medium, with the depth just covering the branch. This method makes full use of the branches and is suitable for large-scale propagation needs.
1. Field planting
1) Soil. Choose fertile, well-drained, slightly acidic loam with a pH value between 5.5 and 6.
2) Planting time. Spring planting from February to March is mainly for small seedlings; autumn planting after November gives better results.
3) Fertilization. Camellias do not like heavy fertilizer. Generally fertilize 2 to 4 times before flowering from October to November and after flowering from April to May. The fertilizer is mainly compound fertilizer and compost, combined with an appropriate amount of phosphate fertilizer; (the fertilization principle is to apply lightly and often. Apply more to strong seedlings, and less or none to weak seedlings).
4) Camellias grow slowly and are not suitable for heavy pruning; the crown develops evenly and does not need special pruning either. Just remove diseased and pest-damaged branches, overly dense branches, weak branches and leggy branches. For newly planted seedlings, moderate pruning may also be done to ensure survival. Bud thinning is an important part of cultivation management. Generally keep at most 3 flower buds per branch and maintain a certain spacing, which can reduce excessive nutrient consumption by the plant and its effect on flowering. The flowering period of camellias lasts as long as half a year. Promptly removing wilted flowers is very beneficial for reducing nutrient consumption and strengthening the tree's vigor.
5) Pest and disease control and intertillage weeding. The main diseases of camellias include brown spot disease, chlorosis, and moss parasitism on branches. The pests are red spider mites, various scale insects, stinging moths, rose leaf wasps, and so on. The occurrence of pests and diseases greatly affects the tree's vigor and ornamental value. The control methods are as follows: for brown spot disease, spray Bordeaux mixture before spring sprouting, then continue spraying preventively every half month, pay attention to drainage and fertilization, and remove and burn the damaged leaves. Chlorosis is mainly caused by a lack of trace elements in the soil, and can often be prevented and controlled by applying ferrous sulfate or magnesium sulfate solution. For red spider mites and various scale insects, spray rosin mixture and strengthen ventilation. For various stinging moths, rose leaf wasps, and so on, spray 40% omethoate 400 to 155 times solution or 80% dichlorvos emulsifiable concentrate 1000 to 1200 times solution for control. Intertillage and weeding and cleaning the garden can also effectively prevent and control pests and diseases, strengthen the tree's vigor, and make the flowers larger and fuller. Intertillage and weeding need to be carried out 6 to 7 times throughout the year.
2. Pot cultivation
1) Potting soil selection. Choose a slightly acidic, loose, fertile mixed soil as the potting soil. The ratio of the mixed soil is 6 parts garden soil, 3 parts pine leaf humus soil, and 1 to 2 parts sandy soil.
2) Pot selection. Clay pots are best for cultivation. The ratio of pot size to seedling is: for a camellia with a seedling height of 40 to 50cm and a crown width of 20 to 25cm, the pot diameter should be about 20cm. Other sizes follow the same pattern. For commercial seedlings, purple clay pots are better and can improve the ornamental effect.
3) Pot seedling selection. Choose plants that grow vigorously, have a main trunk, are single-stemmed without branches, have a beautiful crown, tender green leaves, and no pests or diseases.
4) Watering management. For newly planted seedlings, water thoroughly the first time, then water frequently within 2 months to keep the potting soil moist. After that, water like other potted flowers and trees. The frequency depends on the climate, following the principle of keeping the soil moist. Water more in spring to meet the needs of sprouting and shoot growth; in summer it is best in the morning and evening, and in the rainy season prevent waterlogging; in autumn drought, water promptly; in winter, to prevent freezing, water at noon.
5) Shading and cold protection. Camellias should receive sufficient sunlight in spring and the rainy season, and be shaded and cooled in summer and autumn; when the winter temperature drops to zero degrees, they need to be moved indoors for cold protection.
6) Flowering period control. This is mainly achieved through variety selection, temperature control, and hormone treatment to advance or delay flowering. For example, to delay flowering, choose late-flowering varieties and subject them to low-temperature control (a cold storage above 2 to 3 degrees, storing plants that have been wrapped for cold protection), which can delay flowering by one month. To make them flower earlier, choose early-flowering varieties such as Xiaotaohong and Xueta. If the requirements are not met, appropriately increase the number of dot applications, continue with water spraying and topdressing, and Sijianjing, and then carry out heavy topdressing and hormone treatment. The method is to stop spring growth in camellias. After flower buds form, apply heavy topdressing so that the young branches after flowering become full and mature early and stop growing early; in mid-July or early August, use a brush to dot 500 to 1000PPm gibberellin onto the flower buds once every three days, accompanied by reasonable water and fertilizer; in September, depending on the plumpness of the flower buds, dot gibberellin again. With fertilizer, the flower buds grow rapidly and can flower early from late September to November.
Click to get more camellia planting techniques
Click to get more flower and tree planting techniques