What are the seed-scion grafting methods for potted camellias?
How do you graft potted camellias using seed scions? Here is an introduction. For seed-scion grafting of potted camellias, you can refer to the following methods: 1. Sprout the seeds and cut the scion: first sprout the seeds. When the seed sprouts emerge above the surface of the sand bed, grafting can begin. Take the sprouted seeds, rinse them clean, and use a grafting knife to cut off the root end, keeping a length of 6-9 cm...
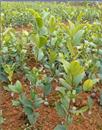
How do you graft potted camellias using seed scions? Here is an introduction.
For seed-scion grafting of potted camellias, you can refer to the following methods:
1. Sprout the seeds and cut the scion: first sprout the seeds. When the seed sprouts emerge above the surface of the sand bed, grafting can begin. Take the sprouted seeds, rinse them clean, and use a grafting knife to cut off the root end, keeping a length of 6-9 cm. Then make the cut starting from the hilum on the hilum side of the seed, cutting straight down along the root until reaching the xylem of the root.
2. Cut the rootstock: choose a flat, straight spot for the grafting site, prune away excess branches, wipe off dust, then use a grafting knife to cut a "door" shape reaching down to the xylem, with a length and width equal to the scion root or slightly wider, and peel back the bark ready for grafting.
3. Insert the scion and wrap: place the cut seed scion into the rootstock slot with the bark peeled back, and immediately wrap it with plastic film tape. Because the seed-scion root is extremely tender, use moderate force when wrapping; it must be tight yet must not damage the seed-scion root, and never use too much force.
4. Add a cover to retain moisture: after wrapping, put on a plastic film cover with a length of more than 20 cm. When tying the cover, first place a small ball of absorbent cotton soaked with water inside the cover to ensure sufficient humidity inside.
5. Remove the cover and cut the rootstock: about 20 days after grafting, the opening heals. After the seed sprout has produced 1-2 leaves, the first rootstock cut can be made. Keep 1-2 small branches above the scion. When the scion has produced 2-3 leaves, remove the cover in the early morning, evening, or on a cloudy day. In the spring of the second year, make the second rootstock cut. To prevent wind breakage, tie and support it.
Camellias grafted by this method can generally bloom in the second year. This method can promote earlier blooming in seedling plants, and is mainly suitable for camellia varieties for which scion branches are difficult to obtain or branch grafting is difficult to keep alive; it is also very valuable for research on camellia variation.
Click to get more camellia cultivation techniques
Click to get more flower and tree cultivation techniques